
 Pin it
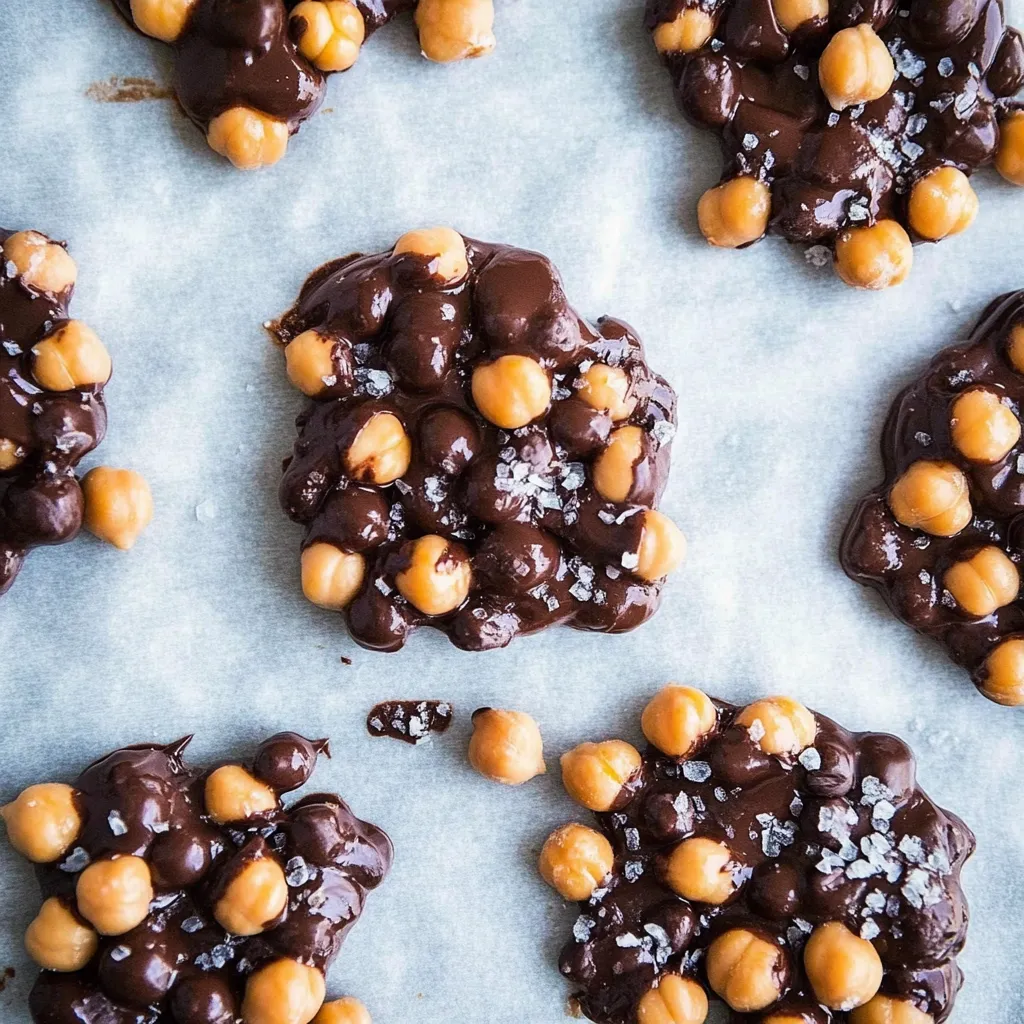
These chocolate covered chickpeas transform humble garbanzo beans into an unexpectedly delightful treat that's both satisfying and surprisingly addictive. The crispy, roasted chickpeas provide a wonderful crunch that contrasts beautifully with smooth melted chocolate, creating a snack that feels indulgent while actually being packed with protein and fiber.
I discovered this recipe completely by accident when I was looking for ways to use up a can of chickpeas I had opened for another dish. My kids were skeptical at first - chocolate covered beans sounded weird to them - but now they request these for movie nights and pack them in their school lunch boxes. There's something so satisfying about turning an everyday pantry staple into something that feels like a special treat.
Essential Ingredients and Selection Tips
- Canned or cooked chickpeas: Look for brands with minimal sodium, and organic when possible for the cleanest flavor
- High-quality chocolate chips: Choose chips that melt smoothly; avoid baking chips that are designed to hold their shape
- Neutral oil: Avocado oil has a mild flavor and high heat tolerance, while coconut oil adds subtle tropical notes
- Sea salt: Flaky finishing salt like Maldon creates the perfect contrast to sweet chocolate
The secret to amazing chocolate covered chickpeas lies in getting them properly crispy before adding the chocolate coating. I learned this the hard way after my first batch turned out soggy - properly roasted chickpeas should sound almost hollow when you tap them with a spoon, and they should be golden brown and completely dry to the touch.
Step-by-Step Instructions
- Prepare chickpeas for maximum crispiness:
- Start by draining your canned chickpeas and giving them a thorough rinse in cold water to remove excess sodium and that slightly metallic canned taste. Pat them completely dry with paper towels - this step is crucial because any moisture will create steam during roasting and prevent them from getting crispy. Some people like to remove the skins by rubbing the chickpeas with a clean kitchen towel, but I find this unnecessary since the skins add extra fiber and crunch.
- Set up for proper roasting:
- Preheat your oven to 350°F and line a large rimmed baking sheet with parchment paper. Spread the dried chickpeas in a single layer, making sure they're not overcrowded - if needed, use two baking sheets so each chickpea has space to crisp up properly. Drizzle with about 1 tablespoon of avocado oil and toss thoroughly until every chickpea is lightly coated.
- Roast with patience for perfect texture:
- This is where patience really pays off. Roast the chickpeas for 50-60 minutes, shaking the pan every 15-20 minutes to ensure even browning. They should gradually turn golden brown and sound hollow when tapped. Don't rush this process - properly crispy chickpeas are the foundation of this recipe. If you're short on time, you can roast at 400°F for 25-30 minutes, but the texture won't be quite as crispy.
- Prepare the chocolate coating:
- While your chickpeas finish roasting, set up your chocolate melting station. Place chocolate chips in a microwave-safe bowl with about 1 teaspoon of oil - this helps create a smooth, glossy coating that won't crack when it sets. Microwave in 30-second intervals, stirring thoroughly between each interval, until the chocolate is completely smooth and melted. Don't rush this step or you might seize the chocolate.
- Coat chickpeas while warm:
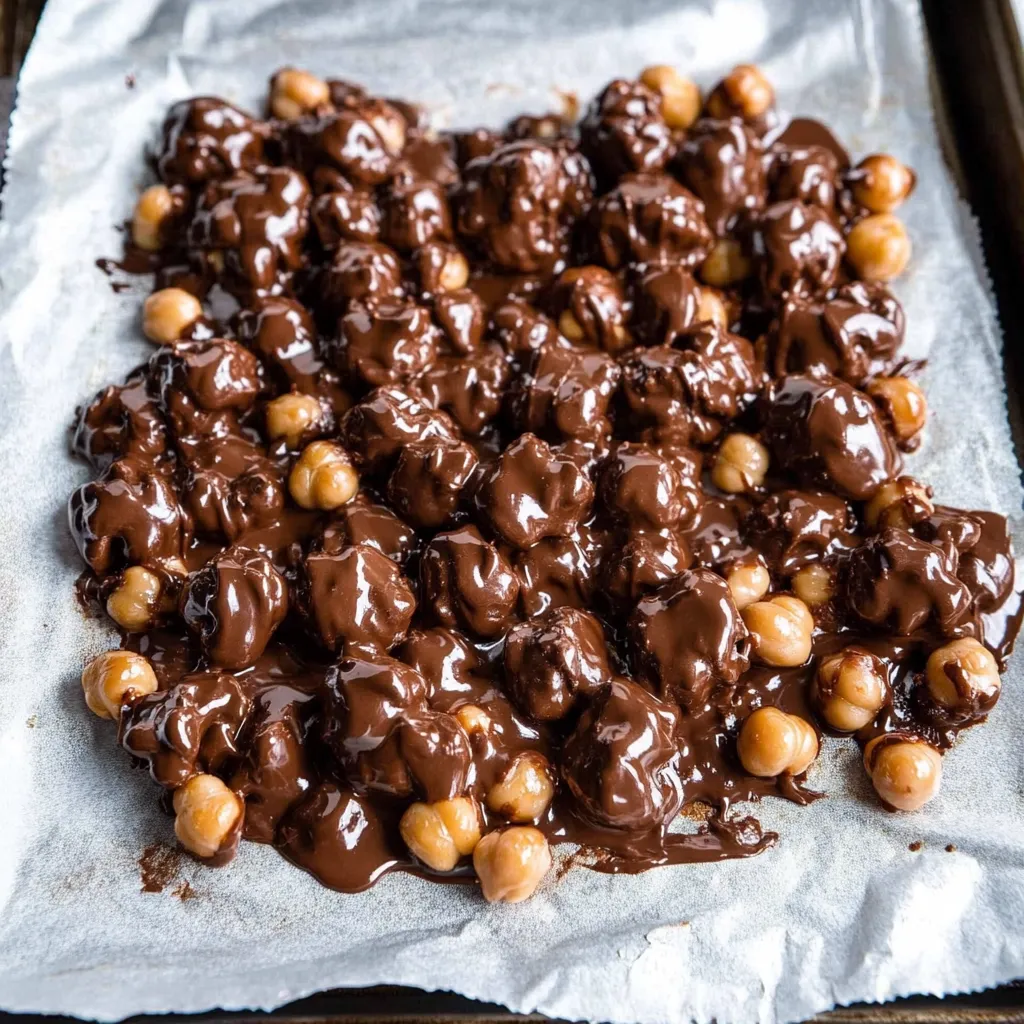
- Remove the chickpeas from the oven and let them cool for just 2-3 minutes - you want them still warm but not so hot they'll cause the chocolate to separate. Add the warm chickpeas directly to the melted chocolate and stir gently but thoroughly until every chickpea is completely coated. The warmth helps the chocolate adhere better and creates a more even coating.
- Create appealing clusters:
- Line another baking sheet with parchment paper and use a spoon to drop the chocolate-covered chickpeas in small clusters or piles. This creates more interesting textures and makes them easier to eat. If you're using sea salt, sprinkle it on now while the chocolate is still wet - this is your only chance for it to stick properly.
- Set the chocolate properly:
- Transfer the baking sheet to the refrigerator and chill for at least 2 hours until the chocolate is completely set and firm to the touch. Once set, you can break apart the clusters into bite-sized pieces. The chocolate should have a nice snap when you bite into it, while the chickpeas remain crispy inside.
 Pin it
These chocolate covered chickpeas have become my go-to when I want something sweet but don't want to completely derail my healthy eating goals. I love that they satisfy my chocolate cravings while actually contributing meaningful nutrition to my day. They're also perfect for portion control since the protein and fiber help you feel satisfied with just a small handful.
Mastering Different Chocolate Types
Each type of chocolate creates a completely different experience with these chickpeas. Dark chocolate with 70% cacao or higher provides a sophisticated, slightly bitter contrast to the nutty chickpeas and offers the most antioxidant benefits. Milk chocolate creates a sweeter, creamier coating that appeals more to kids and those who prefer milder flavors. White chocolate, while not technically chocolate, creates a beautiful visual contrast and pairs surprisingly well with a sprinkle of cinnamon or vanilla salt.
Creative Flavor Combinations
Once you master the basic recipe, the fun really begins with flavor experimentation. I love adding a pinch of cinnamon to the melted chocolate for warmth, or stirring in some espresso powder for a mocha version. For special occasions, I'll roll the chocolate-covered chickpeas in chopped nuts, coconut flakes, or even crushed freeze-dried strawberries while the chocolate is still wet. The key is adding these extras sparingly so they enhance rather than overwhelm the core chocolate-chickpea combination.
Storage and Gifting Ideas
These chocolate covered chickpeas store beautifully in an airtight container in the refrigerator for up to two weeks, though they rarely last that long in my house. They make wonderful gifts when packaged in small mason jars or cellophane bags tied with ribbon. I often make double batches during the holidays and include them in homemade gift baskets alongside other healthy treats. They're especially appreciated by health-conscious friends who feel deprived during the indulgent holiday season.
Troubleshooting Common Issues
The most common problem people encounter is chickpeas that don't get crispy enough, usually because they weren't dried thoroughly before roasting or the oven temperature was too low. Another issue is chocolate that doesn't set properly, often caused by adding the chickpeas when they're too hot or not chilling long enough. If your chocolate coating turns out thick and clumpy, you probably didn't use enough oil in the melting process - next time, add an extra half teaspoon of oil to keep things smooth and glossy.
Nutritional Benefits for Different Lifestyles
These treats work wonderfully for various dietary approaches. For those following plant-based diets, they provide essential protein and iron that can sometimes be lacking. People managing blood sugar appreciate the fiber and protein that help slow sugar absorption from the chocolate. Athletes love them as a post-workout snack since they provide both quick energy from chocolate and sustained fuel from the complex carbohydrates in chickpeas.
These chocolate covered chickpeas represent everything I love about creative cooking - taking something unexpected and transforming it into pure delight. They've opened my eyes to the potential hiding in ordinary pantry ingredients and reminded me that the best treats often come from the most surprising combinations. Every time I make them, I'm struck by how something so simple can be so satisfying, both in the making and the eating.
Frequently Asked Questions
- → How long do chocolate covered chickpeas last?
- Store them in an airtight container in the fridge for up to one week. Keep them cool so the chocolate doesn't melt.
- → Can I use canned chickpeas for this recipe?
- Yes, canned chickpeas work perfectly. Just make sure to drain, rinse, and dry them completely before roasting.
- → What type of chocolate works best?
- Any chocolate chips work great - dark chocolate, milk chocolate, or sugar-free varieties. Pick your favorite!
- → Why aren't my chickpeas getting crispy?
- Make sure to dry them really well after rinsing and roast them long enough. They should sound crispy when tapped with a spoon.
- → Can I make these without oil?
- The oil helps the chickpeas get crispy and helps the chocolate melt smoothly, so it's best to keep it in the recipe.
- → Are these really healthy?
- Yes! Chickpeas are packed with protein and fiber. This treat has way less sugar than regular candy but still satisfies your sweet tooth.