
 Pin it
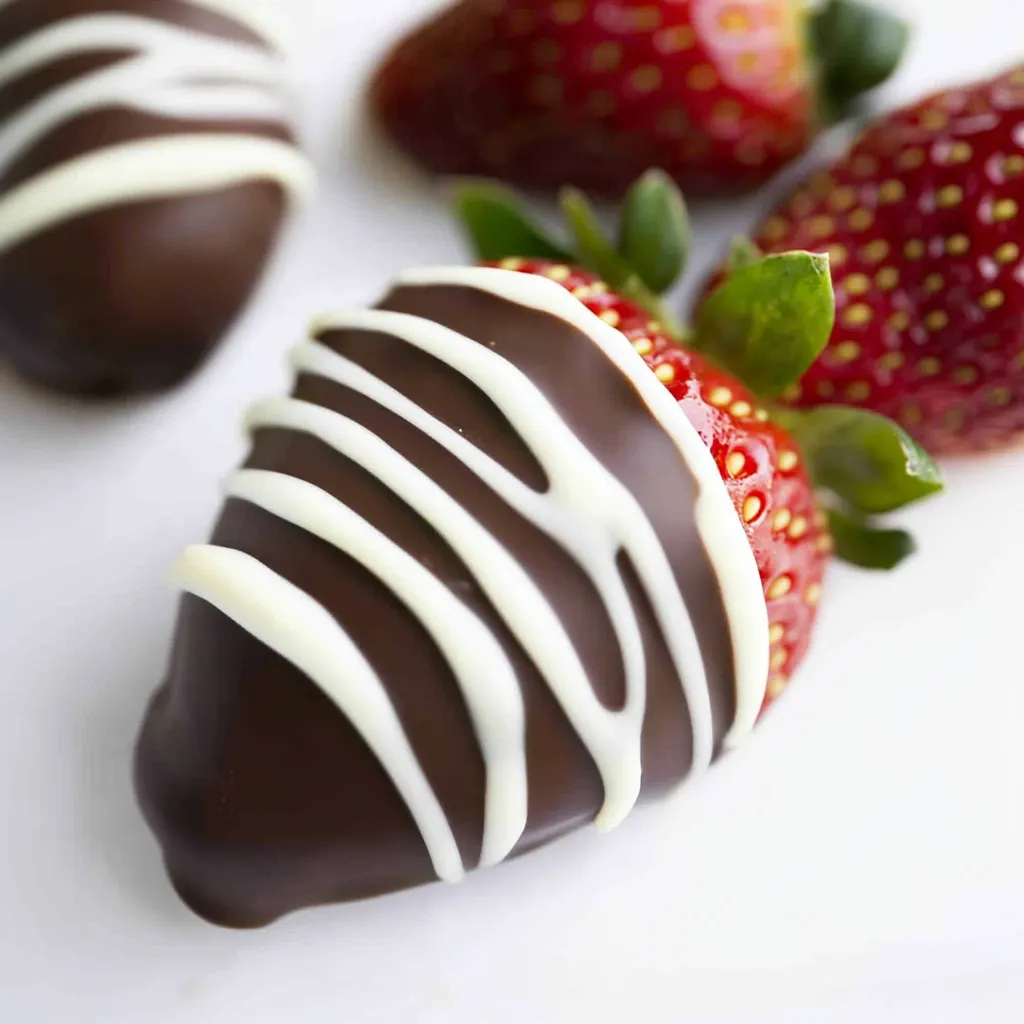
These elegant chocolate covered strawberries transform simple fresh fruit into an irresistible treat that looks professionally made but requires no special skills or equipment. The combination of juicy, sweet strawberries and rich, smooth chocolate creates the perfect balance of flavors and textures that makes every bite feel luxurious and indulgent. With just three basic ingredients and about 30 minutes of your time, you can create stunning desserts that rival anything from an expensive chocolate shop.
I started making these chocolate covered strawberries when I wanted to create something special for Valentine's Day but didn't want to spend a fortune at fancy chocolate shops. The first time I made them, I was amazed at how easy they were and how impressive they looked - my family thought I'd bought them from an expensive boutique. Now they've become my go-to treat for any special occasion, and I love how you can customize them with different chocolates and decorations. The best part is watching people's faces when they bite through that perfect chocolate shell into the juicy strawberry underneath.
Essential Ingredients and Selection Tips:
- Fresh strawberries: Choose firm, ripe berries with bright red color and fresh green tops; avoid any with soft spots or wrinkled skin
- High-quality chocolate: Use real chocolate rather than candy coating for the best flavor; Ghirardelli, Guittard, or Trader Joe's Pound Plus bars work beautifully
- White chocolate: Choose real white chocolate for drizzling rather than white candy coating for superior taste and appearance
- Room temperature fruit: Take strawberries out of the refrigerator 15-30 minutes before dipping for best chocolate adhesion
- Completely dry berries: Any moisture will prevent the chocolate from sticking properly and create a messy result
- Fresh, plump berries: Select strawberries that are uniform in size for the most attractive presentation
Step-by-Step Instructions:
- Prepare strawberries for perfect dipping:
- Gently wash the strawberries under cool running water, being careful not to remove the green tops which serve as natural handles. Pat each strawberry completely dry with paper towels, paying special attention to the area around the stem where water tends to collect. Let the strawberries sit at room temperature for 15-30 minutes to ensure they're not cold, which would cause the chocolate to seize or not adhere properly.
- Set up your dipping station:
- Line a large baking sheet with parchment paper or wax paper where you'll place the dipped strawberries. Have this ready before you start melting chocolate, as you'll need to work quickly once the chocolate is ready. Position your workspace near the refrigerator for easy transfer once the strawberries are dipped.
- Melt chocolate to perfect consistency:
- Break or chop your chocolate into small, uniform pieces and place in a microwave-safe bowl. Microwave at 50% power for 30-second intervals, stirring thoroughly between each interval. When the chocolate is almost completely melted but still has a few small solid pieces, remove from microwave and stir until completely smooth. The residual heat will melt the remaining pieces, preventing overheating that could cause the chocolate to become thick or grainy.
- Master the dipping technique:
- Hold each strawberry by its green top and dip it into the melted chocolate, tilting the bowl as needed to coat the berry completely. Lift the strawberry and allow excess chocolate to drip back into the bowl for 2-3 seconds, then gently tap the hand holding the strawberry against your other wrist to remove additional excess chocolate. This prevents puddles of chocolate from forming around the base.
- Place and shape for best appearance:
- Immediately place each dipped strawberry on the prepared parchment paper, leaving space between berries so they don't touch. If desired, use a toothpick to draw a clean line around the base of each strawberry before the chocolate sets, which will help you remove them cleanly later without leaving chocolate residue on the paper.
- Initial setting process:
- Transfer the baking sheet to the refrigerator and chill for 5-10 minutes, just until the chocolate is firm to the touch but not completely hardened. This partial setting is important if you plan to add drizzles or decorations, as it provides a stable base while still allowing additional chocolate to adhere properly.
- Add decorative elements:
- If adding white chocolate drizzle, melt white chocolate using the same method as before. Transfer to a small pastry bag or zip-top bag with a corner snipped off, then drizzle over the set strawberries in decorative patterns. For other toppings like chopped nuts or mini chocolate chips, these must be added immediately after dipping while the chocolate is still wet.
- Final setting and storage:
- Return decorated strawberries to the refrigerator for another 10-15 minutes until the chocolate is completely firm and set. Once fully hardened, the strawberries can be carefully transferred to an airtight container lined with paper towels to absorb any condensation.
 Pin it
The ingredient I'm most passionate about in this recipe is definitely the quality of chocolate you choose. I learned this lesson when I first started making these and used cheap chocolate chips, which resulted in a thick, waxy coating that didn't taste very good. When I switched to high-quality chocolate bars like Ghirardelli or the Trader Joe's Pound Plus bars, the difference was incredible - the chocolate stayed smooth and glossy, had better flavor, and created that perfect thin shell that cracks beautifully when you bite into it. Good chocolate costs a little more, but it makes such a dramatic difference in both appearance and taste that it's absolutely worth the investment.
Chocolate Selection and Melting Mastery
The success of chocolate covered strawberries depends heavily on choosing the right chocolate and melting it properly. High-quality chocolate contains better ratios of cocoa butter to other ingredients, which creates smoother melting and better coating properties. The microwave method at 50% power prevents overheating that would cause the chocolate to become thick, grainy, or seize up completely. Understanding when to stop heating and let residual heat finish the melting process is crucial for achieving that perfect, glossy finish.
Fruit Preparation and Temperature Control
Perfect chocolate adhesion requires understanding how temperature and moisture affect the coating process. Room temperature strawberries allow the chocolate to flow smoothly and evenly over the surface, while cold strawberries cause the chocolate to set too quickly, creating thick, uneven coatings. Complete dryness is non-negotiable because even tiny amounts of water will cause chocolate to seize or create a grainy texture that ruins both appearance and mouthfeel.
Technique Refinement and Professional Appearance
The difference between homemade-looking and professional-looking chocolate strawberries lies in mastering the dipping and draining technique. Proper tilting of the bowl ensures complete coverage, while the tapping motion removes excess chocolate that would otherwise pool at the base. The timing of decorative additions is crucial - too early and they'll slide off, too late and they won't adhere properly.
Storage and Presentation Excellence
Chocolate covered strawberries are best enjoyed within 48 hours when the chocolate maintains its snap and the strawberries retain their juiciness. Proper storage with paper towels prevents condensation that can make chocolate surfaces cloudy or cause decorations to blur. Understanding how to store them maintains both visual appeal and optimal eating experience for maximum enjoyment.
Creative Customization and Seasonal Adaptations
While classic milk or dark chocolate with white chocolate drizzle never goes out of style, this basic technique opens up endless possibilities for creativity. Different chocolate combinations, various toppings, and seasonal decorations allow you to customize these treats for any occasion from Valentine's Day to Christmas to summer parties. The key is understanding which additions work best with the chocolate coating process.
Troubleshooting Common Issues
Understanding what can go wrong helps prevent disappointment and waste. Seized chocolate, poor adhesion, and cracked coatings all have specific causes and solutions. Learning to recognize and address these issues ensures consistent success and builds confidence in your chocolate-working skills.
These chocolate covered strawberries have become one of my favorite ways to show love and appreciation because they demonstrate that taking a little extra time and care can transform something simple into something truly special. There's something magical about the combination of fresh fruit and rich chocolate that feels both elegant and comforting at the same time. Every time I make them, whether for a romantic dinner or just to brighten someone's day, I'm reminded that some of the most meaningful gestures come from creating something beautiful with your own hands. They prove that you don't need expensive equipment or advanced skills to make treats that rival anything from a high-end chocolate shop - you just need good ingredients, attention to detail, and a little practice.
Frequently Asked Questions
- → How do I prevent the chocolate from seizing up?
- Make sure your strawberries are completely dry before dipping. Even tiny drops of water will cause chocolate to clump and become unusable.
- → Can I use regular chocolate chips instead of melting wafers?
- Yes, but chop them first and melt slowly at 50% power. Melting wafers work better because they're designed to melt smoothly.
- → How long do chocolate covered strawberries last?
- They're best eaten within 2-3 days when stored in the refrigerator. The berries will start to soften after that.
- → What's the best way to store them?
- Keep them in the fridge in a single layer on a plate or tray. Don't stack them or they'll stick together.
- → Can I make these ahead of time?
- Yes, make them up to 2 days ahead. Store in the fridge and they'll stay fresh and the chocolate will stay firm.
- → Why won't my chocolate stick to the strawberries?
- This usually happens when strawberries aren't completely dry. Pat them with paper towels and let them air dry for at least an hour.