
 Pin it
This Christmas fudge delivers all the holiday magic you want in a sweet treat with surprisingly minimal effort required. The combination of creamy white chocolate, rich condensed milk, and refreshing peppermint creates a confection that melts on your tongue while the festive red and green swirls make every piece look like it came from a professional candy shop. What makes this recipe truly special is how it transforms simple pantry ingredients into something that feels incredibly luxurious and gift-worthy.
I started making this fudge during a particularly busy December when I needed homemade gifts but had zero time for complicated recipes. The first batch turned out so beautifully that my neighbors still ask for it every year, and I've never told them how incredibly easy it actually is to make.
Essential Ingredients and Selection Tips
- White chocolate chips: Choose high-quality chips that melt smoothly; avoid white chocolate that contains vegetable oils instead of cocoa butter, as it can cause texture issues
- Sweetened condensed milk: This thick, sweet milk provides the fudge's signature creamy texture and helps it set properly; regular milk won't work as a substitute
- Real butter: Use unsalted butter at room temperature for the smoothest incorporation and richest flavor; margarine will affect both taste and texture
- Peppermint extract: Pure peppermint extract gives the best flavor; start with less than you think you need since it's quite potent and can overpower the chocolate
Detailed Step-by-Step Instructions
- Prepare your workspace and pan:
- Line an an 8x8 inch baking pan with parchment paper, leaving enough overhang on two sides to create handles for easy removal later. Lightly spray the parchment with cooking spray to prevent sticking. Having your pan ready before you start melting chocolate is crucial since the mixture moves quickly once it begins to set.
- Master the microwave melting technique:
- In a large microwave-safe bowl, combine the white chocolate chips, sweetened condensed milk, and butter. Microwave in 30-second intervals, stirring thoroughly between each heating session. This gradual approach prevents the chocolate from seizing, which would ruin the entire batch. The mixture is ready when it's completely smooth and no lumps remain, usually taking 2-3 intervals total.
- Add flavor and work quickly:
- Stir in the peppermint extract immediately after the chocolate mixture is smooth. The mixture will begin to thicken as it cools, so work efficiently from this point forward. Taste and adjust the peppermint if needed, keeping in mind that the flavor will intensify as the fudge sets.
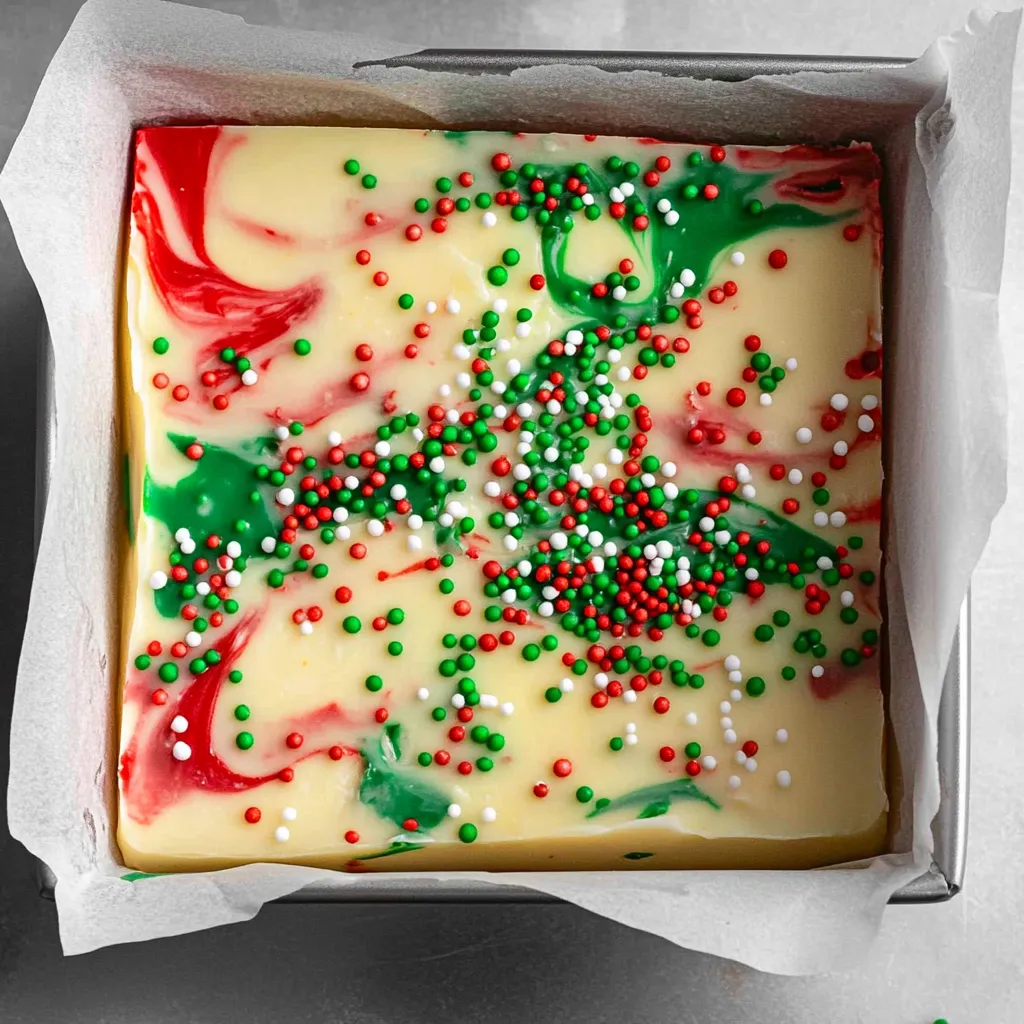
- Create the festive color divisions:
- Remove about half a cup of the white mixture and place it in a small bowl. Add 3-4 drops of red food coloring and stir quickly until evenly distributed. Repeat this process with another half cup of mixture and green food coloring. You should now have three bowls: the original white base plus red and green portions. Work swiftly as the mixture continues to thicken.
- Execute the swirling technique:
- Drop spoonfuls of each color randomly across the prepared pan, alternating between white, red, and green. Don't worry about being perfectly even; random placement creates more natural-looking swirls. Once all the mixture is in the pan, use a butter knife or skewer to gently swirl through the colors, creating marbled patterns without overmixing, which would muddy the colors.
- Finish and set properly:
- Immediately sprinkle the surface with holiday sprinkles or crushed candy canes while the fudge is still soft enough for them to stick. Place the pan in the refrigerator for at least 2 hours, or until the fudge feels firm when lightly pressed. Use the parchment overhang to lift the entire block out of the pan, then cut into squares with a sharp knife, wiping the blade clean between cuts for the neatest appearance.
 Pin it
My family considers this fudge a Christmas tradition now, and I always make extra because it disappears faster than any other holiday treat I make. The combination of creamy sweetness with that cool peppermint finish creates something truly addictive that even people who don't usually love white chocolate find irresistible.
Flavor Variations and Seasonal Adaptations
While peppermint creates the classic Christmas flavor, this base recipe adapts beautifully to different occasions and preferences. Vanilla extract creates a more traditional fudge taste that appeals to those who find peppermint too intense. Almond extract offers a sophisticated flavor that pairs wonderfully with the white chocolate. For special occasions, consider orange extract for Halloween versions or coconut extract for tropical-themed treats.
Color Combinations for Different Holidays
The swirling technique works perfectly for any holiday color scheme. Valentine's Day calls for red and pink swirls, while Easter looks beautiful with pastel pink, yellow, and green. Fourth of July versions using red, white, and blue create striking patriotic treats. For everyday occasions, single-color versions or classic chocolate and vanilla swirls work beautifully.
Texture Enhancements and Mix-ins
Adding texture creates more complex and interesting fudge. Chopped nuts like pecans or walnuts fold in beautifully and add satisfying crunch. Mini marshmallows create pockets of chewiness, while crushed cookies or candy pieces provide surprising flavor bursts. Always add mix-ins after the chocolate has melted but before adding colors to ensure even distribution.
Professional Presentation Tips
The visual appeal of this fudge makes it perfect for gifting. Cut pieces into uniform squares using a ruler for the most professional appearance. Package individual pieces in small paper cups or arrange them in decorative tins lined with parchment paper. For gift boxes, layer the fudge between sheets of wax paper to prevent sticking while maintaining the beautiful appearance.
Storage and Make-Ahead Strategies
This fudge stores exceptionally well, making it perfect for advance holiday preparation. At room temperature, it keeps for up to a week in an airtight container. Refrigerated storage extends the life to two weeks, though the texture becomes firmer. For longer storage, wrap individual pieces in wax paper before freezing for up to three months. Thaw at room temperature for the best texture.
This recipe represents everything I love about holiday baking - it looks impressive, tastes incredible, and requires minimal skill or time investment. The fact that it can be made days ahead and actually improves in flavor makes it perfect for busy holiday schedules. Whether you're creating gifts for neighbors or treats for your own family, this fudge delivers that special homemade magic that makes the holidays memorable.
Frequently Asked Questions
- → How long does this fudge take to set?
- The fudge needs at least 2 hours in the refrigerator to set completely before cutting.
- → Can I use different flavors instead of peppermint?
- Yes! You can swap peppermint extract for vanilla extract, mint extract, or any flavor you like.
- → How do I store leftover fudge?
- Store the fudge in an airtight container in the refrigerator for up to 5 days to keep it fresh.
- → What if my chocolate seizes up in the microwave?
- Heat in short 30-second intervals and stir between each one. Don't overheat or the chocolate will harden.
- → Can I make this fudge without butter?
- Yes, you can skip the butter if you want. It adds creaminess but the fudge will still turn out great without it.
- → How many pieces does this recipe make?
- This recipe makes 16 squares when cut into standard fudge-sized pieces.