 Pin it
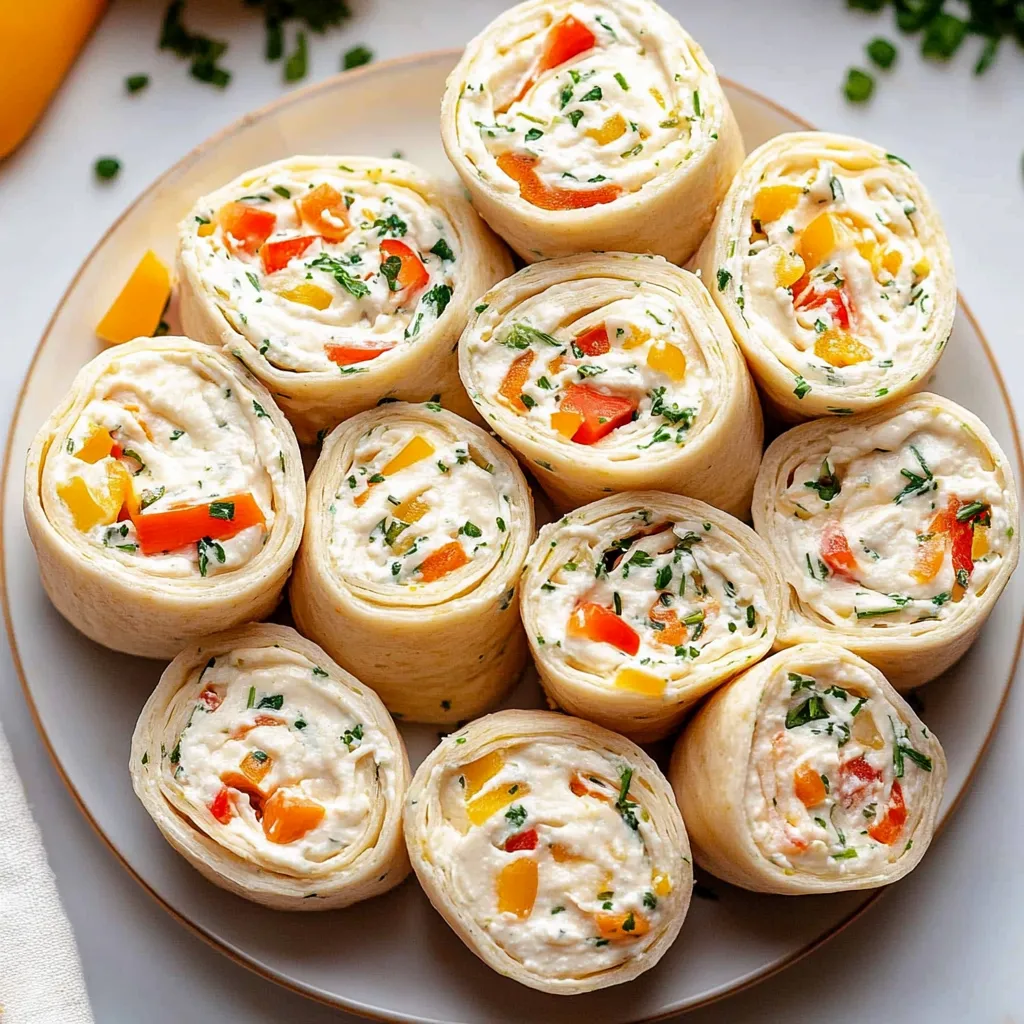
These delightful vegetable cream cheese tortilla roll ups transform simple ingredients into an impressive appetizer that's as beautiful as it is delicious. Colorful sweet mini peppers and fresh herbs are blended with creamy cheese and wrapped in soft tortillas to create pin-wheel slices that brighten any serving platter. Perfect for entertaining, these make-ahead bites deliver a satisfying combination of creamy, crunchy, and savory in every mouthful.
I made these for a weekend brunch gathering, and they disappeared faster than any other dish on the table! My neighbor, who typically gravitates toward heartier meat-based appetizers, asked for the recipe before leaving. Even my picky five-year-old nephew, who "doesn't eat vegetables," happily gobbled up three slices.
Ingredients
- Cream cheese: Creates the creamy, spreadable base that holds everything together while providing rich flavor and satisfying texture. Full-fat offers the best flavor, but low-fat works well too.
- Mini sweet peppers: Add vibrant color, sweet flavor, and pleasant crunch. Their mild taste makes them more universally appealing than standard bell peppers.
- Tortillas: Provide the perfect wrapper that's pliable enough to roll tightly without cracking. Burrito-sized tortillas work best as they create more roll ups with less effort.
- Dried shallots: Contribute a subtle onion flavor without the harshness or moisture of fresh onions, which could make the filling too wet.
- Garlic powder: Adds depth without overwhelming the other flavors. Using powder instead of fresh ensures even distribution and prevents harsh garlic bites.
- Fresh chives: Bring bright, mild onion notes and pretty green flecks throughout the filling. Their delicate flavor complements without dominating.
- Fresh dill: Provides distinctive herbal notes that elevate these roll ups beyond basic party fare. The slight tanginess pairs perfectly with cream cheese.
- Salt and pepper: Balance and enhance all the other flavors, transforming simple ingredients into something special.
Instructions
- Step 1:
- Prepare the cream cheese filling by first ensuring your cream cheese is properly softened—this is crucial for smooth mixing and easy spreading. Place 8 ounces of cream cheese in a medium bowl and stir it until smooth and creamy. Finely dice about 1 cup of mini sweet peppers (approximately 6-8 peppers) into small, uniform pieces no larger than 1/4 inch. This size ensures the peppers add texture without making the tortillas difficult to roll. Add the diced peppers to the cream cheese along with 2 tablespoons of finely chopped fresh chives, 1 tablespoon of chopped fresh dill, 1 teaspoon of dried shallots, 1/2 teaspoon of garlic powder, 1/4 teaspoon of salt, and a pinch of black pepper. Mix thoroughly until all ingredients are evenly distributed throughout the cream cheese.
- Step 2:
- Taste and adjust seasonings before spreading the mixture. This is your opportunity to perfect the flavor balance. Keep in mind that the flavors will intensify as the roll ups chill, so be cautious about adding more herbs or seasonings at this stage. If the mixture seems too thick for easy spreading, you can add a teaspoon of milk or sour cream to achieve a more spreadable consistency. The filling should be flavorful but not overpowering, as it needs to complement the neutral tortilla rather than compete with it.
- Step 3:
- Spread the filling evenly on large burrito-sized tortillas. Lay one tortilla flat on a clean work surface and spread approximately 3-4 tablespoons of the cream cheese mixture over it, creating a thin, even layer that extends almost to the edges. Leave about 1/2 inch bare at one edge to seal the roll. The layer should be thin enough to roll easily without squeezing out the sides but thick enough to taste in each bite. Use an offset spatula or the back of a spoon for the smoothest application. Repeat with the remaining tortillas until all the filling is used.
- Step 4:
- Roll each tortilla tightly by starting at the edge with filling and rolling toward the bare edge. Apply gentle, even pressure as you roll to create a compact cylinder without squeezing out the filling. The tighter your roll, the better your pinwheels will hold together when sliced. Once rolled, immediately wrap each tortilla roll in plastic wrap, twisting the ends to secure it. This not only helps maintain the tight roll but also prevents the tortilla from drying out during chilling.
- Step 5:
- Chill thoroughly by refrigerating the wrapped rolls for at least 30 minutes, though 2 hours is ideal for the best texture and flavor development. This chilling time is non-negotiable—it allows the cream cheese to firm up, which makes slicing much cleaner and prevents the filling from squeezing out. It also gives the flavors time to meld and intensify. The rolls can be chilled for up to 24 hours before slicing, making them perfect for advance preparation.
- Step 6:
- Slice with precision by first unwrapping one chilled roll at a time, keeping the others refrigerated until needed. Using a sharp chef's knife (not a serrated knife, which can tear the tortilla), slice off and discard the uneven ends, then cut the roll into 1/2-inch slices. Wipe your knife clean between cuts with a damp paper towel for the neatest presentation. Work quickly but carefully—the roll ups are easier to slice when cold and firm.
- Step 7:
- Arrange and serve the pinwheels cut-side up on a serving platter, slightly overlapping for an attractive presentation. If not serving immediately, cover loosely with plastic wrap and refrigerate, but bring them out about 10 minutes before serving to take the chill off for the best flavor. Garnish the platter with a few sprigs of fresh dill or chives for an elegant touch that hints at the flavors inside.
 Pin it
I discovered through experimentation that adding just a teaspoon of fresh lemon zest to the cream cheese mixture brightens all the flavors and adds a subtle dimension that makes people ask, "What's in these that makes them so good?" My grandmother always said that the secret to memorable appetizers is adding that one unexpected ingredient that elevates without dominating.
Perfect Pepper Preparation
The mini sweet peppers are a star ingredient in this recipe, providing color, crunch, and subtle sweetness. For the best results, proper preparation is key. Begin by removing the stems, seeds, and white membranes from each pepper—the seeds and membranes can add unwanted bitterness. To dice them efficiently, first cut each pepper into long, thin strips, then line up the strips and cut across them to create tiny, uniform pieces. This technique ensures consistent texture throughout your filling. If mini sweet peppers aren't available, standard bell peppers make a good substitute, though their flavor is slightly stronger. For the most colorful presentation, use a combination of red, orange, and yellow peppers. Green bell peppers tend to have a more bitter profile that can overpower the delicate herbs, so they're best avoided unless you particularly enjoy their flavor. If you're using bell peppers instead of mini peppers, you'll need about half of one medium pepper to equal the amount called for in this recipe.
Creative Variations for Every Occasion
While this basic recipe is delicious as written, it serves as an excellent canvas for customization based on season, occasion, or personal preference. For a Mediterranean twist, add 1/4 cup of crumbled feta cheese, 2 tablespoons of chopped Kalamata olives, and substitute basil for the dill. Create a Southwestern version by mixing in 1/4 cup of corn kernels, 2 tablespoons of chopped cilantro instead of dill, and 1/2 teaspoon of cumin. For a holiday variation, incorporate 1/4 cup of finely diced red bell pepper and 2 tablespoons of chopped green onions for a festive red and green color scheme. If you're serving a more sophisticated crowd, try an herb-lover's version with 1 tablespoon each of finely chopped fresh basil, parsley, tarragon, and chives. For a kid-friendly option that still incorporates vegetables, use finely grated carrots in place of the peppers and add a tablespoon of honey to the cream cheese mixture. Don't hesitate to experiment with different tortilla flavors as well—spinach tortillas create a striking color contrast with the filling, while sun-dried tomato tortillas add another layer of flavor.
Presentation and Serving Suggestions
How you present these colorful pinwheels can elevate them from simple snack to impressive appetizer. For casual gatherings, arrange them in concentric circles on a round platter, creating a colorful spiral effect. For more formal occasions, stand them on edge in a circular pattern to showcase the swirled filling. Consider providing a complementary dipping sauce, such as a light herb-infused sour cream or a tangy Greek yogurt dip, alongside for those who enjoy extra creaminess. These roll ups pair beautifully with other finger foods like fresh vegetable crudités, marinated olives, or crackers with various spreads for a complete appetizer spread. They also make excellent additions to lunchboxes or picnic baskets. If serving at an outdoor event during warmer weather, place your serving platter on a bed of ice to keep the roll ups chilled and food-safe. For brunch settings, arrange them alongside fruit skewers for a beautiful color contrast and complementary flavor pairing.
I developed this recipe for a baby shower I hosted during spring when mini sweet peppers were abundant at the farmers' market. After trying several variations, this combination of peppers and herbs proved to be the perfect balance—flavorful enough to interest adults but approachable enough that even the pickier guests enjoyed them. What makes these roll ups special is their versatility; they're equally at home at an elegant brunch or a casual game day gathering. The vibrant colors naturally draw people in, but it's the perfect balance of creamy, crunchy, and herbal flavors that keeps them reaching for "just one more." Over the years, this has become my signature appetizer—the one friends request when they invite me to potlucks, knowing these colorful pinwheels will brighten both the table and their taste buds.
Frequently Asked Questions
- → How far ahead can I make these roll ups?
- You can make these up to 1 day ahead for best results, though they'll keep in the fridge for 2-3 days total.
- → Can I use gluten-free tortillas?
- Absolutely! Any type of tortilla works well, including gluten-free options.
- → What can I use instead of cream cheese?
- Garlic and Herb Boursin cheese works great (skip the extra spices), or try hummus for a dairy-free option.
- → Why are my roll ups getting soggy?
- Vegetables with high water content like spinach, zucchini, and tomatoes can make roll ups soggy. Use less watery veggies or eat within 2 days.
- → Can I use dried herbs instead of fresh?
- Yes, but use just 1/2 teaspoon of dried dill and chives to avoid overpowering flavors.
