
 Pin it
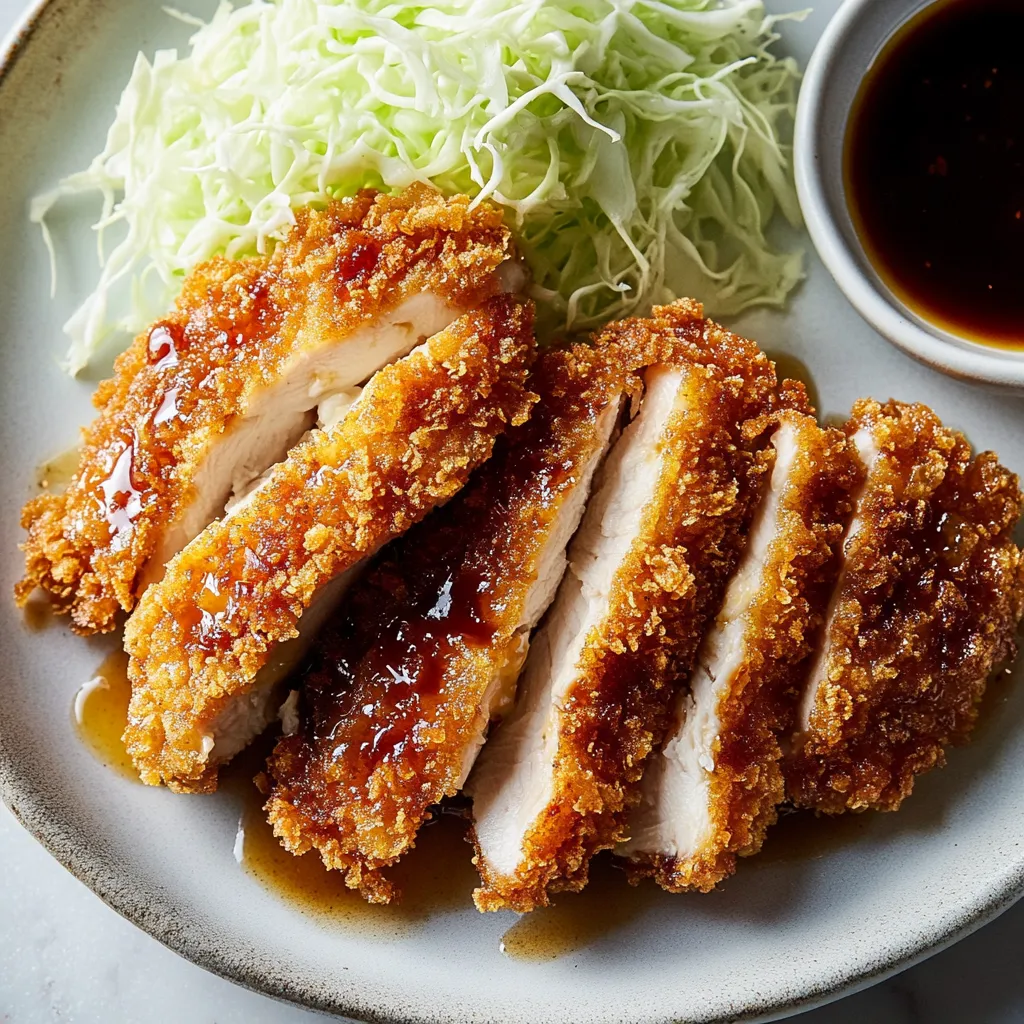
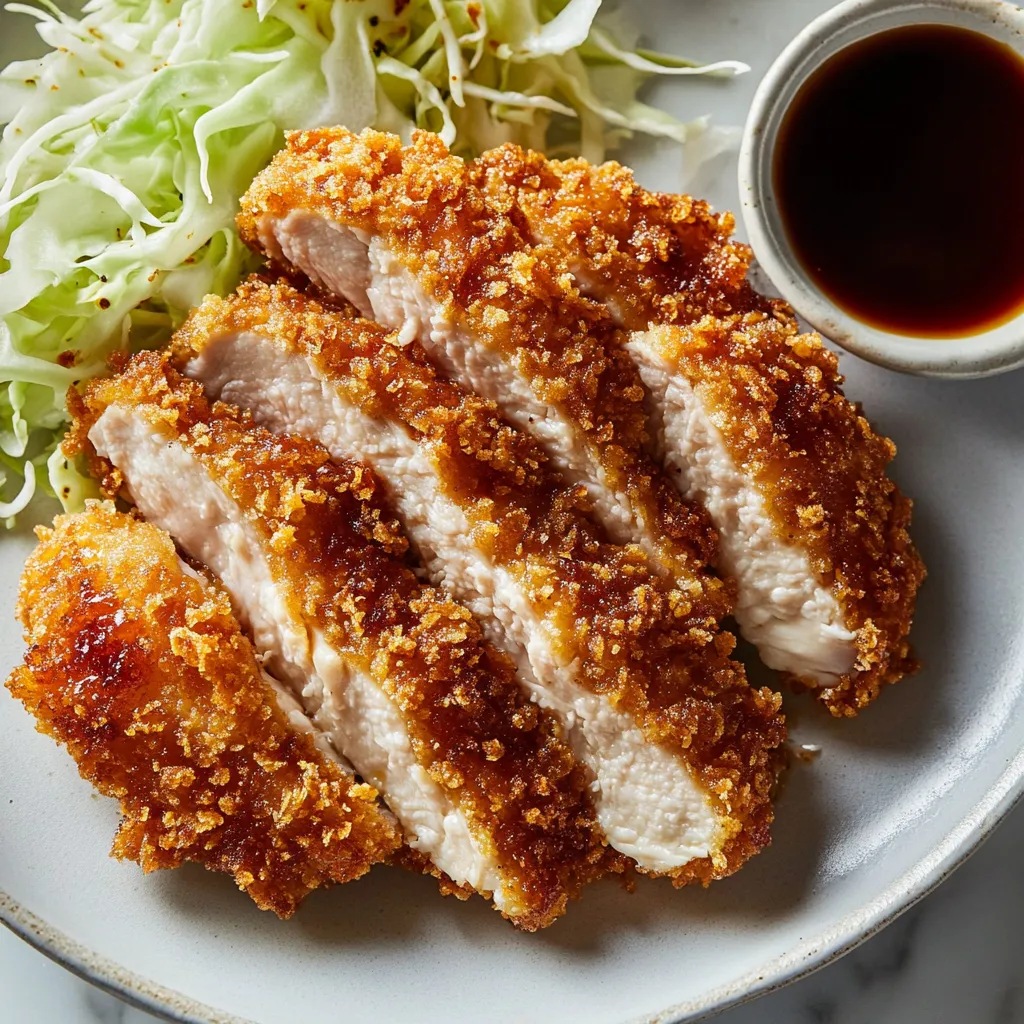
Chicken katsu transforms simple chicken thighs into something extraordinarily crispy and satisfying through the magic of panko breadcrumbs and proper frying technique. The golden-brown crust shatters when you bite into it, giving way to incredibly juicy, flavorful meat that stays moist thanks to using thighs instead of the more commonly suggested breast meat. Each piece gets pounded thin so it cooks quickly and evenly, then coated in a three-stage breading process that creates layers of texture and ensures the panko adheres perfectly without falling off during frying. Served alongside tangy tonkatsu sauce, crisp shredded cabbage, and steamed rice, this Japanese comfort food delivers everything you want from fried chicken but with a lighter, crunchier coating that doesn't feel heavy or greasy.
I first encountered chicken katsu at a Japanese restaurant and became immediately obsessed with that incredibly crispy coating that somehow managed to stay crunchy while the chicken inside remained perfectly juicy. When I tried making it at home the first time using chicken breasts like most recipes suggest, the results were disappointing—the meat dried out before the coating finished browning, and I ended up with pretty crust surrounding tough, stringy chicken. Switching to thighs changed everything completely. The extra fat and different muscle structure meant the meat stayed tender and flavorful no matter what, and suddenly my homemade version rivaled what I'd get at restaurants. Now my family requests this constantly, and I've made it so many times that I can bread and fry a whole batch while barely paying attention. The combination of that shattering crust with juicy meat and tangy sauce has made this one of our most-requested weeknight dinners.
Ingredients and What Makes Them Essential
- Boneless, skinless chicken thighs (1½ to 2 pounds): These provide the juiciest, most flavorful results because thigh meat has more intramuscular fat and different muscle fiber structure than breast meat, which means it stays moist and tender even with high-heat cooking. Thighs are also more forgiving if you slightly overcook them, whereas breasts become dry and stringy very quickly. Choose thighs that are roughly similar in size so they cook at the same rate, and look for ones without excessive gristle or thick fat deposits that need trimming. The meat should look pink and fresh without any gray patches or off smells.
- All-purpose flour (1 cup): This forms the first layer of the breading system and creates a dry surface that helps the egg mixture adhere properly to the chicken. The flour also absorbs any surface moisture from the chicken that would otherwise prevent good adhesion. Season the flour generously with salt and pepper so every layer of the coating contributes flavor rather than just texture. Sifting the flour isn't necessary, but breaking up any lumps helps it coat more evenly.
- Eggs (2 large): Eggs provide the sticky, protein-rich binder that glues the panko breadcrumbs to the floured chicken and creates structure as it cooks. The egg proteins coagulate when they hit hot oil, forming a firm layer that locks the breadcrumbs in place and prevents them from sliding off. Room-temperature eggs mix more smoothly with the sour cream than cold eggs straight from the refrigerator, though either works fine.
- Sour cream (2 tablespoons): This addition to the egg wash is the secret ingredient that makes the coating extra crispy and helps it adhere better than eggs alone. The fat in sour cream enriches the egg mixture and creates a thicker consistency that holds more panko, while the acidity tenderizes the chicken surface slightly. The result is a coating that's more substantial and stays attached better during frying. You can substitute buttermilk if you prefer, which provides similar acidity and tanginess.
- Panko breadcrumbs (2 cups): These Japanese-style breadcrumbs are absolutely essential and cannot be substituted with regular breadcrumbs if you want authentic results. Panko flakes are larger, lighter, and more irregular than Western breadcrumbs, which creates a coating with dramatically more surface area that fries up incredibly crispy and stays crunchy longer. Regular breadcrumbs are dense and become soggy quickly, while panko maintains its texture. Look for panko in the Asian foods aisle or near regular breadcrumbs—it's widely available now at most supermarkets.
- Neutral cooking oil (for frying): You need enough oil to come at least halfway up the sides of the chicken for proper shallow frying, which usually means 1 to 2 cups depending on your pan size. Use oil with a high smoke point like vegetable, canola, or peanut oil that won't break down or smoke at frying temperatures. Avoid olive oil, which has too low a smoke point and imparts flavor you don't want here. The oil needs to reach 350°F for optimal results—hot enough to create immediate sizzle and crispness but not so hot that the coating burns before the chicken cooks through.
- Tonkatsu sauce (for serving): This thick, sweet-savory Japanese sauce is traditionally served with katsu and provides the essential flavor complement to the fried chicken. Tonkatsu sauce tastes somewhat like a sweeter, fruitier Worcestershire sauce with hints of tomato and spices. You can find it bottled at Asian markets or well-stocked grocery stores, or you can make a quick approximation by mixing ketchup, Worcestershire sauce, soy sauce, and sugar. The tangy-sweet flavor cuts through the richness of the fried chicken beautifully.
- Green cabbage (for serving, thinly shredded): Crisp, fresh cabbage provides cooling crunch and mild flavor that balances the rich fried chicken. The cabbage is always served raw and shredded very thinly—almost like coleslaw without the dressing. This raw vegetable component is traditional and important for textural contrast and cutting the richness of the fried food. Some people drizzle a little tonkatsu sauce over their cabbage, while others prefer it plain as a palate cleanser.
Step-by-Step Instructions
- Pound the chicken to uniform thickness:
- Working with a few pieces at a time to avoid overcrowding, place the chicken thighs inside a large zip-top plastic bag or between two sheets of plastic wrap or parchment paper. Using a rolling pin, the flat side of a meat mallet, or even the bottom of a heavy pan, pound the chicken firmly but not aggressively until it's uniformly about a quarter-inch thick across the entire piece. The goal is even thickness rather than paper-thin meat, since too-thin chicken will overcook and dry out before developing good color. Pay special attention to any thick spots and pound those areas more to match the thinner sections. This pounding step is crucial because it ensures fast, even cooking—thick spots would still be raw when thin areas are already overcooked. As you finish each piece, transfer it to a plate and continue with the remaining chicken.
- Set up your breading station:
- Get three shallow dishes, pie plates, or wide bowls and arrange them in a row on your counter near the stove. In the first dish, combine the flour with about one teaspoon of salt and half a teaspoon of black pepper, whisking them together so the seasonings distribute evenly throughout the flour. In the second dish, crack both eggs and add the sour cream, then whisk vigorously with a fork until you have a smooth, pale yellow mixture with no streaks of sour cream remaining—the consistency should be like thin pancake batter. In the third dish, pour in the panko breadcrumbs and season them with another half teaspoon of salt and some pepper, tossing with your hands to mix. Have a baking sheet lined with parchment paper or a wire rack ready nearby for holding the breaded chicken pieces.
- Bread the chicken systematically:
- Set up an efficient workflow where you use one hand for dry ingredients and one hand for wet ingredients, which prevents your fingers from getting completely coated in breading. Take one pounded chicken thigh and lay it in the seasoned flour, using your dry hand to flip it and press gently so flour adheres to both sides. Shake off any excess flour—you want a light, even coating without thick clumps. Transfer the floured chicken to the egg mixture and use your wet hand to turn it, making sure it's completely coated in the egg wash on all surfaces. Let excess egg drip off for a moment, then move the chicken to the panko breadcrumbs. Use your dry hand to sprinkle panko over the top, then flip the chicken and press the breadcrumbs firmly into both sides with your palms. You want an even, substantial layer of panko that's well-adhered and compact rather than loose and fluffy. Transfer the breaded chicken to your prepared baking sheet and repeat with all remaining pieces. If you're not frying immediately, refrigerate the breaded chicken uncovered for up to 4 hours, which actually helps the coating adhere better by drying it slightly.
- Heat the oil to proper temperature:
- Pour enough neutral oil into a large skillet—preferably cast iron or stainless steel rather than nonstick—so it comes about half an inch to three-quarters of an inch up the sides, which usually requires 1 to 2 cups depending on pan size. Place the pan over medium-high heat and let the oil heat for several minutes until it reaches 350°F on an instant-read or deep-fry thermometer. If you don't have a thermometer, test the oil by dropping in a small pinch of panko—it should immediately sizzle vigorously and float to the surface within a second or two. Proper oil temperature is absolutely critical for success: too cool and the coating absorbs oil and becomes soggy, too hot and the outside burns before the inside cooks through. Maintain the heat throughout frying by adjusting the burner as needed between batches.
- Fry the chicken in batches:
- Once your oil reaches the correct temperature, carefully add 2 to 3 pieces of breaded chicken to the pan without crowding them—they should have space around each piece without touching each other. Adding too many at once drops the oil temperature dramatically and results in greasy, soggy coating instead of crispy perfection. Listen for that satisfying sizzle as the chicken hits the oil, which indicates proper temperature. Let the chicken cook undisturbed for about 1½ to 2 minutes on the first side, resisting the urge to move or flip them prematurely. You'll see the edges starting to turn golden-brown and crispy. Use tongs or a spatula to carefully flip each piece over and cook the second side for another 1½ to 2 minutes. The chicken should be deep golden-brown and crispy on both sides, and an instant-read thermometer inserted into the thickest part should register 165°F. Because the chicken is pounded thin, it cooks very quickly—don't be tempted to leave it longer or it will dry out.
- Drain and keep warm:
- As each batch finishes frying, use tongs to transfer the pieces to a wire rack set over a baking sheet or a plate lined with several layers of paper towels. The wire rack is ideal because it allows air circulation on all sides, keeping both the top and bottom crispy instead of the bottom getting soggy from sitting in its own steam. If using paper towels, flip the chicken pieces over after a minute so both sides can drain. Let the oil temperature recover for about 30 seconds between batches before adding more chicken. If you need to hold finished pieces for more than a few minutes while completing subsequent batches, you can keep them warm in a 200°F oven on the wire rack, though they're honestly best served immediately while still hot from the pan.
- Slice and serve immediately:
- Once all the chicken is fried and has drained briefly, transfer the pieces to a cutting board and use a sharp knife to slice each one crosswise into strips about three-quarters of an inch wide. This slicing step is traditional and makes the chicken easier to eat with chopsticks, but it also creates a dramatic presentation where you can see the golden coating surrounding the juicy interior. Arrange the sliced katsu on serving plates alongside a generous mound of very thinly shredded raw cabbage and a small bowl of tonkatsu sauce for dipping or drizzling. Serve immediately with steamed white rice on the side. The contrast of hot, crispy chicken with cool, crunchy cabbage and tangy-sweet sauce over plain rice creates the perfect balanced bite.
 Pin it
The technique that made the biggest difference in my results was learning to maintain proper oil temperature throughout the entire frying process rather than just checking it once at the beginning. My early attempts at katsu were inconsistent—some pieces emerged perfectly golden and crispy while others were pale and greasy—and I couldn't figure out why until I started monitoring the temperature constantly. I discovered that adding cold chicken to the hot oil dropped the temperature significantly, sometimes by 50 degrees or more, and it took time for the oil to recover between batches. Once I started adjusting my burner heat to maintain steady 350°F temperature and giving the oil time to reheat between batches, my results became dramatically more consistent. Every piece now comes out golden-brown and crispy with juicy meat inside, and I haven't had a greasy, soggy failure since learning this lesson. Investing in an inexpensive instant-read thermometer specifically for monitoring oil temperature was one of the best cooking purchases I've made, and I use it every single time I fry anything now.
Understanding Japanese Breading Techniques
The three-stage breading process used for katsu and similar Japanese fried foods creates a coating that's dramatically different from simpler breading methods and delivers superior crispness that lasts. The first flour layer dries the meat surface and creates a slightly rough texture that the wet egg mixture can grip, preventing the breading from sliding off in the oil. Without this initial flour step, the egg mixture would bead up on the chicken's surface and fail to create good adhesion. The egg and sour cream layer provides the crucial sticky binder that cements the panko to the flour-dusted meat while also creating a moisture barrier that keeps the chicken juicy inside its crispy shell.
Panko breadcrumbs are specifically engineered for maximum crispiness through their unique manufacturing process. Unlike Western breadcrumbs made from dried, ground bread, panko is made from bread without crusts that's processed into large, irregular flakes with a distinctive shard-like shape. These flakes are lighter and airier with more surface area than regular crumbs, which means they fry up incredibly crispy and stay that way much longer because they don't absorb as much oil. The irregular shape also creates more textural interest—you get varying levels of crunch in each bite rather than uniform coating. The gaps between panko flakes allow more oil to circulate during frying, which further enhances crispness.
Proper oil temperature and frying technique make the difference between greasy, soggy coating and the light, crispy results you want. When chicken hits oil at the correct 350°F temperature, moisture on the surface instantly vaporizes into steam, which escapes outward through the coating and prevents oil from penetrating inward. This outward steam pressure creates a barrier that keeps the breading crispy while the chicken cooks through. If the oil is too cool, steam doesn't generate quickly enough to prevent oil absorption, resulting in heavy, greasy coating. If it's too hot, the outside burns and seals before the interior cooks, leaving you with raw chicken inside a blackened crust.
Chicken Thighs vs. Breast Meat
The choice between thighs and breasts for katsu significantly affects both the cooking process and the final result in ways that make thighs the superior option despite being less commonly suggested. Chicken thighs contain more intramuscular fat—the tiny white streaks of fat marbled throughout the meat—which melts during cooking and continuously bastes the meat from within, keeping it moist and tender. Breast meat is extremely lean with minimal fat, which means it dries out quickly when exposed to high heat and has less inherent flavor. The muscle fiber structure also differs: thigh meat has shorter, looser fibers that remain tender even when fully cooked, while breast meat has longer, tighter fibers that toughen and become stringy if cooked beyond 165°F.
From a practical cooking standpoint, thighs are far more forgiving of minor timing errors or temperature fluctuations that commonly occur in home kitchens. If you leave chicken thighs in 350°F oil for an extra 30 seconds, they'll still emerge juicy and delicious. The same timing error with breast meat often results in noticeably drier texture that's less pleasant to eat. This forgiveness factor makes thighs ideal for home cooks who might not have perfect frying experience or precise temperature control. Thighs also have richer, more chickeny flavor that stands up well to the crispy coating and strong tonkatsu sauce, whereas mild breast meat can taste bland by comparison.
The one legitimate advantage of breast meat is its uniform thickness and shape, which makes it slightly easier to pound to even thickness since thighs have more irregular contours with varying thick and thin spots. However, this minor convenience doesn't outweigh the significant flavor and texture advantages of thighs. If you do choose to use breast meat for personal preference or dietary reasons, take extra care not to overcook it—remove it from the oil the moment it reaches 165°F internal temperature, and consider brining it briefly in salt water before breading to help it retain moisture during frying.
Variations and Adaptations
While classic chicken katsu is delicious as-is, the basic technique adapts easily to different proteins and flavor profiles that keep the dish interesting if you make it frequently. Tonkatsu, the pork version, traditionally uses thin-cut pork loin chops that are sometimes pounded even thinner, then breaded and fried using the identical method. Pork loin is lean like chicken breast, so watch the cooking time carefully to prevent drying out. The slightly sweet flavor of pork pairs beautifully with tonkatsu sauce and makes an excellent variation when you want something different.
Fish katsu uses firm white fish like cod, halibut, or mahi-mahi cut into pieces and breaded the same way, though it requires gentler handling since fish is more delicate than chicken or pork. The cooking time is shorter—usually just a minute per side—since fish cooks faster than poultry. Vegetable katsu can feature thick slices of eggplant, sweet potato, or even thick portobello mushroom caps, all of which work beautifully with the panko coating. These vegetarian versions are lighter and cook even faster than meat, making them excellent for quick weeknight dinners.
For flavor variations while keeping chicken as the protein, you can season the panko layer with different spices or aromatics. Adding garlic powder, onion powder, or dried herbs to the breadcrumbs creates subtle flavor without compromising the crispy texture. Some cooks mix sesame seeds into the panko for nutty flavor and extra crunch. You could also use flavored panko if you find it—some Japanese markets carry panko seasoned with seaweed, wasabi, or curry, all of which create interesting variations. Spicy katsu can be made by adding cayenne pepper or chili powder to the flour layer and serving with spicy mayo instead of tonkatsu sauce.
 Pin it
This chicken katsu has become one of those recipes I make regularly without even thinking about it because the technique is so straightforward once you've done it a few times, yet it never fails to feel special and impressive. The combination of incredibly crispy coating with juicy, flavorful meat hits all the comfort food notes while somehow feeling lighter and less heavy than American-style fried chicken. I love that I can have this on the table in 30 minutes on a busy weeknight, yet it's also nice enough to serve to guests who always ask for the recipe and seem surprised when I explain how simple it is. The leftovers make outstanding sandwiches—I just tuck the cold katsu into soft white bread with shredded cabbage, tonkatsu sauce, and Japanese mayo for an authentic katsu sando that's become my favorite packed lunch. Once you nail the breading technique and oil temperature management, you'll find yourself making variations constantly because the method is so versatile and reliably delicious. This is definitely one of those recipes that earns its place in your regular rotation and gets requested repeatedly by everyone who tries it.
Frequently Asked Questions
- → Can I use chicken breasts instead of thighs?
- Yes, chicken breasts work fine. Just pound them thin like the thighs so they cook evenly and stay tender.
- → What can I substitute for sour cream in the egg wash?
- You can use milk, buttermilk, or even skip it entirely and just use beaten eggs. The sour cream helps the coating stick better though.
- → How do I know when the oil is hot enough?
- Use a thermometer to check for 350°F. If you don't have one, drop a breadcrumb in - it should sizzle immediately and turn golden in about a minute.
- → Can I bake this instead of frying?
- Yes, you can bake at 400°F for about 20-25 minutes, flipping halfway. Spray the breaded chicken with cooking oil for better browning.
- → What is tonkatsu sauce and where can I find it?
- Tonkatsu sauce is a thick, sweet-savory sauce sold in most grocery stores near the Asian foods. You can also make your own with ketchup, Worcestershire sauce, and soy sauce.
- → How do I keep the breading from falling off?
- Make sure the chicken is completely dry before breading, press the panko firmly onto the chicken, and let the breaded pieces rest for 5-10 minutes before frying.
- → Can I prep this ahead of time?
- Yes, you can bread the chicken up to 4 hours ahead and keep it in the fridge. Just fry it right before serving for the best texture.