
 Pin it
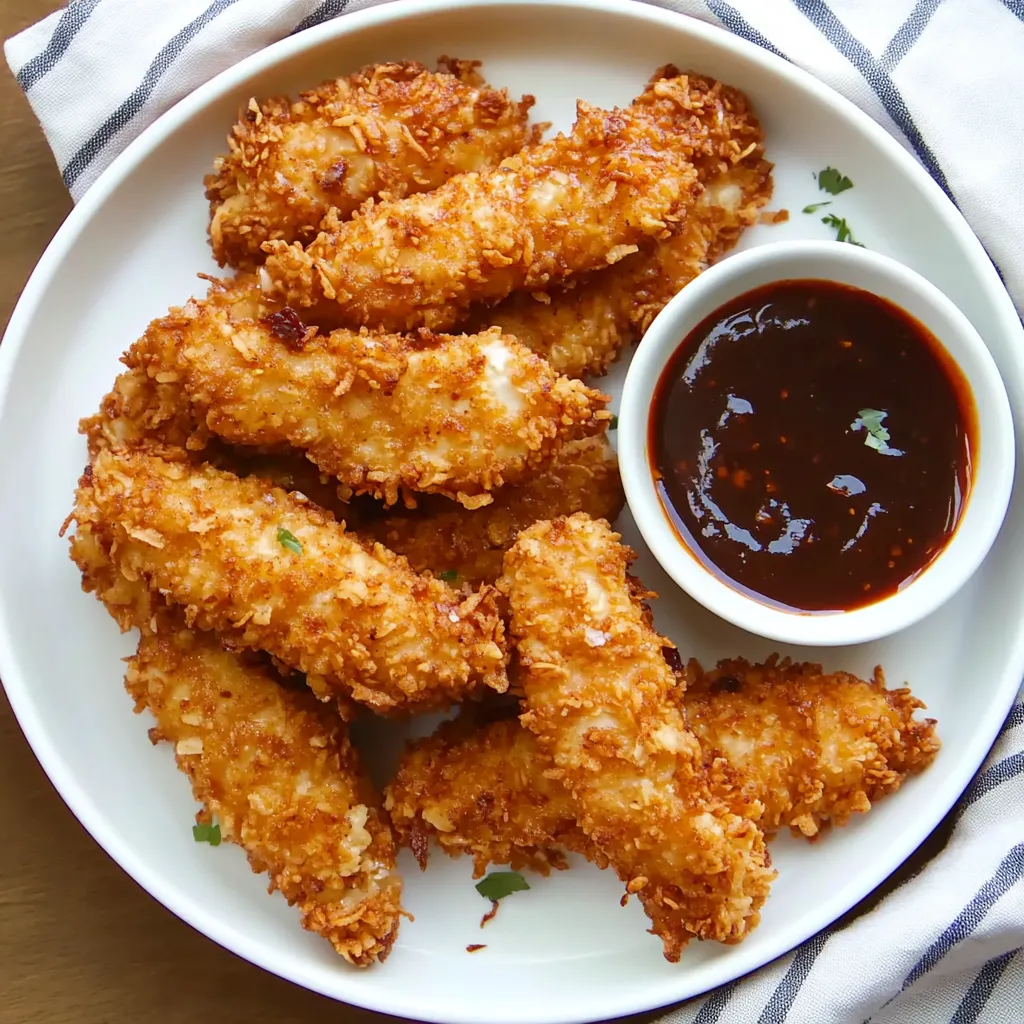
This irresistible crispy coconut chicken transforms ordinary chicken strips into golden, crunchy perfection with a delightfully sweet-and-spicy twist. The combination of shredded coconut and panko breadcrumbs creates an incredibly satisfying coating that delivers maximum crunch, while a hint of sriracha adds just enough heat to keep things interesting. Whether you're hosting a game day gathering or need a crowd-pleasing weeknight dinner, this recipe delivers restaurant-quality results with simple pantry ingredients.
I made these for a family barbecue last weekend, and my coconut-skeptic brother couldn't stop eating them! Even my picky eight-year-old, who typically removes breading from chicken, asked for seconds. My sister-in-law immediately asked for the recipe, saying they were better than any restaurant version she'd tried.
Ingredients
- Chicken breasts: Cut into uniform strips for even cooking. The consistent size ensures that every piece cooks at the same rate, preventing some from becoming dry while others remain undercooked.
- Eggs and milk: Create the essential egg wash that helps the coating adhere properly to the chicken. The milk adds richness and helps create a more tender texture.
- Sriracha hot sauce: Adds a subtle kick to the egg wash that complements the sweet coconut beautifully. The heat level is completely adjustable to your family's preferences.
- Shredded coconut: Provides the signature texture and subtle sweetness that makes this dish special. Sweetened coconut works best, but unsweetened can be used for a less sweet version.
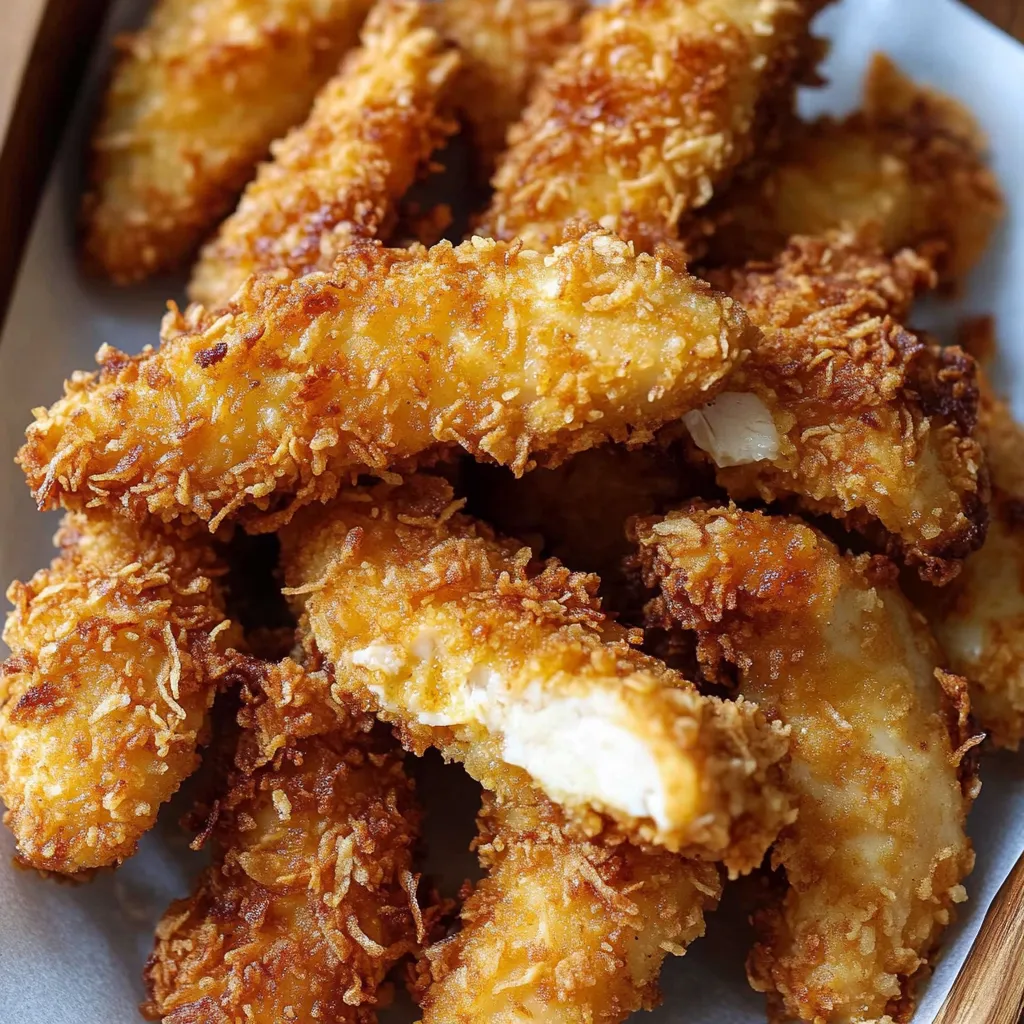
- Panko breadcrumbs: Create superior crunch compared to regular breadcrumbs. Their larger, irregular shape holds up better during frying and creates that coveted crispy texture.
- Cayenne pepper: Adds warmth and depth to the coating without overwhelming heat. A little goes a long way in creating complex flavor.
- Vegetable oil: Essential for frying, providing the high heat needed for proper crisping. Its neutral flavor won't compete with the coconut and spices.
- Sweet chili sauce: The perfect dipping sauce that bridges the sweet and spicy elements of the dish, though any favorite sauce works well.
Instructions
- Step 1:
- Set up your breading station efficiently by arranging two shallow dishes side by side. In the first dish, whisk together 2 large eggs, 2 tablespoons of milk, and 1 tablespoon of sriracha hot sauce until well combined. This egg wash should be smooth and evenly colored from the sriracha. In the second dish, combine 1 cup of shredded coconut, 1 cup of panko breadcrumbs, 1 teaspoon of salt, 1/2 teaspoon of black pepper, and 1/4 teaspoon of cayenne pepper. Mix the dry ingredients thoroughly to ensure even distribution of seasonings throughout the coating mixture.
- Step 2:
- Prepare the chicken properly by cutting 1.5 pounds of boneless, skinless chicken breasts into strips approximately 1 inch wide and 4 inches long. Pat each strip completely dry with paper towels—this is crucial for proper adhesion of the coating. Any moisture on the chicken will prevent the egg wash from sticking properly, leading to coating that falls off during cooking. Season the chicken strips lightly with salt and pepper before proceeding to the breading process.
- Step 3:
- Bread each piece methodically by first dipping a chicken strip into the egg wash, turning to coat all sides completely. Allow excess egg wash to drip off, then immediately transfer the strip to the coconut-panko mixture. Press the coating firmly onto all sides of the chicken, ensuring complete coverage. The key is to really press the coating into the chicken—don't just roll it around. Place the breaded strips on a clean plate and repeat with all remaining chicken pieces. Let the breaded chicken rest for 5-10 minutes to help the coating set before cooking.
- Step 4:
- Heat oil to the proper temperature by adding enough vegetable oil to a heavy-bottomed skillet to reach about 1/3 inch depth. Heat the oil over medium-high heat until it reaches 375°F on a candy thermometer. If you don't have a thermometer, test the oil by dropping in a small piece of the coating mixture—it should sizzle immediately and vigorously. Proper oil temperature is crucial: too low and the chicken will absorb oil and become greasy; too high and the coating will burn before the chicken cooks through.
- Step 5:
- Fry in small batches to maintain oil temperature and ensure even cooking. Carefully place 3-4 chicken strips in the hot oil, being careful not to overcrowd the pan. Fry for 3-4 minutes on the first side until the coating is deep golden brown and crispy. Flip carefully with tongs and fry for another 3-4 minutes on the second side. The internal temperature should reach 165°F when checked with an instant-read thermometer. Transfer cooked pieces to a paper towel-lined baking sheet and keep warm in a 200°F oven while cooking the remaining batches.
- Step 6:
- Maintain quality while cooking by monitoring the oil temperature between batches and adjusting heat as needed. Remove any loose coating bits from the oil between batches to prevent burning, which can give a bitter taste to subsequent pieces. If the oil starts to smoke, reduce the heat immediately. The goal is maintaining that perfect 375°F temperature that creates maximum crispiness without burning.
- Step 7:
- Serve immediately while the coating is at its crispiest. Arrange the golden chicken strips on a serving platter with small bowls of sweet chili sauce for dipping. Garnish with fresh cilantro or green onions if desired. The contrast between hot, crispy chicken and cool, sweet-spicy dipping sauce is part of what makes this dish so irresistible.
 Pin it
I discovered through testing that adding just a tablespoon of cornstarch to the coconut-panko mixture creates an even crispier coating that stays crunchy longer. My grandmother always said that the secret to great fried foods is in the details—this small addition makes a noticeable difference in both texture and staying power.
Perfecting the Coating Technique
The secret to restaurant-quality crispy coconut chicken lies in proper breading technique. Start with completely dry chicken—any surface moisture will prevent the egg wash from adhering properly. When dipping in the egg wash, make sure every surface is coated, but allow excess to drip off to prevent a thick, gummy layer. In the coconut mixture, don't just roll the chicken around—actively press the coating into the meat using your palms or the back of a spoon. This pressure helps the coating bond with the egg wash and creates a more substantial crust that won't fall off during cooking. For even better adhesion, some chefs recommend a double-dipping technique: egg wash, coconut mixture, another quick dip in egg wash, then a final roll in coconut mixture. While this creates an incredibly thick coating, it's not necessary for delicious results with the standard method.
Oil Temperature and Frying Tips
Successful frying depends on maintaining consistent oil temperature. Invest in a good candy or oil thermometer for the most accurate readings. When the oil temperature drops (which happens when you add cold chicken), don't increase the heat dramatically—this often leads to overheating once the temperature recovers. Instead, make small adjustments and be patient. If you're frying multiple batches, give the oil time to return to proper temperature between batches. Signs of oil that's too hot include excessive bubbling, smoking, or coating that browns within the first minute. Oil that's too cool will result in greasy, soggy chicken that absorbs oil rather than crisping. For the crispiest results, don't move the chicken around too much while frying—let each side develop a proper crust before flipping.
Baking Alternative Method
While frying produces the crispiest results, the baked version still delivers great flavor with less oil. When baking, preheat your oven to 400°F and line a baking sheet with parchment paper lightly sprayed with cooking oil. Arrange the breaded chicken strips in a single layer, making sure they don't touch—this allows hot air to circulate around each piece. Flip the chicken halfway through the 25-minute baking time to ensure even browning. For extra crispiness when baking, place a wire rack on your baking sheet and arrange the chicken on the rack—this allows air to circulate underneath as well. Some bakers like to spray the breaded chicken lightly with cooking oil before baking to help promote browning, though it's not strictly necessary. The baked version won't achieve the same level of crispiness as fried, but it's still delicious and significantly lighter.
I created this recipe after years of loving coconut shrimp but wanting something more substantial for family dinners. After testing numerous combinations of coatings and spice levels, this version emerged as the perfect balance—crispy enough to satisfy texture lovers, flavorful enough to keep adults interested, and approachable enough that even hesitant eaters enjoy it. What makes this dish special is how the sweet coconut plays against the subtle heat, creating complexity without overwhelming anyone's palate. My family has dubbed these "better than restaurant" and they've become a requested dish for birthday dinners and casual entertaining. There's something irresistibly satisfying about that first bite when your teeth break through the crispy coating to reach the juicy chicken beneath—it's a textural experience that never gets old.
Frequently Asked Questions
- → Can I bake this coconut chicken instead of frying?
- Yes! Bake at 400°F for 25 minutes or until chicken is cooked through. It won't be quite as crispy but still delicious.
- → What oil should I use for frying?
- Vegetable oil works best for frying. You can also use canola oil or peanut oil for high heat cooking.
- → How do I know when the oil is hot enough?
- The oil should reach 375°F. You can test by dipping a wooden spoon handle in - small bubbles should form around it.
- → Can I make this ahead of time?
- You can coat the chicken strips and refrigerate for up to 4 hours before frying. Cook just before serving for best crispiness.
- → What can I serve with coconut chicken?
- Try it with rice, steamed vegetables, or a fresh salad. Sweet chili sauce makes a perfect dipping sauce.
- → How long does leftover coconut chicken last?
- Store in the fridge for up to 3 days. Reheat in the oven at 350°F for 5-8 minutes to crisp it back up.