
 Pin it
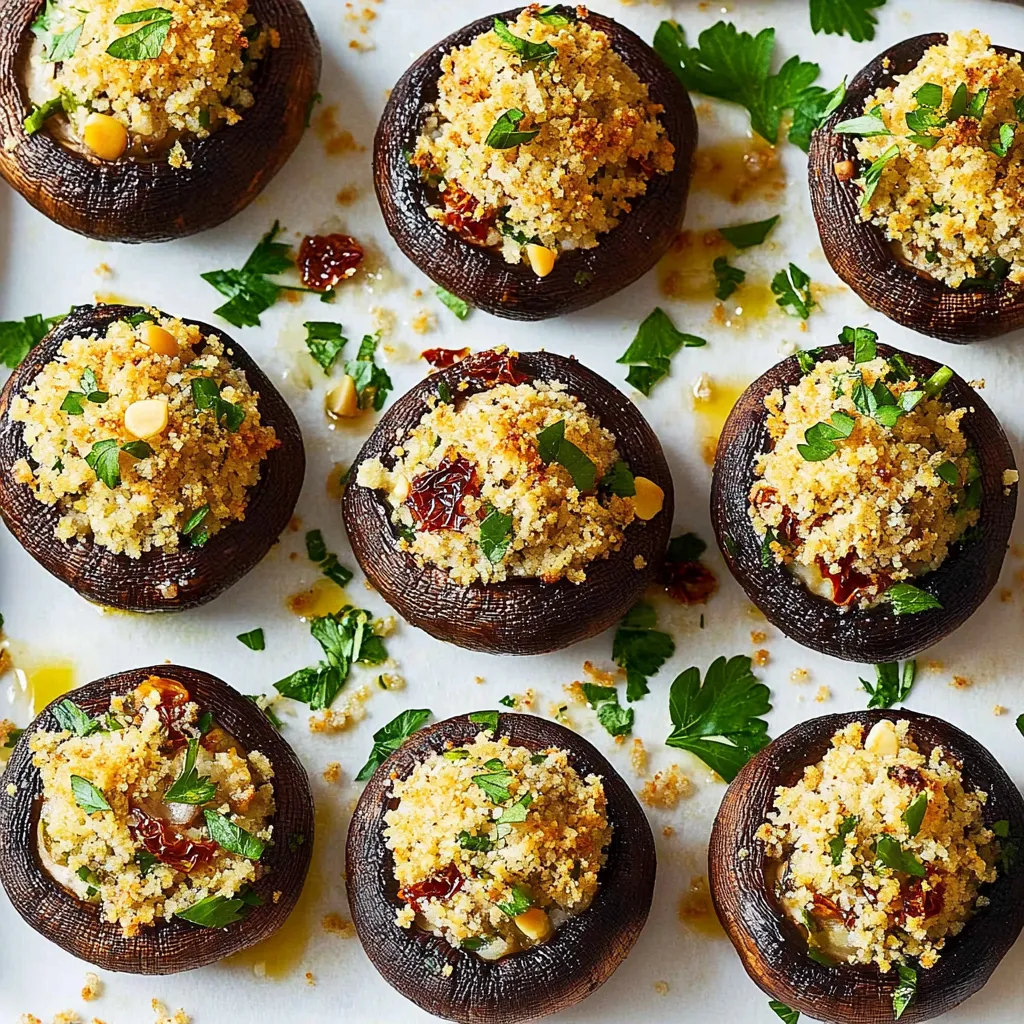
Stuffed mushrooms are one of those appetizers that look impressive on a party table but are secretly incredibly easy to make, requiring maybe fifteen minutes of actual work before the oven does everything else. These skip the typical cream cheese filling that can feel heavy and rich in favor of a crispy, garlicky breadcrumb mixture loaded with Parmesan cheese, sun-dried tomatoes, pine nuts, and fresh parsley that creates textural contrast and savory depth. The mushroom caps themselves get brushed with olive oil and seasoned before being stuffed, which means every component is flavorful rather than just the filling carrying all the weight. What makes these particularly appealing for entertaining is how they can be assembled ahead of time and baked right before guests arrive, they're finger food that doesn't require plates or utensils, and they disappear so fast that you'll wish you'd made a double batch.
I started making stuffed mushrooms about ten years ago for holiday parties after eating too many versions with gloppy cream cheese filling that tasted bland and sat heavy in your stomach. The first time I tried the breadcrumb approach instead, using panko for extra crispiness and adding sun-dried tomatoes for intensity, they were so much better that I never went back to cream cheese. Now these are my most-requested appetizer, and people always ask for the recipe assuming it's complicated when it's actually one of the easiest things I make.
Ingredients and What Makes Them Essential
- Large Cremini Mushrooms (16 mushrooms, about 1½ pounds): Cremini mushrooms, also called baby bella or mini portobello, have more flavor than white button mushrooms and hold their shape well during baking. Choose the largest ones you can find because bigger caps hold more filling. The mushrooms should be firm, dry, and unblemished. Avoid any that feel slimy or have dark wet spots.
- Panko Breadcrumbs (½ cup): Panko are Japanese-style breadcrumbs that are larger and flakier than regular breadcrumbs, which means they stay crispier during baking. Regular breadcrumbs work in a pinch but create denser, less crispy filling. Don't substitute fresh breadcrumbs which would be too soft.
- Pine Nuts (¼ cup, toasted): Pine nuts add buttery richness and textural crunch. Toast them in a dry skillet for 3 to 5 minutes until fragrant and golden - this dramatically improves their flavor. You can substitute chopped walnuts or almonds if pine nuts are too expensive, though the flavor will be different.
- Sun-Dried Tomatoes (¼ cup, finely chopped): Sun-dried tomatoes provide concentrated umami and slight sweetness. Use the kind packed in oil and drain them well before chopping. If using dry-packed, reconstitute them in warm water for 10 minutes first. The tomatoes should be chopped into tiny pieces that distribute throughout the filling.
- Pecorino Romano or Parmesan Cheese (½ cup, freshly grated): Hard aged cheese adds salty, nutty, umami richness. Pecorino is slightly sharper and saltier than Parmesan; both work beautifully. Freshly grate it yourself rather than using pre-grated which doesn't melt as well and contains anti-caking agents.
- Fresh Parsley (3 tablespoons, finely chopped): Fresh parsley adds herbal brightness and pretty green flecks throughout the filling. Use flat-leaf Italian parsley if possible, which has better flavor than curly parsley. Don't substitute dried parsley which tastes like grass clippings.
- Garlic (3 cloves, minced): Fresh garlic provides pungent, aromatic flavor. Mince it very finely so it distributes evenly and doesn't create harsh bites. Don't use jarred minced garlic or garlic powder which taste completely different.
- Extra-Virgin Olive Oil (⅓ cup, divided): Good quality olive oil adds flavor and helps the mushrooms brown and become tender. You'll use some to brush the caps and some to mix into the filling. Don't substitute vegetable oil which lacks flavor.
- Salt and Black Pepper (to taste): Proper seasoning is crucial. You'll season the mushroom caps before filling and the filling mixture separately. Kosher salt and freshly ground black pepper taste best.
Step-by-Step Instructions
- Prep the Mushrooms:
- Preheat your oven to 375°F and line a large rimmed baking sheet with parchment paper. Take each mushroom and wipe it clean with a damp paper towel, removing any dirt. Don't rinse them under water which makes them absorb moisture and become soggy. Twist or gently pull out the stems from each mushroom cap, creating a cavity for the filling. You can save the stems for another use like adding to soup or stock, or discard them. Arrange all the mushroom caps cavity-side-up on your prepared baking sheet, spacing them evenly. Drizzle about 2 tablespoons of olive oil over all the mushrooms, making sure each one gets some. Sprinkle generously with salt and pepper, seasoning the inside of each cap. This pre-seasoning is crucial for flavor.
- Toast the Pine Nuts:
- Place ¼ cup of pine nuts in a small, dry skillet over medium heat. Shake the pan occasionally and toast for about 3 to 5 minutes until the nuts are fragrant and golden brown in spots. Watch them carefully because they can burn quickly. Once toasted, transfer immediately to a plate to cool - leaving them in the hot pan can cause them to continue cooking and burn.
- Make the Filling:
- In a medium bowl, combine ½ cup of panko breadcrumbs, the toasted and cooled pine nuts, ¼ cup of finely chopped sun-dried tomatoes (drained well if they were packed in oil), ½ cup of freshly grated cheese, 3 tablespoons of finely chopped parsley, and 3 cloves of minced garlic. Drizzle in about 3 tablespoons of olive oil - enough to moisten the breadcrumbs so they hold together but not so much that the mixture becomes greasy. Add ¼ teaspoon of salt and several grinds of black pepper. Use a fork or your hands to mix everything together thoroughly until evenly combined. The mixture should hold together when squeezed but not be wet or greasy. If it seems too dry, add another tablespoon of olive oil.
- Stuff the Mushrooms:
- Using a small spoon, scoop some of the filling mixture and pack it into one mushroom cap, mounding it up generously. Really pile it high - the filling won't fall out during baking if you pack it in well. Use your fingers to press it down slightly and shape it into a mound. Repeat with all the remaining mushroom caps, dividing the filling evenly among them. You want each mushroom to have a generous amount of filling that rises above the rim of the cap.
- Add Final Oil and Bake:
- Once all the mushrooms are stuffed, drizzle the remaining olive oil generously over the tops of the filling. This helps create that golden, crispy top. Transfer the baking sheet to your preheated 375°F oven and bake for 20 to 25 minutes. The mushrooms are done when they're tender when pierced with a fork, the filling is golden brown and crispy on top, and you can see liquid released from the mushrooms pooling on the baking sheet. The filling should look toasted and crisp, not pale.
- Cool and Serve:
- Remove the baking sheet from the oven and let the stuffed mushrooms cool for about 5 minutes. They'll be extremely hot inside immediately after baking. After cooling slightly, transfer them to a serving platter. Taste one and adjust seasoning if needed - you might want to sprinkle with a bit more salt or add a squeeze of lemon juice for brightness. Serve warm. These are best eaten with your hands as finger food, though you can provide small forks if preferred.
 Pin it
My sister-in-law claims she hates mushrooms and refuses to eat them in any form, insisting they're slimy and taste like dirt. At a holiday party, I saw her eat three of these stuffed mushrooms before I mentioned what they were. When I told her, she looked horrified for a second, then grudgingly admitted these were "different" and "actually good." She still won't eat regular mushrooms but will eat these, which I find hilarious. Converting the mushroom hater with properly prepared stuffed mushrooms feels like a cooking achievement.
Understanding Why Cremini Work Better Than White
While white button mushrooms are the most common variety and would technically work in this recipe, cremini mushrooms produce superior results for several reasons. Cremini are simply more mature versions of white mushrooms - they're the same species but have been allowed to grow slightly longer, developing a brown cap and more concentrated flavor. This extra growing time creates meatier texture that holds up better during the relatively long baking time without becoming mushy. The flavor is earthier, richer, and more pronounced than mild white mushrooms, which means the mushroom itself contributes to the overall taste rather than just being a bland vessel. Cremini also tend to be sold in larger sizes than white buttons, providing more space for filling. If cremini aren't available, choose the absolutely largest white mushrooms you can find and reduce baking time by about 5 minutes since they cook faster.
The Science of Moisture and Mushroom Texture
Mushrooms are approximately 90% water, which creates challenges when cooking them. When you rinse mushrooms under running water, their porous structure acts like a sponge, absorbing additional water that they then release during cooking. This extra moisture makes them steam rather than roast, preventing proper browning and creating soggy texture. Wiping with a damp paper towel removes dirt without adding significant moisture. During baking, mushrooms naturally release their internal water, which is why you see liquid pooling on the baking sheet. Proper seasoning and adequate oven temperature helps drive off this moisture while creating browning through the Maillard reaction. The oil drizzled on the caps promotes browning and carries fat-soluble flavor compounds. This is also why the breadcrumb filling works better than cream cheese - breadcrumbs absorb excess moisture and stay relatively crisp, while cream cheese becomes watery and loose when mushrooms release liquid.
Why Panko Creates Superior Crispiness
Panko breadcrumbs differ significantly from traditional breadcrumbs in both texture and performance. Regular breadcrumbs are made from finely ground bread, creating small, uniform particles. Panko, a Japanese invention, is made from bread that's been processed into larger, irregular flakes with a coarser, airier structure. This structure creates more surface area for browning and remains crispier during and after cooking. When panko absorbs oil or moisture, the flakes maintain distinct separation rather than clumping into a dense mass. This means panko-based fillings stay crispy on top while regular breadcrumbs can become gummy or dense. For stuffed mushrooms specifically, where moisture from the mushrooms threatens to make filling soggy, panko's ability to maintain texture is crucial. If you only have regular breadcrumbs, they'll work but the filling won't be quite as crispy and light.
The Role of Sun-Dried Tomatoes in Flavor Building
Sun-dried tomatoes provide concentrated umami and complexity that elevates this filling from good to exceptional. When tomatoes are dried, their water content reduces dramatically while the sugars, acids, and glutamates concentrate. This creates intense tomato flavor with slight sweetness and significant umami - that savory, mouth-filling quality that makes food taste satisfying. The chewy texture also adds interest to the filling. Sun-dried tomatoes packed in oil have softer texture and more integrated flavor than dry-packed, though either works after proper preparation. The small amount called for (¼ cup for 16 mushrooms) distributes throughout the filling without overwhelming it, adding depth that makes people wonder what creates the complex flavor. Some recipes call for fresh tomatoes, but they add too much moisture and lack the concentrated flavor that makes sun-dried tomatoes special.
Make-Ahead Strategies and Timing
Stuffed mushrooms are excellent for advance preparation, which makes them ideal for entertaining when you need to minimize day-of cooking. You can prep the components separately ahead: clean the mushrooms and store them stem-side-down on paper towels in the refrigerator for up to 1 day. Make the filling and store it covered in the refrigerator for up to 2 days. For maximum convenience, assemble the stuffed mushrooms completely - fill the caps, arrange on a baking sheet, cover tightly with plastic wrap, and refrigerate for up to 4 hours before baking. When ready to serve, drizzle with final olive oil and bake as directed, potentially adding 2 to 3 minutes to the baking time if they're very cold. Don't assemble more than 4 hours ahead because the filling can make the mushrooms release moisture and become soggy. You cannot freeze stuffed mushrooms successfully - the mushrooms release too much water when thawed and become mushy.
Variations and Customization Ideas
While the base recipe is excellent, this stuffed mushroom template accommodates numerous variations. For Italian sausage mushrooms, brown ½ pound of Italian sausage, crumble it, and mix into the filling. For bacon mushrooms, add ¼ cup of cooked, crumbled bacon to the filling. For crab-stuffed mushrooms, mix in ½ cup of lump crab meat. For spinach version, sauté chopped spinach and squeeze out moisture before adding to filling. For Mediterranean style, use feta cheese instead of Parmesan and add kalamata olives. For vegan mushrooms, use nutritional yeast instead of cheese and add extra herbs. For spicy version, include red pepper flakes or diced jalapeños. For herb variations, try basil, oregano, or thyme in addition to or instead of parsley. For nut-free, substitute sunflower seeds for pine nuts. Each variation maintains the crispy breadcrumb base while creating different flavor profiles.
Storage, Reheating, and Serving Temperature
Stuffed mushrooms are definitely best served warm, freshly baked when the filling is at peak crispiness and the mushrooms are tender. However, they store reasonably well and reheat better than many appetizers. Let leftover mushrooms cool completely, then transfer to an airtight container and refrigerate for up to 3 days. To reheat, arrange them on a baking sheet and warm in a 350°F oven for about 10 minutes until heated through. The filling won't be quite as crispy as when freshly baked, but it's still good. Avoid microwave reheating if possible - it makes the filling soggy and the mushrooms rubbery. These can be served at various temperatures - hot from the oven is ideal, warm after sitting out for 10 to 15 minutes is still excellent, and even room temperature they're acceptable for casual gatherings, though the filling is less crispy. Plan your baking time so they come out of the oven about 10 minutes before you want to serve them.
Troubleshooting Common Problems
When stuffed mushrooms don't turn out right, there's usually a fixable cause. If the mushrooms are watery and soggy, you rinsed them under water instead of wiping with a damp towel, or you didn't bake them long enough to drive off their natural moisture - wipe instead of rinsing and bake until liquid pools on the pan. If the filling is gummy instead of crispy, you used regular breadcrumbs instead of panko or added too much oil - use panko and add just enough oil to moisten. If they taste bland, you didn't season the mushroom caps before filling or underseasoned the filling - always season caps separately. If the filling falls out, you didn't pack it in firmly enough or used mushrooms that were too small - press filling in and use large caps. If the tops burn before mushrooms cook, your oven runs hot - reduce temperature by 25 degrees. If mushrooms are tough, you overbaked them - remove when just tender. Most issues relate to moisture management, seasoning, or timing.
Serving Suggestions and Party Planning
Stuffed mushrooms work beautifully in various entertaining contexts. For cocktail parties, they're perfect passed appetizers - make them smaller using medium mushrooms and calculate about 2 to 3 per person. For sit-down dinners, serve 2 to 3 larger stuffed mushrooms as a first course on individual plates with a small salad. For holiday buffets, arrange them on a platter garnished with fresh herbs and lemon wedges. They pair well with other appetizers like crostini, cheese plates, or crudités. For beverages, they complement white wines like Pinot Grigio or Sauvignon Blanc, or light reds like Pinot Noir. Beer drinkers enjoy them with crisp lagers or wheat beers. For complete appetizer spreads, balance them with lighter options like vegetables and dips. Calculate about 2 mushrooms per person if serving multiple appetizers, or 3 to 4 per person if mushrooms are the main appetizer.
 Pin it
After making stuffed mushrooms countless times over the past decade for various parties and gatherings, they've become one of my most reliable appetizers because they genuinely please everyone and require minimal effort relative to how impressive they look. I appreciate how I can prep everything ahead and just bake them when guests are due to arrive, and how they're substantial enough that people feel satisfied after eating a couple rather than immediately looking for more food. The crispy breadcrumb filling was a revelation after years of eating gloppy cream cheese versions, and I've converted numerous people to this approach after they try them. These represent exactly what party food should be - delicious, impressive-looking, easy to eat, and simple enough to make that you're not stressed about it.
Frequently Asked Questions
- → Can I make stuffed mushrooms ahead of time?
- You can prep the filling a few hours early and keep it in the fridge. Stuff and bake the mushrooms right before serving so they stay crispy and warm.
- → What kind of mushrooms work best for stuffing?
- Large cremini mushrooms are perfect because they have nice deep caps that hold plenty of filling. Baby bellas work great too since they're the same thing.
- → How do I keep stuffed mushrooms from getting soggy?
- Make sure your oven is hot at 400°F and don't overcrowd the pan. If they release liquid while baking, let them sit for a minute after removing from the oven.
- → Can I use regular breadcrumbs instead of panko?
- Yes, but panko gives you a crispier texture. If using regular breadcrumbs, you might want to toast them lightly in a pan first for extra crunch.
- → How long do leftover stuffed mushrooms last?
- Store them in an airtight container in the fridge for up to 3 days. Reheat in the oven at 350°F for about 10 minutes to crisp them back up.
- → Can I freeze stuffed mushrooms?
- It's better to freeze them before baking. Stuff the mushrooms, freeze on a tray, then transfer to a freezer bag. Bake from frozen, adding 5-10 extra minutes.