
 Pin it
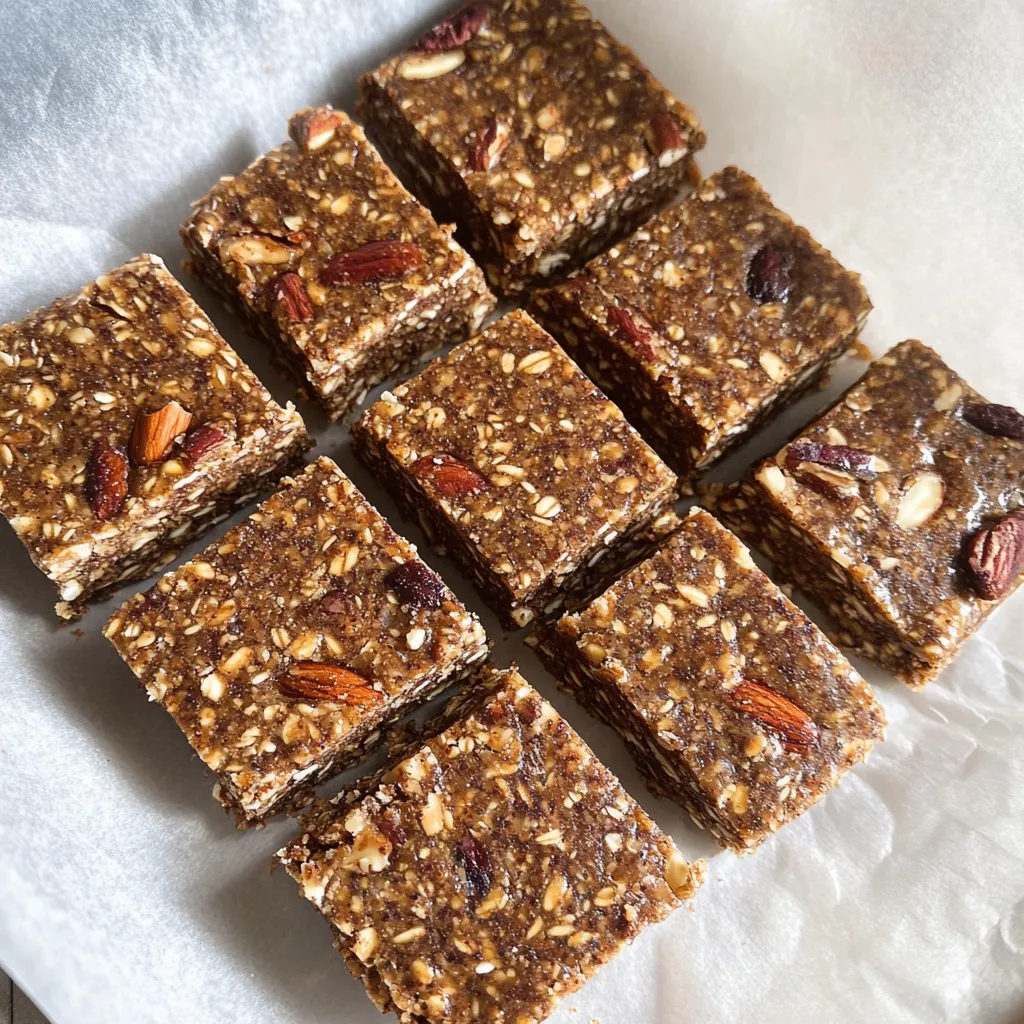
Date Energy Bars pack all the natural sweetness and sustained energy you need into one simple, wholesome treat. Made with just a handful of whole food ingredients like Medjool dates, rolled oats, nuts, and seeds, these bars prove that healthy snacks don't have to be complicated or loaded with artificial ingredients. They're naturally sweet without any added sugar, perfectly chewy with a light golden color when baked, and sturdy enough to toss in your bag for busy days ahead.
I started making these bars when I got tired of spending money on expensive store-bought energy bars that were packed with ingredients I couldn't pronounce. My kids love finding these in their lunchboxes, and I love knowing they're getting real nutrition instead of processed junk. They've become my go-to solution for those hectic mornings when everyone needs something quick but nourishing.
Ingredients and Why Each One Matters
- Medjool dates: These are the star ingredient that provides natural sweetness and acts as the binding agent; their soft, sticky texture helps hold everything together perfectly
- Rolled oats: Creates the base structure of the bars while adding fiber and slow-releasing energy; use certified gluten-free oats if needed
- Mixed nuts (pecans and almonds work great): Add healthy fats, protein, and a satisfying crunch that makes these bars more filling and nutritious
- Chia seeds: Tiny powerhouses that boost the fiber and omega-3 content while adding a subtle nutty flavor and helping with the texture
- Cinnamon: Adds warmth and natural sweetness without any extra sugar, plus it helps balance blood sugar levels
- Vanilla extract: Enhances all the other flavors and gives the bars a more complex, bakery-like taste
- Sea salt: Just a pinch brings out the sweetness of the dates and balances all the flavors perfectly
When shopping for dates, look for ones that feel soft and pliable rather than hard and dried out. Medjool dates are usually the best choice because they're naturally softer and stickier than other varieties. If your dates feel a bit firm, don't worry - soaking them in hot water will soften them right up for easy blending.
Step-by-Step Cooking Instructions
- Prepare your dates properly:
- Start by placing your Medjool dates in a bowl and covering them with hot water. Let them soak for exactly 5 minutes - this softens them enough for easy blending while keeping them from getting too mushy. Before draining, scoop out and reserve 3 tablespoons of this soaking water because you'll need it later to help create the right consistency in your mixture.
- Process the dry ingredients first:
- While your dates are soaking, add the rolled oats, nuts, chia seeds, cinnamon, salt, vanilla extract, and any optional add-ins like cacao nibs or chocolate chips to your food processor. Pulse and blend until everything is mostly ground up but still has some texture - you don't want it completely powdered, just broken down enough that it will stick together well.
- Combine with dates and reserved water:
- Drain your soaked dates and add them to the food processor along with those 3 tablespoons of reserved soaking water. Blend everything together, stopping to scrape down the sides as needed, until you have a sticky dough that holds together when pressed. The mixture should be cohesive but not overly wet - if it seems too dry, add a tiny bit more of the soaking water.
- Press into your prepared baking dish:
- Line an 8x8 inch baking dish with parchment paper, leaving some overhang for easy removal later. Transfer your date mixture into the dish and press it down firmly and evenly with your hands or a spatula. Really pack it down well - this step is crucial for bars that will hold their shape when cut. The surface should be smooth and level.
- Bake until lightly golden:
- Preheat your oven to 350°F and bake the pressed mixture for exactly 15 minutes. You're looking for the edges to be lightly golden and the surface to feel set when you gently touch it. Don't overbake or the bars will become too hard and crumbly instead of chewy.
- Cool before cutting:
- Let the bars cool in the pan for at least 15-20 minutes before attempting to cut them. This cooling time allows them to firm up properly so they'll slice cleanly instead of crumbling apart. Use the parchment paper overhang to lift the entire slab out, then cut into your desired bar size.
 Pin it
My favorite time to make these bars is on Sunday afternoons when I'm doing meal prep for the week. The smell of cinnamon and vanilla baking fills the whole kitchen, and by Monday morning I have healthy snacks ready for everyone's busy schedules. I've experimented with different nut combinations over the years, and while pecans and almonds are my go-to, walnuts and cashews work beautifully too.
These bars have become my secret weapon for avoiding the afternoon energy crash that used to hit me around 3 PM. Unlike processed snack bars that give you a quick sugar rush followed by a crash, these provide steady energy that lasts. The combination of healthy fats from nuts, fiber from oats and dates, and natural sugars creates the perfect balance for sustained energy.
I love how adaptable this recipe is to whatever I have on hand. Sometimes I'll add a handful of unsweetened coconut flakes, other times I'll throw in some mini dark chocolate chips for the kids. The base recipe is so forgiving that you can really make it your own based on your family's preferences.
The texture of these bars is absolutely perfect - chewy but not sticky, substantial but not heavy. They're firm enough to pack in lunch boxes without falling apart, yet tender enough that even my youngest can bite through them easily. This balance comes from the combination of the sticky dates binding everything together and the light baking that sets the structure.
Storage is incredibly simple with these bars. I usually cut them into individual portions and store them in an airtight container in the refrigerator, where they stay fresh for up to a week. They're actually delicious straight from the fridge - the cool temperature makes them extra refreshing on hot days.
These Date Energy Bars have truly become one of my most-requested recipes from friends and family. They satisfy that desire for something sweet while providing real nutritional value, and they're simple enough that even busy parents can whip them up without stress. Every time I pack them for a hiking trip or school event, people ask for the recipe - they're just that good.
Frequently Asked Questions
- → Can I make these bars without baking them?
- Yes, you can skip the baking step and just refrigerate the pressed bars for 2 hours until firm. They'll be softer but still hold together well.
- → What can I use instead of dates?
- You can substitute dried figs, apricots, or raisins. Soak them in warm water for 10 minutes first to soften them up.
- → How long do these energy bars stay fresh?
- Store them in an airtight container at room temperature for up to one week, or freeze them for up to 3 months.
- → Can I use different nuts in this recipe?
- Absolutely! Try walnuts, cashews, or hazelnuts instead. Any combination of raw nuts works great in these bars.
- → Are these bars good for kids' lunches?
- Yes, they're perfect for lunch boxes. They're naturally sweet, don't melt, and give kids steady energy without a sugar crash.
- → Do I need to soak the dates?
- Soaking makes the dates easier to blend and creates a smoother texture. If your dates are very soft, you can skip this step.