
 Pin it
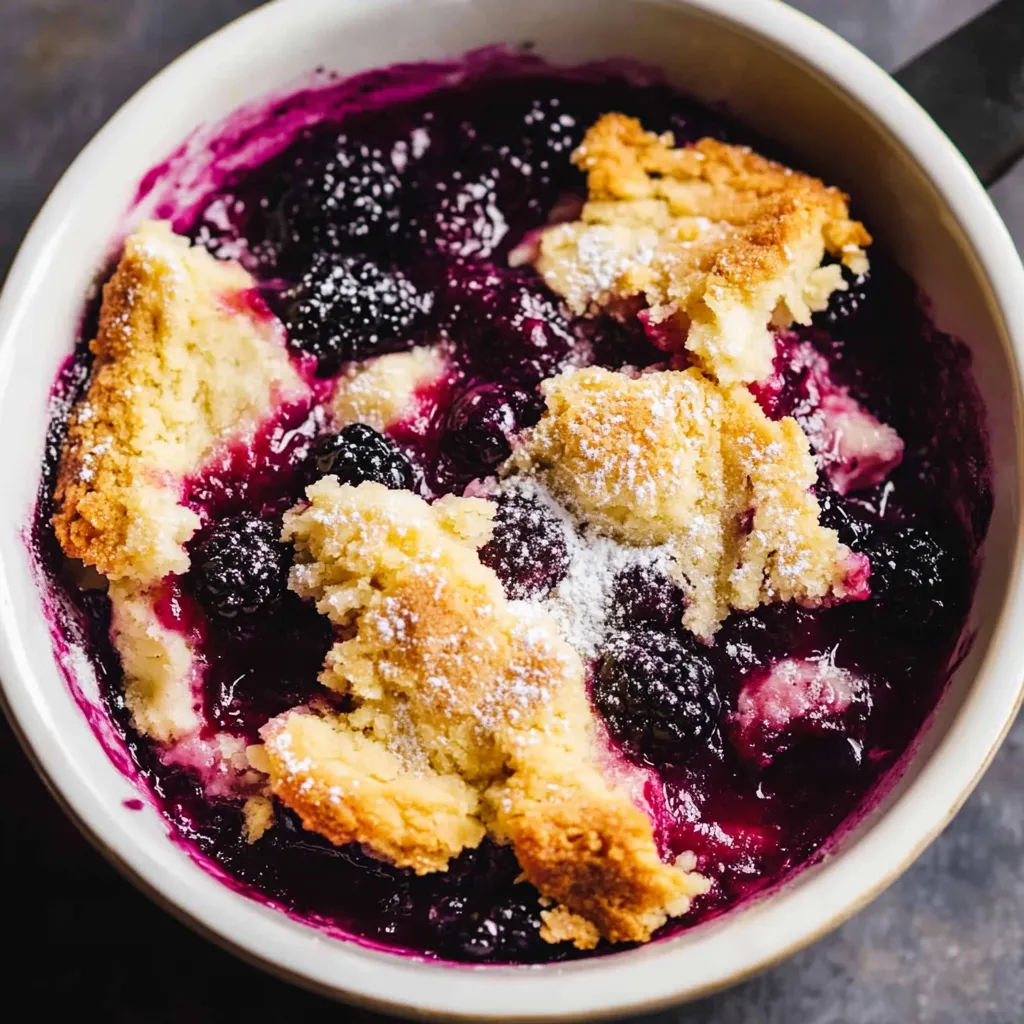
This blackberry cobbler changed everything I thought I knew about baking. One bite of those tender, juicy berries nestled under a golden, slightly crispy topping, and I understood why people get excited about homemade desserts. The beauty lies in its simplicity - no fancy techniques, no complicated steps, just real ingredients that come together into something that tastes like summer in a bowl.
I discovered this recipe during a particularly hectic summer when my blackberry bushes were overflowing and I had a house full of unexpected guests. What started as a desperate attempt to use up fruit before it spoiled became the dessert everyone kept talking about long after they went home. Even my most accomplished baker friends asked for the recipe.
Essential Ingredients and Selection Tips
- Granulated sugar: Regular white sugar works perfectly here; it sweetens the batter and caramelizes on top for that golden finish
- Self-rising flour: This contains built-in leavening agents that make the cobbler rise and become fluffy; if you don't have it, mix 1 cup all-purpose flour with 1½ teaspoons baking powder and ½ teaspoon salt
- Whole milk: The fat content helps create a tender texture; avoid skim milk which can make the cobbler tough
- Butter: Use real butter, not margarine, for the best flavor and texture; it should be melted but not hot when you add it
- Fresh or frozen blackberries: Look for plump, deep purple berries; frozen ones work just as well and don't need thawing
Detailed Cooking Instructions
- Prepare your oven and pan:
- Preheat your oven to 350°F and make sure the rack is positioned in the center. Lightly grease a 9x9 inch baking dish with butter or cooking spray. This prevents sticking and makes serving easier later. If you only have a 9x13 inch pan, consider doubling the recipe so the cobbler won't be too thin.
- Create the base batter:
- In a medium mixing bowl, whisk together 1 cup of granulated sugar and 1 cup of self-rising flour until completely combined with no lumps. Pour in 1 cup of whole milk and add ½ stick (4 tablespoons) of melted butter. Stir everything together until you have a smooth batter - it should be pourable but not too thin, similar to pancake batter consistency.
- Assemble in the baking dish:
- Pour the batter directly into your prepared 9x9 inch baking dish, spreading it evenly with a spoon if needed. Don't worry about making it perfectly smooth - rustic is the goal here. Now comes the magic part: sprinkle 2 cups of blackberries evenly over the top of the batter. Don't stir or mix them in; just let them sit on top.
- Add the finishing sugar and first bake:
- Sprinkle ¼ cup of granulated sugar evenly over the blackberries. This creates a beautiful caramelized top as it bakes. Place the dish in your preheated oven and bake for exactly 50 minutes. During this time, the batter will rise up around the berries and start to turn golden brown.
- Final sugar addition and finishing bake:
- After 50 minutes, carefully remove the cobbler from the oven and sprinkle the remaining 2 tablespoons of sugar over the top. Return it to the oven for another 10 minutes. The top should be golden brown and a toothpick inserted into the batter portion should come out clean or with just a few moist crumbs.
 Pin it
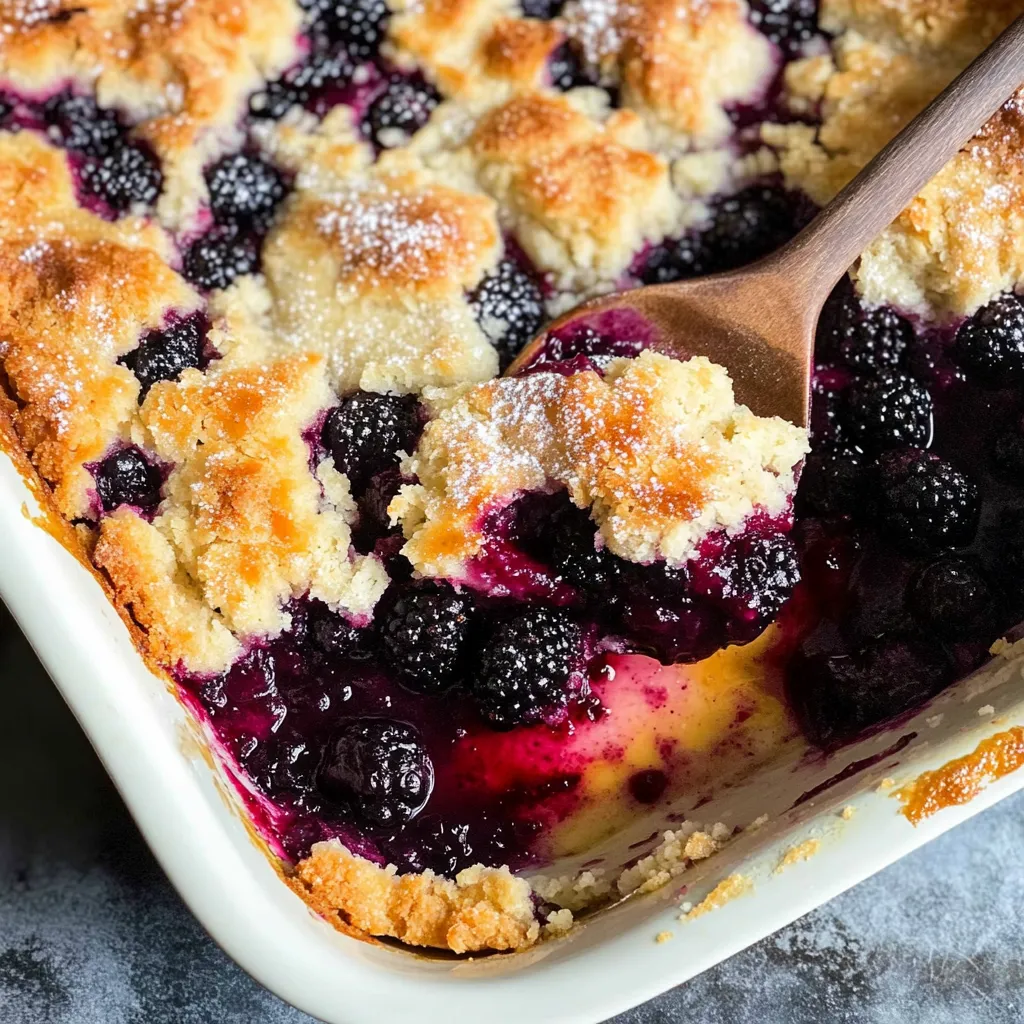
The magic of this cobbler happens during baking when the batter somehow finds its way around and under the berries, creating layers of texture that seem impossible given how simple the assembly was. The first time I made it, I kept checking through the oven door, amazed at how the plain batter was transforming into something so beautiful.
Blackberries hold a special place in my heart because they remind me of childhood summers spent picking wild berries along country roads with my grandmother. She taught me that the best berries are often the ones that require a little effort to reach, hidden deeper in the thorny bushes where the birds haven't found them yet.
The versatility of this cobbler recipe makes it a year-round favorite in my kitchen. During blackberry season, I use fresh berries straight from the farmers market or my own backyard bushes. In winter, frozen berries work just as beautifully, providing that burst of summer flavor when fresh fruit feels like a distant memory.
Understanding the role of each ingredient helps you troubleshoot if things don't go exactly as planned. The milk provides moisture and helps create steam during baking, which contributes to the light texture. The butter adds richness and helps the top brown beautifully. The sugar does double duty - sweetening the batter and creating that gorgeous caramelized finish.
Temperature control matters more than you might think with this simple recipe. An oven that runs too hot can cause the top to brown before the inside is fully cooked, while too cool an oven results in a pale, dense cobbler. Using an oven thermometer helps ensure accuracy, especially since many home ovens run warmer or cooler than their settings indicate.
The timing of sugar additions serves a specific purpose beyond just sweetness. The first addition gets incorporated into the baking process, helping with texture and browning. The final sprinkle creates that last-minute caramelization that gives the cobbler its signature appearance and adds another layer of flavor.
Serving temperature can dramatically change your cobbler experience. Warm from the oven, it's soft and spoonable with a slightly gooey texture. Cooled to room temperature, it firms up and becomes easier to cut into neat squares. Both ways are delicious, but I prefer it slightly warm with a scoop of vanilla ice cream melting into all the nooks and crannies.
Professional Chef Tips
- Use frozen berries straight from the freezer without thawing - they hold their shape better and won't make the batter watery
- Let the cobbler rest for at least 15 minutes after baking so the juices can thicken slightly and won't run all over your serving plates
- If your cobbler looks too pale after the full baking time, turn on the broiler for 1-2 minutes to achieve that perfect golden top
This cobbler represents everything I love about home baking - it's approachable, forgiving, and produces results that look and taste like you spent way more time and effort than you actually did. Whether you're serving it at a casual family dinner or bringing it to a potluck gathering, it never fails to impress people who assume homemade desserts require advanced skills or special equipment.
Frequently Asked Questions
- → Can I use frozen blackberries instead of fresh?
- Yes, use frozen blackberries straight from the freezer. Don't thaw them first or they'll become mushy and affect the texture.
- → What if I don't have self-rising flour?
- Make your own by mixing 1 cup all-purpose flour with 1/2 teaspoon salt and 1 1/2 teaspoons baking powder.
- → How long does blackberry cobbler last?
- Store covered in the refrigerator for up to 3 days. Reheat individual portions in the microwave for 30 seconds before serving.
- → Can I use other berries in this recipe?
- Absolutely! Try blueberries, raspberries, strawberries, or peaches. You can also mix different berries together for variety.
- → Why is my cobbler topping not golden brown?
- Make sure your oven is fully preheated to 350°F. The final sugar sprinkle in the last 10 minutes helps create that golden color.
- → Should I serve cobbler warm or cold?
- Serve warm for the best taste and texture. The contrast between warm cobbler and cold vanilla ice cream is perfect.