
 Pin it
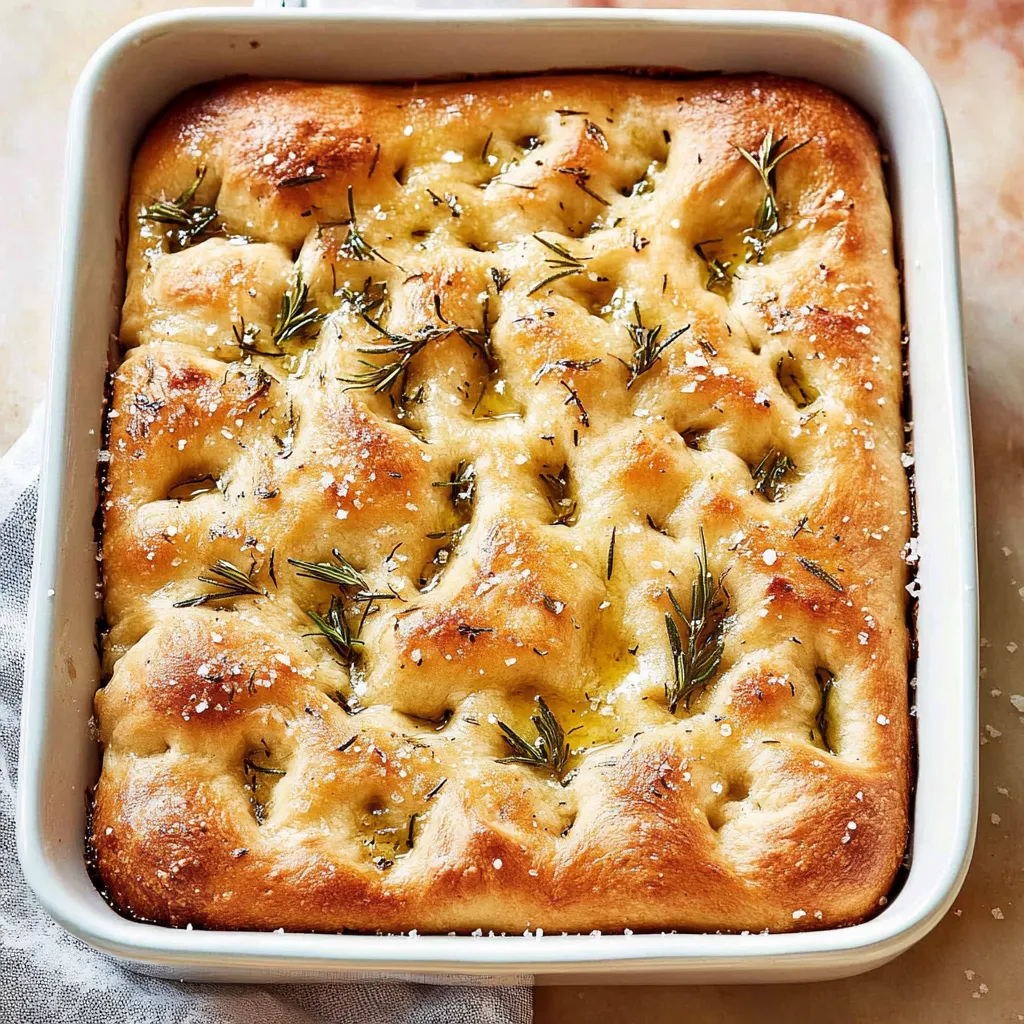
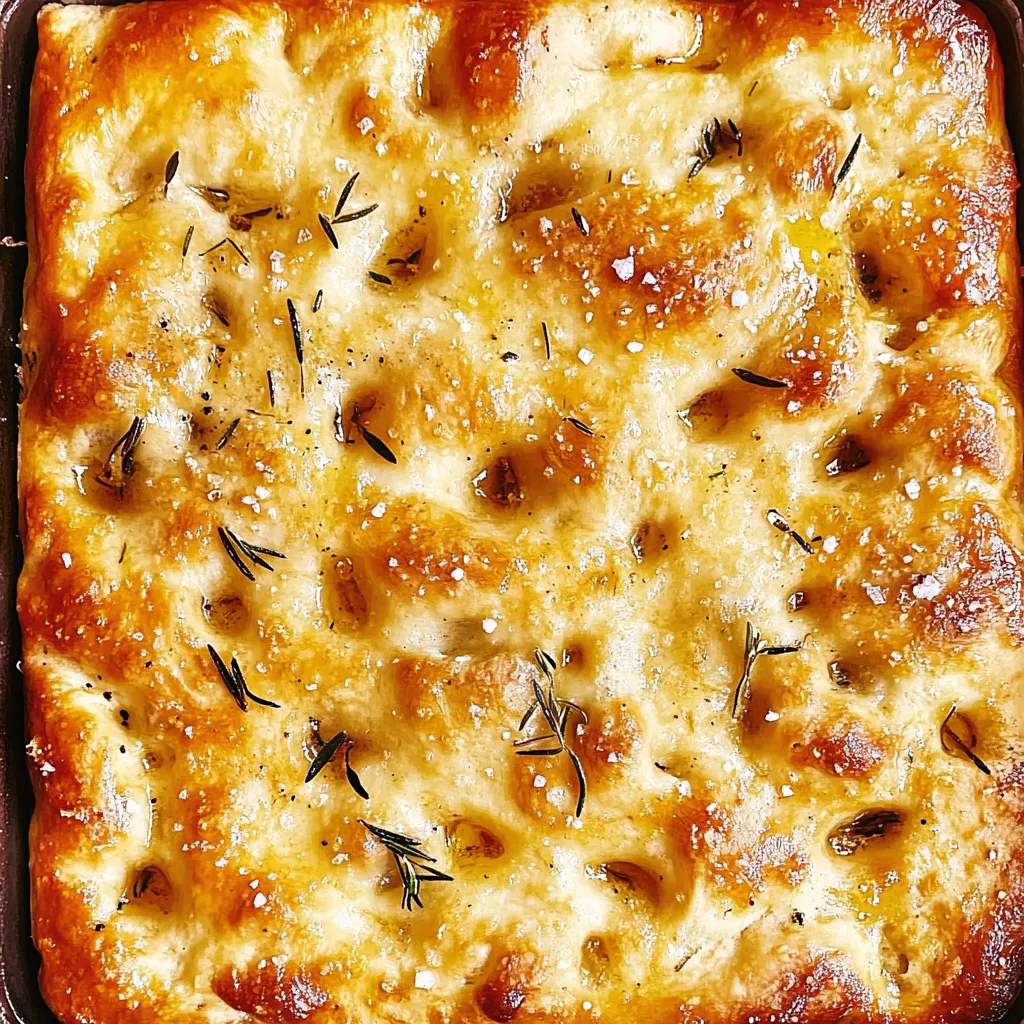
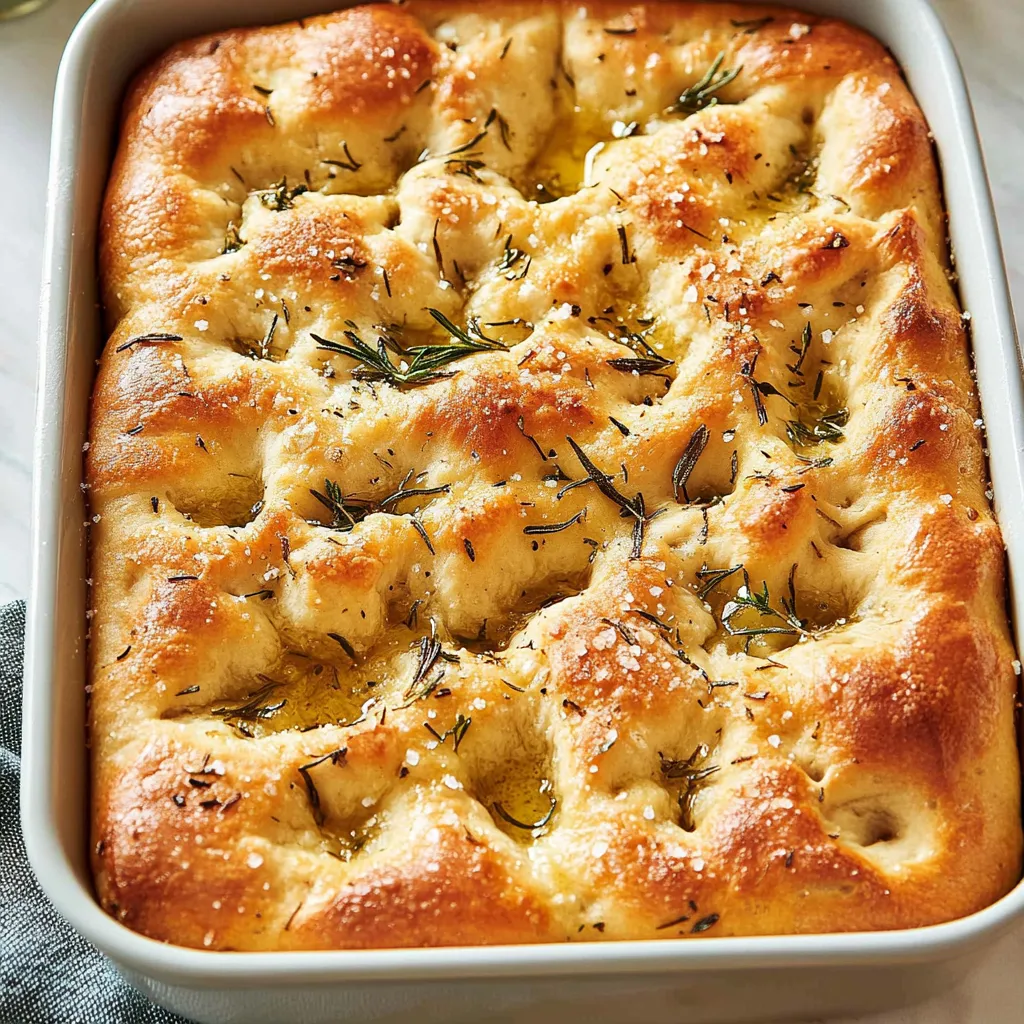
This focaccia bread brings together that perfect combination of crispy golden edges and soft, pillowy interior that makes homemade bread so incredibly satisfying. The generous amount of olive oil creates those signature dimples filled with flavor, while the rosemary and flaky sea salt on top add aromatic, savory notes that make every bite interesting. What makes this recipe special is how forgiving it is - the wet dough practically does the work for you, requiring minimal kneading and producing consistent results even for first-time bread bakers.
I watched my husband discover this recipe years ago when he was frustrated with complicated bread recipes that required constant attention. The first time we made focaccia, we were amazed at how something so simple could taste so good. Now it's become our weekend ritual - we make a batch on Saturday mornings and use it for sandwiches, serve it with soup, or just tear off pieces warm from the oven. The smell of rosemary and olive oil baking fills the whole house.
Essential Ingredients for Success
- All-purpose flour: Measure accurately using a kitchen scale for best results; weigh to 500 grams for precision
- Warm water: Should feel warm but not hot to the touch; activates the yeast properly
- Active dry or instant yeast: Fresh yeast creates the airy texture; check expiration dates
- Extra virgin olive oil: Use good quality oil since the flavor really comes through in the finished bread
- Fresh rosemary sprigs: The aromatic needles crisp up beautifully and add authentic Italian flavor
- Fine sea salt for dough: Develops flavor throughout the bread structure
- Flaky sea salt for topping: Provides textural contrast and bursts of salty flavor
Detailed Step-by-Step Instructions
- Proof the yeast properly:
- In the bowl of a stand mixer fitted with the dough hook attachment, combine 2 cups warm water (around 110°F) with 1 teaspoon sugar. Stir in 2 1/4 teaspoons active dry yeast and let sit for 5 minutes until foamy on top. If it doesn't foam, your yeast is dead and you need to start over with fresh yeast - this step is crucial for bread that rises properly.
- Mix the dough:
- Add 4 cups all-purpose flour and 2 teaspoons fine sea salt to the foamy yeast mixture. Mix on low speed until a shaggy dough forms and no dry flour remains. Increase to medium speed and mix for 5 full minutes. The dough will be very sticky and elastic, actually grabbing at the sides of the bowl as it develops gluten. Don't be alarmed by how wet it is - this high hydration creates the airy interior.
- First rise in oiled bowl:
- Brush a large bowl generously with 2 tablespoons olive oil. Use a spatula to transfer the sticky dough from the mixer bowl to the oiled bowl - don't try to use your hands or it will stick everywhere. Use your fingers to brush any pooled oil around the edges over the top of the dough. Cover tightly with plastic wrap or a damp towel and let rise in a warm spot until doubled in size, 1 to 1.5 hours.
- Shape and transfer to pan:
- Brush a 9x13-inch baking pan with 2 tablespoons olive oil. If your pan isn't nonstick, butter it first before adding the oil to prevent sticking. Coat your hands generously with olive oil, then slide one hand under the edge of the dough. Fold it toward the center, then continue working around the bowl, folding the dough into itself to create a rough ball. Transfer to the prepared pan and turn to coat in oil.
- Press and shape the focaccia:
- Using oiled hands, press the dough toward the edges of the pan. It will spring back - that's normal. Let it relax for a few minutes, then press again toward the edges. Cover the pan and let rise for 45 minutes until doubled. About 30 minutes into this rise, preheat your oven to 425°F so it's fully heated when the dough is ready.
- Create signature dimples:
- Drizzle 2 more tablespoons of olive oil over the risen dough. Generously oil your hands again and use your fingertips to press indentations all over the surface of the dough. Press firmly all the way down to the pan - don't be shy here. You'll see and hear air bubbles popping, which is exactly what you want. These dimples will fill with olive oil and create pockets of flavor.
- Top and bake to perfection:
- Sprinkle flaky sea salt and fresh rosemary needles over the dimpled surface. Bake for 20-30 minutes until the focaccia is deeply golden brown on top and around the edges. The color should be quite dark for the best flavor - don't pull it out too early. Let cool in the pan for 5 minutes, then transfer to a cutting board and slice while still warm.
 Pin it
The transformation that happens in the oven never stops amazing me. That wet, sticky dough becomes this gorgeous golden bread with crispy edges and soft, airy pockets inside. I love how the dimples fill with olive oil that crisps up during baking, creating little pools of flavor throughout. The hardest part is waiting for it to cool enough to slice without burning your mouth.
Understanding High-Hydration Dough
This recipe uses more water than traditional bread recipes, which is what creates that open, airy crumb structure inside. The dough will seem impossibly wet and sticky at first, but resist the urge to add more flour. Trust the process - this wetness is what makes focaccia so special. The gluten development from mixing and the long rises give the wet dough enough structure to hold its shape.
Mastering the Folding Technique
When you fold the dough into itself before transferring to the pan, you're building structure and creating surface tension that helps the bread rise properly. This gentle handling preserves the air bubbles that developed during the first rise while giving the dough enough strength to hold its shape in the pan.
Temperature and Rising Considerations
Rising times are estimates because temperature dramatically affects how quickly yeast works. In a warm kitchen, dough rises faster; in a cold one, slower. Always judge by the size of the dough rather than the clock - it should genuinely double in volume. If your kitchen is cold, you can create a warm environment by placing the covered bowl in an oven with just the light on.
Achieving Golden Brown Color
The key to deeply flavored focaccia is proper browning. Many people pull it from the oven too early when it's pale golden. Wait for true golden brown color, even dark brown around the edges. This caramelization creates complex flavors that make homemade focaccia taste like it came from an Italian bakery.
Storage and Reheating Methods
Focaccia is definitely best the day it's baked, but leftovers can be stored at room temperature for up to three days in an airtight container. Reheat slices in a 350°F oven for about 5 minutes to refresh the crust. For longer storage, slice and freeze for up to three months, then reheat directly from frozen.
 Pin it
This recipe proves that impressive bread doesn't require professional skills or complicated techniques. The wet dough and simple method make it accessible to anyone, while the results rival what you'd find at an artisan bakery. It's become one of those recipes we make so often that we don't even need to look at the instructions anymore, which is exactly what a good bread recipe should be.
Frequently Asked Questions
- → Can I make focaccia without a stand mixer?
- Yes, you can mix and knead the dough by hand. It'll take about 10 minutes of kneading to get that stretchy texture, but it's totally doable.
- → Why didn't my yeast foam up?
- Either your water was too hot and killed the yeast, or the yeast is old and no longer active. Try again with fresh yeast and water around 110°F.
- → Can I use instant yeast instead of active dry?
- Yes, you can use the same amount of instant yeast. You can skip the proofing step and add it directly to the flour if you prefer.
- → How do I store leftover focaccia?
- Wrap it in foil or keep it in an airtight container at room temperature for up to 2 days. You can also freeze it for up to 3 months.
- → What other toppings work well on focaccia?
- Cherry tomatoes, olives, caramelized onions, garlic, sun-dried tomatoes, or fresh herbs like thyme and oregano all taste great on focaccia.
- → Do I really need to let it rise twice?
- Yes, both rises are important. The first develops flavor and structure, while the second gives you that light, airy texture focaccia is known for.
- → Can I bake focaccia in a different sized pan?
- Sure, but the thickness will change. A smaller pan makes thicker focaccia, a larger one makes it thinner. Adjust baking time as needed.