
 Pin it
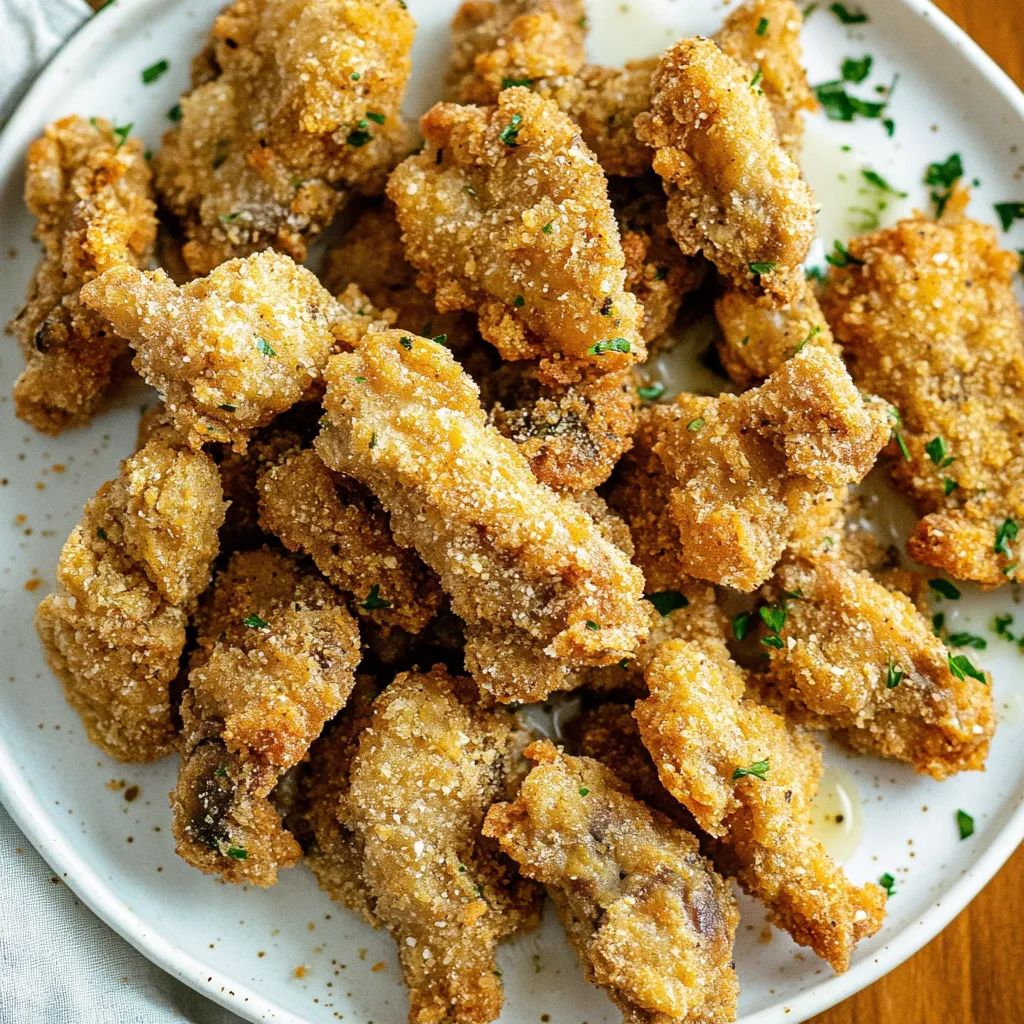
Tearing oyster mushrooms into chunks and double-coating them in vegan buttermilk and seasoned flour creates crispy, golden pieces that taste remarkably similar to fried chicken. The first dip in buttermilk then breading, followed by a second dip in each, builds thick coating that stays crunchy while the mushrooms inside stay tender and meaty. Frying at 325°F prevents burning the coating before cooking through, and adding some of the breading mixture to the buttermilk creates extra-craggy texture. These satisfy fried chicken cravings while being completely plant-based.
Fried oyster mushrooms became my plant-based comfort food after discovering that the double-coating technique used for traditional fried chicken works perfectly on mushrooms too. The first time I made these, I only dipped once in buttermilk and breading - they were good but not spectacular. Learning to dip twice in each, and especially adding some breading mixture to the buttermilk to create that shaggy coating, transformed them completely. Now these taste so much like fried chicken that non-vegans are shocked they're mushrooms.
Ingredients and Why They Matter
For the Vegan Buttermilk:
- Plant-based milk (1 cup): Any unsweetened variety; soy or oat work well
- Lemon juice (1 tablespoon): Creates tangy, buttermilk-like flavor
- Flaxseed meal (1 tablespoon): Thickens and helps coating stick
- Hot sauce (1 tablespoon, optional): Adds heat and flavor
For the Breading:
- All-purpose flour (1½ cups): Base for coating
- Nutritional yeast (3 tablespoons): Adds cheesy, savory flavor
- Cornstarch (2 tablespoons): Creates extra crispiness
- Paprika (1 tablespoon): Color and mild flavor
- Onion powder (2 teaspoons): Savory depth
- Garlic powder (2 teaspoons): Essential savory flavor
- Dried oregano (1 teaspoon): Herbal notes
- Italian seasoning (1 teaspoon): Additional herbs
- Salt (1½ teaspoons): Essential seasoning
- Black pepper (½ teaspoon): Subtle heat
Main Ingredients:
- Oyster mushrooms (1 pound): Meaty texture perfect for frying
- Neutral oil for frying (about 4 cups): Vegetable, peanut, or canola; high smoke point essential
How To Make It
- Prep the mushrooms carefully:
- This step is crucial and different from regular mushrooms. Never soak or rinse oyster mushrooms under running water - they'll absorb moisture like sponges and become waterlogged, which prevents proper crisping. Instead, take a damp paper towel and gently wipe each mushroom to remove any dirt or debris. Use your hands to tear the mushrooms into irregular chunks - don't cut them with a knife. Tearing creates rough, uneven edges that hold coating better than smooth, knife-cut surfaces. Make them whatever size you prefer - smaller nugget-sized pieces or larger tender-sized chunks. The irregular shapes actually help create that authentic fried chicken appearance.
- Prepare the breading station:
- In a large, shallow bowl or wide dish, combine all the breading ingredients - flour, nutritional yeast, cornstarch, paprika, onion powder, garlic powder, oregano, Italian seasoning, salt, and black pepper. Whisk everything together thoroughly for about 30 seconds until the spices are evenly distributed throughout with no clumps. The mixture should look uniformly colored. Set this bowl aside - you'll be using it multiple times.
- Make vegan buttermilk mixture:
- In another wide, shallow bowl, whisk together the plant-based milk and lemon juice. The acid from the lemon curdles the milk slightly, creating that tangy buttermilk flavor and thick texture. Add the flaxseed meal and hot sauce if using. Now here's the key step many recipes skip - add ½ cup of the prepared breading mixture to this buttermilk. Whisk vigorously until smooth with no lumps remaining. Let this mixture sit for 5 minutes to thicken. The flaxseed meal will absorb liquid and the flour will hydrate, creating thick, pancake-batter-like consistency. This thickened buttermilk with breading bits in it creates that shaggy, extra-crispy coating.
- Heat oil to proper temperature:
- Pour neutral oil into a large, heavy-bottomed skillet or Dutch oven to a depth of about 1 inch - roughly 3-4 cups depending on your pan size. Heat over medium-high heat until the oil reaches 325°F. Use a candy thermometer or instant-read thermometer clipped to the side of the pan to monitor temperature accurately - this is essential, not optional. Oil that's too cool creates greasy, soggy mushrooms. Oil that's too hot burns the coating before the mushrooms cook through. The 325°F sweet spot creates golden-brown, crispy coating. Test by dropping a tiny bit of breading mixture into the oil - it should sizzle immediately and float.
- Double-coat the mushrooms:
- This technique creates the signature thick, crunchy crust. Working with one mushroom piece at a time, dip it completely in the buttermilk mixture, turning to coat all sides. Let excess drip off but don't shake it too vigorously - you want a good coating. Transfer to the breading mixture and press down firmly, turning to coat all sides completely. The breading should adhere well. Now here's the double-dip magic - return the breaded mushroom to the buttermilk, coating it completely again. Let excess drip off. Finally, dredge once more in the breading mixture, pressing firmly so it sticks. The mushroom should now have a thick, shaggy coating. Place on a clean plate and repeat with remaining mushrooms. The double coating creates dramatically thicker crust than single dipping.
- Fry in batches:
- Carefully add 3-4 coated mushrooms to the hot oil, depending on your pan size. Don't overcrowd - they need space for oil to circulate and maintain temperature. The oil should continue bubbling actively around the mushrooms. If the bubbling stops, the temperature has dropped and you need to remove mushrooms and wait for oil to reheat. Fry for 3-4 minutes until the bottom is deep golden brown and crispy. Use tongs or a slotted spoon to carefully flip each piece. Fry the second side for another 3-4 minutes until equally golden and crispy all over. The coating should feel hard and crunchy when tapped with tongs.
- Drain and serve:
- When both sides are golden brown and the coating is crispy, use tongs to remove the mushrooms from the oil. Let excess oil drip back into the pan for a few seconds, then transfer to a wire rack set over a baking sheet - not paper towels which trap steam and make coating soggy. Let the oil return to 325°F before adding the next batch. This temperature recovery between batches is crucial for consistent results. Continue frying remaining mushrooms in batches. Serve immediately while hot and crispy with ranch dressing, chipotle mayo, or your favorite dipping sauce. These taste best fresh but can be reheated in a 350°F oven for 10-15 minutes to restore some crispness.
 Pin it
Oyster mushrooms seemed like odd choice for frying until learning about their unique texture. Unlike button or cremini mushrooms which release tons of water when cooked, oyster mushrooms have drier, meatier texture that holds up beautifully to high-heat frying. Their natural umami flavor tastes savory and satisfying. The shape - with the wide cap and stem - resembles chicken pieces, especially when torn by hand into irregular chunks. This texture similarity is what makes them convincing fried chicken substitute.
Why No Water Washing
This point deserves emphasis because it's so different from other vegetables. Mushrooms are like sponges - their porous structure absorbs water rapidly. Wet mushrooms release steam during frying instead of crisping, creating soggy coating. The moisture also prevents the buttermilk and breading from adhering properly. A damp (not soaking wet) paper towel removes dirt effectively without waterlogging. This dry-cleaning technique applies to all mushroom cooking but is especially critical for frying where moisture is the enemy of crispiness.
The Double-Dip Technique
This method comes straight from traditional fried chicken preparation. The first dip in buttermilk then breading creates base layer. The second dip adds another complete layer on top, doubling the thickness. This creates that substantial, crunchy coating that shatters when you bite through it - the hallmark of great fried foods. Single-dipped items have thin coating that can be underwhelming. Double-dipping takes slightly longer but the textural payoff is enormous. The shaggy, irregular surface created by the double coating also provides more crunchy surface area.
Adding Breading to Buttermilk
This technique is less common but crucial for maximum crispiness. When you add flour mixture to the buttermilk, it creates thick, batter-like consistency with suspended particles. These particles create rough, uneven coating rather than smooth surface. The irregular surface has more peaks and valleys that crisp up during frying, creating superior crunch. The thickened buttermilk also clings better to the mushrooms. This step differentiates good fried mushrooms from truly exceptional ones.
Temperature Control Science
The 325°F frying temperature is carefully chosen. Below 300°F, food absorbs excessive oil before crisping, creating greasy results. Above 350°F, the exterior burns before the interior cooks. At 325°F, the coating crisps and browns in the same time it takes for heat to penetrate and cook through. For mushrooms which cook quickly, this moderate temperature prevents burning. A thermometer eliminates guesswork - visual cues alone aren't reliable. Temperature drops when you add food, so monitoring and adjusting heat maintains consistency.
Tearing vs Cutting
Tearing mushrooms by hand rather than cutting with a knife creates irregular, rough edges that hold coating better than smooth cut surfaces. The torn edges also look more natural and chicken-like than uniform knife cuts. Additionally, tearing is faster than precise knife work. The varied sizes and shapes mimic real fried chicken pieces. Don't worry about making them uniform - the irregular shapes are actually beneficial for both appearance and coating adhesion.
Oil Selection
Neutral oils with high smoke points are essential for deep frying. Vegetable oil (usually soybean or corn), canola oil, and peanut oil all have smoke points above 400°F, well above the 325°F frying temperature. These oils won't break down or impart off-flavors. Avoid olive oil which has lower smoke point and strong flavor. Avoid butter which burns. The neutral flavor lets the seasoned coating shine without competing oil taste.
Batch Frying Strategy
Overcrowding the pan causes multiple problems. It drops oil temperature dramatically because you're adding too much cold food at once. Lower temperature means greasy, soggy results. Crowding also prevents oil circulation, causing uneven cooking. Frying in batches of 3-4 pieces keeps temperature stable and ensures even browning. Wait for oil to return to 325°F between batches - this patience ensures consistent quality across all pieces. Keep finished pieces warm in a 200°F oven while frying remaining batches.
Serving and Reheating
Fried foods taste best within 30 minutes of cooking when coating is at peak crispness. As they sit, steam from the hot mushrooms gradually softens the crust. For parties, fry in batches and keep warm in a low oven. Leftovers can be refrigerated for 3-4 days but won't retain crispness. To revive them, reheat in a 350°F oven for 10-15 minutes or air fryer at 325°F for 5 minutes. The dry heat restores some crunch, though they won't be quite as crispy as when freshly fried. Avoid microwaving which makes everything soggy.
 Pin it
These fried oyster mushrooms represent the kind of plant-based cooking that proves vegan food can satisfy the same cravings as traditional comfort food. The combination of crispy coating and meaty mushroom interior creates something that tastes indulgent and satisfying while being made entirely from vegetables. When you serve these at a gathering and watch non-vegans reach for seconds without realizing they're not chicken, you know you've created something that transcends dietary labels. Sometimes the best recipes are the ones that prove plants can deliver the same textures and satisfaction as meat when prepared with proper technique, and these fried mushrooms definitely accomplish that goal perfectly every single time you make them.
Frequently Asked Questions
- → Can I use regular mushrooms instead of oyster mushrooms?
- Oyster mushrooms work best because of their meaty texture and natural shape, but you could try king oyster or maitake mushrooms as alternatives.
- → How do I know when the oil is hot enough?
- The oil should reach about 325°F. If you don't have a thermometer, drop a tiny bit of breading in - it should sizzle right away but not burn.
- → Can I bake these instead of frying them?
- Yes, you can bake them at 400°F for about 20-25 minutes, flipping halfway through. They won't be quite as crispy but still taste great.
- → Why do I need to coat the mushrooms twice?
- The double coating creates that extra thick, crunchy crust that makes these mushrooms so good. One coating just isn't enough for maximum crispiness.
- → What can I serve with fried mushrooms?
- Ranch dressing is classic, but they're also great with hot sauce, vegan mayo, barbecue sauce, or aioli. Serve them alongside fries, coleslaw, or a fresh salad.
- → How long do leftovers stay good?
- Store them in the fridge for 3-4 days in an airtight container. Reheat in the oven or air fryer to get them crispy again.