
 Pin it
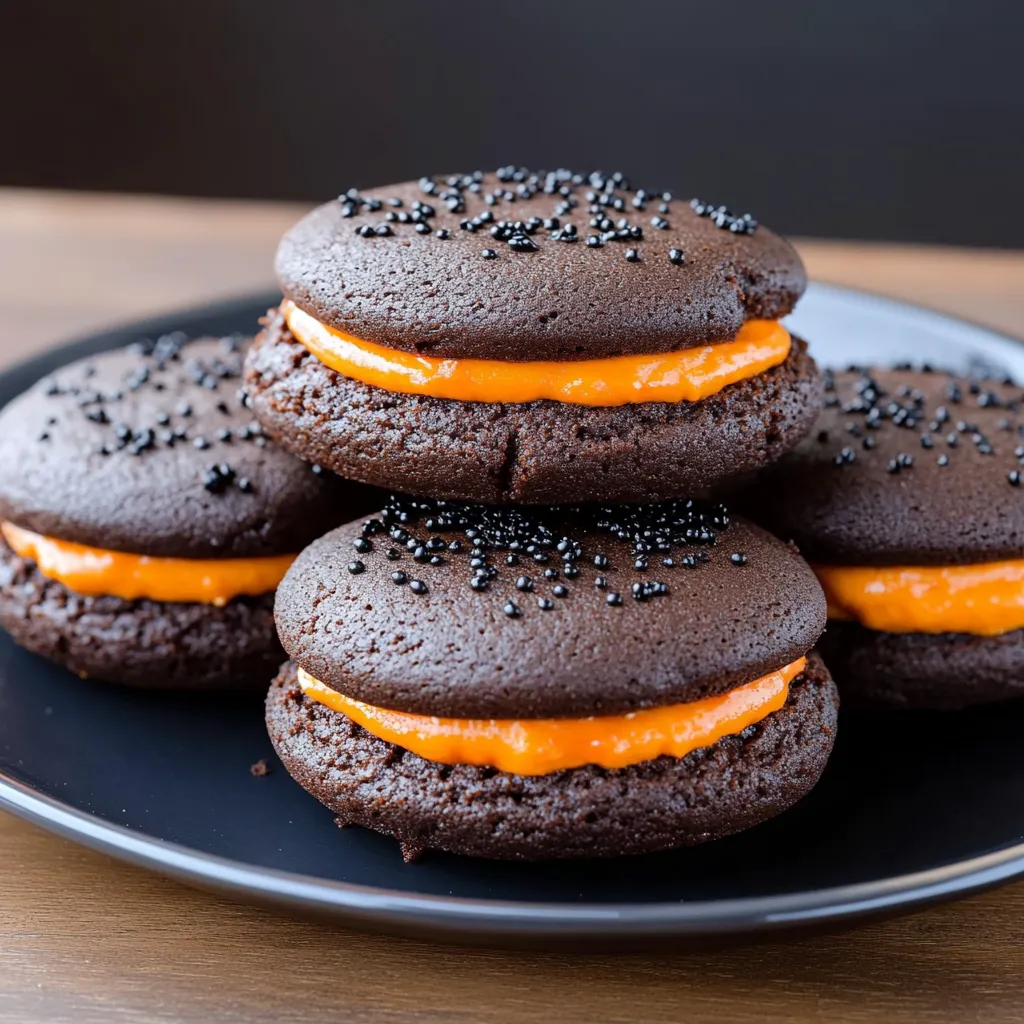
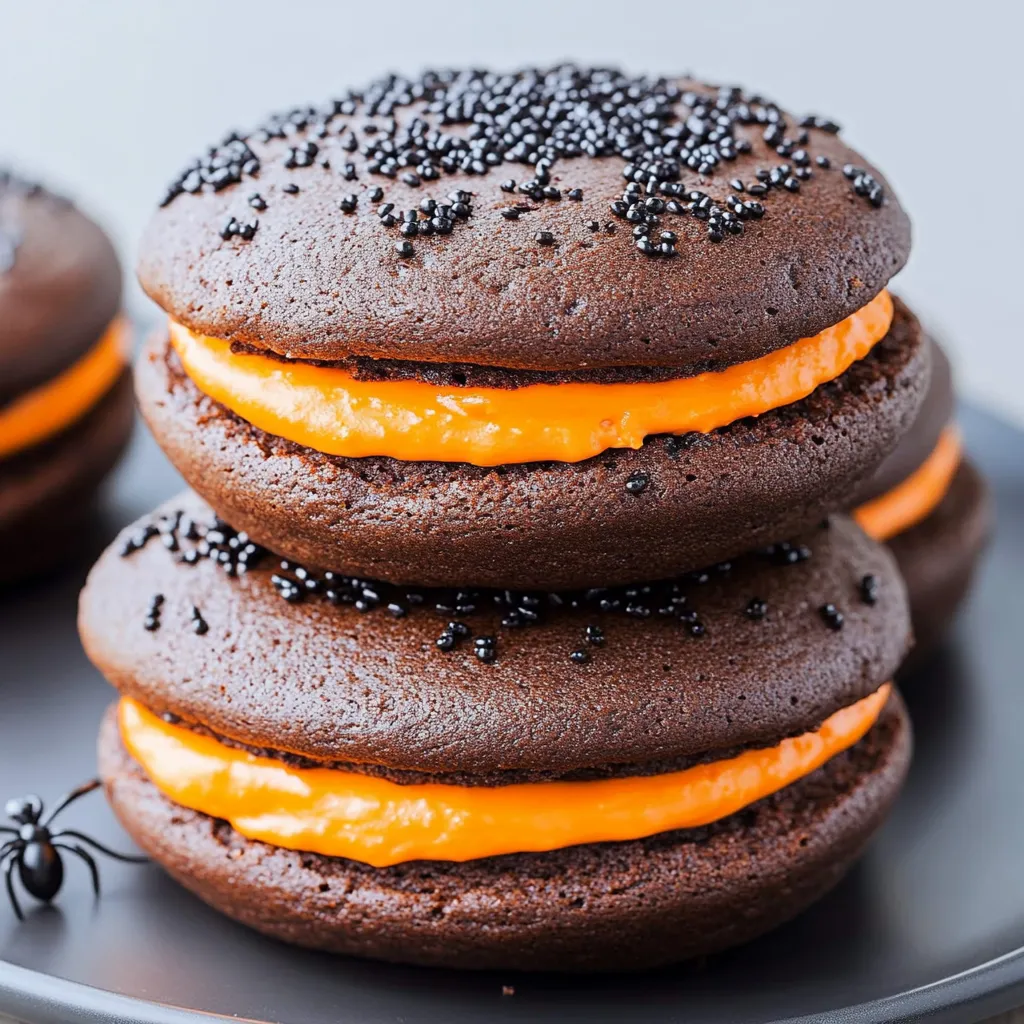
These adorable Halloween whoopie pies transform classic cake mix into the most delightful handheld treats that are perfect for all your little ghosts and goblins. With rich chocolate cakes sandwiched around bright orange filling and decorated with spooky touches like sprinkles or spider legs, these treats bring the perfect combination of festive fun and incredible flavor to any Halloween celebration.
The story behind these whoopie pies is one of my favorites because it shows how sometimes the best recipes come from happy accidents and desperate moments. When my oldest was in kindergarten, I needed to bring birthday treats to his class and stumbled across the idea of using cake mix for whoopie pies. Those turned out so amazingly that even his teacher, who had seen countless classroom treats over her long career, declared them the best she'd ever tasted and begged me for the recipe. Of course, I promptly lost my own copy and had to recreate them from memory - which led to these even better Halloween versions.
Ingredients and Why They Matter
- Devil's food cake mix: provides rich, deep chocolate flavor and the perfect tender texture without any complicated measuring or mixing
- Instant chocolate pudding mix: adds extra moisture and intensifies the chocolate flavor while making the cakes incredibly soft
- Vegetable oil and eggs: create the ideal texture that's sturdy enough to hold together but soft enough to bite through easily
- Vanilla cake icing: serves as the perfect creamy base that can be easily colored and spreads beautifully between the cakes
- Orange food coloring gel: creates that vibrant Halloween color that regular liquid food coloring just can't match
- Black sprinkles or edible sparkles: add the perfect spooky finishing touch that makes these treats look festive and fun
- Black rope licorice and candy eyes: transform simple whoopie pies into adorable spider treats that kids absolutely love
Step-by-Step Instructions
- Prepare your workspace and oven:
- Preheat your oven to 350°F and line two large baking sheets with parchment paper or silicone baking mats. Having everything ready before you start mixing ensures smooth assembly and even baking.
- Mix the cake batter:
- In a large mixing bowl, combine one box of Devil's food cake mix, 1 cup water, 1/3 cup vegetable oil, 3 large eggs, and one 3.4-ounce package of instant chocolate pudding mix. Beat with an electric mixer on medium speed for 2-3 minutes until everything is well blended and the batter is thick and smooth.
- Shape the whoopie pie cakes:
- Using a large cookie scoop or spoon, drop 18 evenly sized portions of batter onto your prepared baking sheets, spacing them about 2 inches apart. Try to make them as round and uniform as possible - they should be about 2-3 inches in diameter. For more professional results, you can pipe the batter using a large round tip and pastry bag.
- Bake to perfection:
- Bake for 7-10 minutes, depending on the size of your cakes. They're done when they spring back lightly when touched and look set on top. Don't overbake or they'll become too firm to create tender whoopie pies. Remove from the oven and let them cool completely on the baking sheets.
- Prepare the orange filling:
- While the cakes cool, place about 1 cup of vanilla cake icing in a medium bowl. Add orange food coloring gel gradually, starting with just a few drops and mixing thoroughly until you reach that perfect bright Halloween orange color. The gel gives much more vibrant color than liquid food coloring.
- Assemble the whoopie pies:
- Once the cakes are completely cool, turn half of them upside down so the flat bottoms are facing up. Using a piping bag or offset spatula, spread or pipe about 2 tablespoons of orange icing onto each upturned cake, leaving a small border around the edges.
- Complete the sandwiches:
- Gently place the remaining cakes on top of the icing, flat side down, and press very lightly to spread the filling to the edges. Don't press too hard or the icing will squeeze out the sides.
- Add festive decorations:
- Immediately sprinkle the tops with black sprinkles or edible sparkles while the icing is still soft enough for them to stick. For a more dramatic look, you can also dust the tops lightly with powdered sugar using Halloween stencils.
 Pin it
I've learned through making these countless times that patience with the cooling process really pays off in the final result. The first time I tried to assemble them while the cakes were still warm, the icing melted everywhere and created a beautiful but messy disaster. Now I always plan for that cooling time, and sometimes I even make the cakes the day before and store them covered at room temperature, which actually makes assembly even easier.
Creating Perfect Spider Whoopie Pies
Transforming these whoopie pies into spiders is one of my favorite variations because it adds such a fun, creepy element that kids absolutely love. The trick is placing four pieces of black rope licorice on the icing before you add the top cake, positioning them so they extend out like spider legs. When you gently press the top cake down, the licorice gets secured between the layers and creates the most realistic spider legs. For the spider eyes, use a small dab of icing to attach candy eyes to the top of each whoopie pie. You can use white chocolate chips with mini chocolate chips pressed into them if you can't find candy eyes, or even pipe small white dots with black centers using icing. The key is making sure the eyes are slightly different sizes and positions to give each spider its own personality and make them look more realistic and fun.
Mastering the Icing Consistency and Color
Getting the orange icing just right is crucial for both appearance and ease of assembly. The store-bought vanilla icing is already the perfect consistency for spreading and piping, but if you find it's too stiff after adding the food coloring, you can warm it slightly in the microwave for 10-15 seconds to make it more spreadable. The gel food coloring is worth seeking out because it creates that vibrant Halloween orange without thinning the icing. If you want to make different colored icings for variety, this same technique works beautifully with purple, green, or even black food coloring. Black icing can be tricky to achieve - start with chocolate icing instead of vanilla, then add black gel coloring gradually until you reach the desired darkness. This prevents you from having to use so much coloring that it affects the taste.
Stenciling Techniques for Professional Results
Using stencils to create Halloween designs on top of your whoopie pies is a fantastic way to make them look incredibly professional with minimal effort. You can buy small Halloween stencils or create your own by printing designs and cutting them out of cardstock. The key is making sure your stencil lies completely flat against the surface of the whoopie pie to prevent powdered sugar from getting where you don't want it. Hold the stencil firmly in place and use a fine-mesh sifter to dust powdered sugar evenly over the design. When you lift the stencil carefully, you'll reveal a perfect Halloween shape that looks like it came from a professional bakery. Popular designs include pumpkins, bats, ghosts, and spider webs that all work beautifully with the scale of whoopie pies.
Scaling for Parties and Storage Tips
This recipe is incredibly easy to double or triple for large Halloween parties, and the whoopie pies actually transport beautifully in single layers in covered containers. For big events, I like to make an assembly line with kids helping to add the decorations while adults handle the icing assembly. This keeps everyone involved and makes the process fun rather than overwhelming. For storage, these whoopie pies need to be kept in the refrigerator because of the icing filling, but they taste best when brought to room temperature for about 15-20 minutes before serving. I've found that they actually improve slightly after a day in the refrigerator as the flavors meld together and the texture becomes even more tender and cake-like.
Creative Decoration Variations
Beyond spiders and simple sprinkles, there are so many creative ways to decorate these whoopie pies for different Halloween themes. Orange icing with chocolate chip "seeds" makes them look like little pumpkins, while green icing with pretzel stick "stems" creates an adorable pumpkin patch theme. White icing with mini chocolate chips creates spooky ghost faces that are both cute and delicious. For more elaborate presentations, consider making different sizes - mini whoopie pies are perfect for little hands and create an impressive variety when displayed together. You can also create themed platters by making some traditional orange ones, some spider ones, and some with different stenciled designs to give guests options while maintaining the cohesive Halloween theme.
These Halloween whoopie pies have become one of my most treasured seasonal recipes because they perfectly capture the spirit of Halloween fun while being genuinely delicious treats that both kids and adults crave. Every time I make them, I'm transported back to that kindergarten classroom where they first made their debut, and I love how such a simple concept has brought so much joy to countless Halloween celebrations over the years. They prove that sometimes the most memorable treats are the ones that combine ease of preparation with endless creative possibilities and flavors that make everyone smile.
Frequently Asked Questions
- → How long do Halloween whoopie pies stay fresh?
- Store them covered at room temperature for up to 3 days or in the fridge for up to a week.
- → Can I make these whoopie pies ahead of time?
- Yes, bake the cakes a day ahead and assemble with frosting just before serving for best results.
- → What can I use instead of orange food coloring?
- Try natural alternatives like turmeric powder or carrot juice, though the color won't be as vibrant.
- → How do I make the spider leg whoopie pies?
- Cut black licorice into pieces, insert 8 pieces as legs before adding the top cake, then stick on candy eyes.
- → Can I freeze Halloween whoopie pies?
- Yes, freeze unfrosted cakes for up to 3 months. Thaw completely before adding frosting and decorating.
- → What size should I make the whoopie pie cakes?
- Use about 2 tablespoons of batter per cake for standard size, or 1 tablespoon for mini versions.