
 Pin it
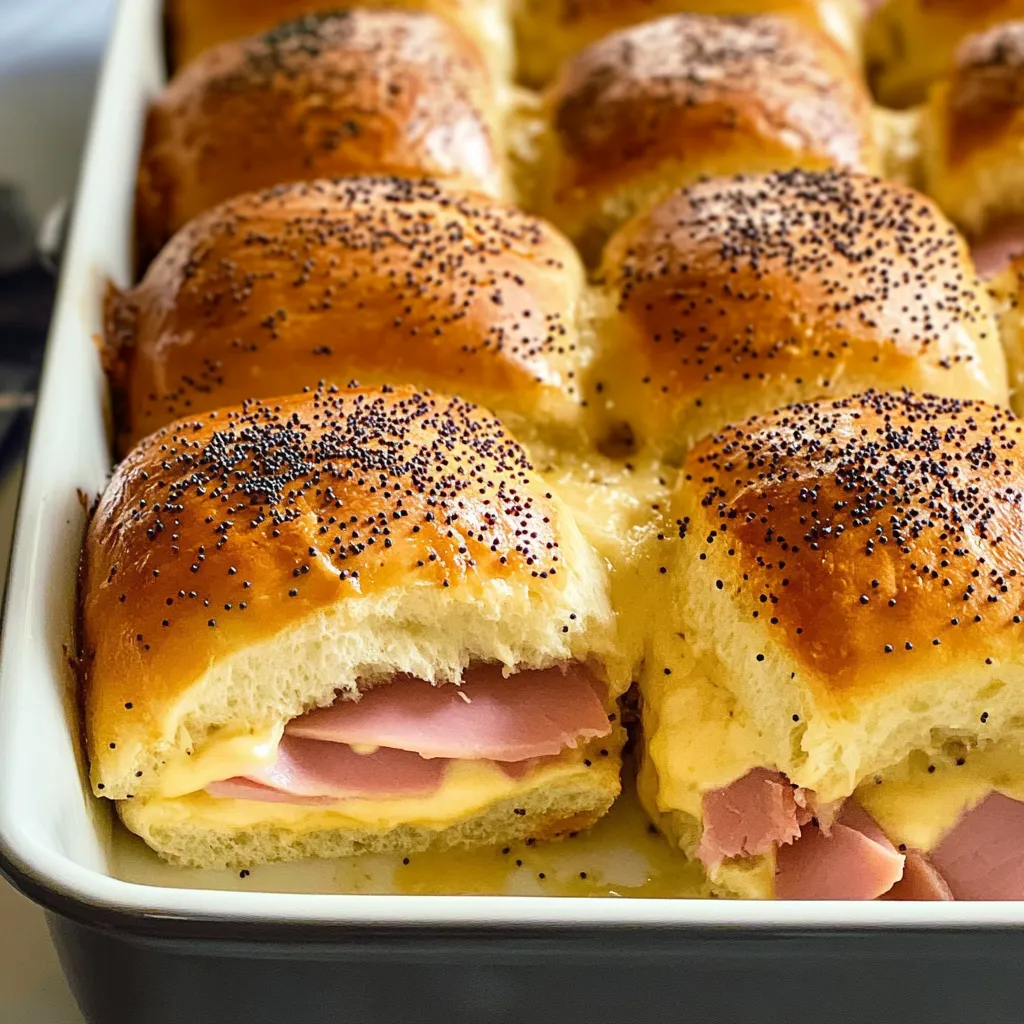
These irresistible ham and cheese sliders combine the sweet softness of Hawaiian rolls with savory deli ham, melty Swiss cheese, and a flavor-packed butter mixture that soaks into every bite. The genius lies in keeping the rolls connected during assembly and baking them as one large slab, creating perfectly portioned sliders that are crispy on top but tender and gooey inside. With their golden, poppy seed-topped exterior and that incredible savory butter that ties everything together, these sliders deliver comfort food satisfaction that works equally well for casual family dinners or impressive party spreads.
I discovered the magic of these sliders when I needed something quick and satisfying for a last-minute gathering, and they've become one of my most requested recipes ever since. The combination of that sweet Hawaiian bread with the savory butter mixture creates this incredible flavor that makes people think you spent hours in the kitchen when it really takes just minutes to assemble. What I love most is how the connected rolls bake together, creating these perfect individual portions that pull apart beautifully while staying warm and melty. Now they're my go-to solution whenever I need to feed a crowd without stress.
Essential Ingredients and Selection Tips:
- Hawaiian sweet rolls: Choose King's Hawaiian or similar brand for authentic sweetness and soft texture
- Quality deli ham: Select thinly sliced, honey-glazed or brown sugar ham for the best flavor
- Swiss cheese: Use real Swiss cheese rather than processed; the nutty flavor complements the sweet rolls perfectly
- Unsalted butter: Allows you to control the salt level while the butter carries the savory flavors
- Dijon mustard: Adds tangy depth that balances the sweetness; yellow mustard works but Dijon is superior
- Fresh poppy seeds: Adds texture and visual appeal; make sure they're fresh for the best flavor
Step-by-Step Instructions:
- Prepare your workspace efficiently:
- Preheat your oven to 350°F and position a rack in the center for even baking. Choose a 9x13-inch baking dish that will hold the entire package of rolls comfortably. Having everything ready before you start assembly makes the process smooth and prevents the butter mixture from hardening while you work.
- Create the signature butter mixture:
- Place butter in a microwave-safe bowl and melt completely, about 45-60 seconds depending on your microwave's power. Add Dijon mustard, Worcestershire sauce, onion powder, and a pinch of salt, whisking until completely smooth and well combined. The mixture should be liquid enough to brush easily but thick enough to cling to the rolls.
- Slice rolls with precision:
- Using a sharp serrated knife, carefully cut through the entire package of Hawaiian rolls horizontally while keeping them connected. Work slowly and use a gentle sawing motion to avoid tearing the soft bread. The goal is two complete halves that maintain their shape - one bottom slab and one top slab.
- Layer the bottom foundation:
- Place the bottom half of the connected rolls in your baking dish, cut side up. Arrange half of the Swiss cheese slices over the rolls, overlapping as needed to cover the entire surface completely. Don't leave gaps, as the cheese acts as a moisture barrier and flavor layer that's essential for the final result.
- Add ham with proper distribution:
- Fold each slice of ham and arrange it evenly over the cheese layer, making sure each individual roll gets approximately the same amount of meat. The folding technique prevents the ham from lying flat and creates better texture and distribution. Aim for generous coverage without overcrowding, which would make the sliders difficult to bite through.
- Complete the cheese layers:
- Top the ham with the remaining Swiss cheese slices, again overlapping to ensure complete coverage. This double layer of cheese creates that incredible gooey texture and prevents the ham from drying out during baking. Press gently to help everything adhere together before adding the top layer of rolls.
- Assemble and finish preparation:
- Place the top half of the connected rolls over the cheese layer, creating one large assembled slab. Brush the entire top surface generously with the prepared butter mixture, making sure to cover every bit of the surface. Sprinkle poppy seeds evenly over the buttered top for both flavor and visual appeal.
- Bake with proper technique:
- Cover the baking dish tightly with aluminum foil and bake for 20 minutes to heat through and melt the cheese without browning the tops too quickly. Remove the foil and continue baking for 8-10 minutes until the tops are golden brown and the cheese is completely melted. Let cool for 2-3 minutes before cutting into individual sliders.
 Pin it
The technique I'm most excited about in this recipe is definitely the savory butter mixture that gets brushed over the tops. This isn't just melted butter - it's a flavor bomb that includes Dijon mustard, Worcestershire sauce, and onion powder that transforms these from basic sandwiches into something absolutely irresistible. The first time I tried adding these ingredients to the butter instead of just using plain melted butter, the difference was incredible. That mixture soaks into the bread during baking, creating this amazing savory crust while adding depth of flavor that makes people wonder what your secret ingredient is. It's one of those small touches that elevates the entire dish from ordinary to extraordinary.
Assembly Strategy and Structural Integrity
The genius of this recipe lies in treating the connected rolls as one large canvas rather than individual sandwiches. This approach ensures even distribution of ingredients while creating portion control and easier serving. The layering sequence - cheese, ham, cheese - provides structural support and prevents ingredients from sliding around during baking. Understanding this assembly method is key to achieving professional-looking results.
Heat Distribution and Baking Science
The two-stage baking process ensures optimal texture throughout the sliders. The initial covered baking allows steam to heat the interior evenly while preventing the tops from browning too quickly. Removing the foil for the final stage creates the golden, slightly crispy top while ensuring the cheese is completely melted. This technique prevents the common problem of burnt tops with cold centers.
Butter Mixture Chemistry and Flavor Development
The savory butter mixture works through both fat distribution and flavor layering. The melted butter carries the other flavors into the bread while creating a barrier that keeps the tops from drying out. The Dijon mustard adds acidity that balances the sweet rolls, while Worcestershire provides umami depth. The onion powder distributes evenly and doesn't create harsh bites like fresh onion might.
Cheese Selection and Melting Properties
Swiss cheese is ideal for these sliders because of its excellent melting properties and nutty flavor that complements both the sweet rolls and savory ham. The double layer ensures complete coverage and creates the stretchy, gooey texture that makes these sliders so appealing. Other cheeses can be substituted, but Swiss provides the classic flavor profile that defines this recipe.
Make-Ahead Strategy and Storage Solutions
These sliders are perfect for meal prep and entertaining because they can be completely assembled ahead of time. The butter mixture can be prepared and the sliders assembled up to 24 hours in advance, then baked when needed. This flexibility makes them ideal for busy schedules and party planning while ensuring fresh, hot results when served.
Serving Temperature and Texture Optimization
Understanding the optimal serving temperature ensures the best eating experience. The sliders should be hot enough that the cheese is fully melted and stretchy, but not so hot that they burn your mouth. The brief cooling period after baking allows the cheese to set slightly while maintaining the gooey interior and crispy top contrast.
These ham and cheese sliders have become one of my most reliable crowd-pleasers because they perfectly balance simplicity with impressive results. There's something so satisfying about pulling apart those golden, connected rolls to reveal the melted cheese and perfectly seasoned layers inside. Every time I serve them, whether for a casual family dinner or a party, people are amazed at how much flavor is packed into such a simple concept. They represent everything I love about good comfort food - familiar flavors elevated through thoughtful technique and attention to detail that transforms everyday ingredients into something truly special.
Frequently Asked Questions
- → Can I make these sliders ahead of time?
- Yes, you can assemble the sliders completely and refrigerate them covered for up to 24 hours before baking. Just add a few extra minutes to the baking time if starting from cold.
- → What other cheese works well in these sliders?
- Cheddar, provolone, or American cheese work great. Swiss gives the best flavor, but use whatever you have on hand or prefer.
- → Can I freeze leftover sliders?
- Yes, wrap cooled sliders individually in foil and freeze for up to 3 months. Reheat in a 300°F oven for 15-20 minutes until heated through.
- → How do I keep the sliders from getting soggy?
- Make sure to use the foil covering during the first part of baking, then remove it to let the tops get crispy. Don't skip the butter mixture either.
- → What can I serve with these sliders?
- Potato chips, coleslaw, pickles, or a simple green salad work perfectly. They're great for game day, potlucks, or quick family dinners.