
 Pin it
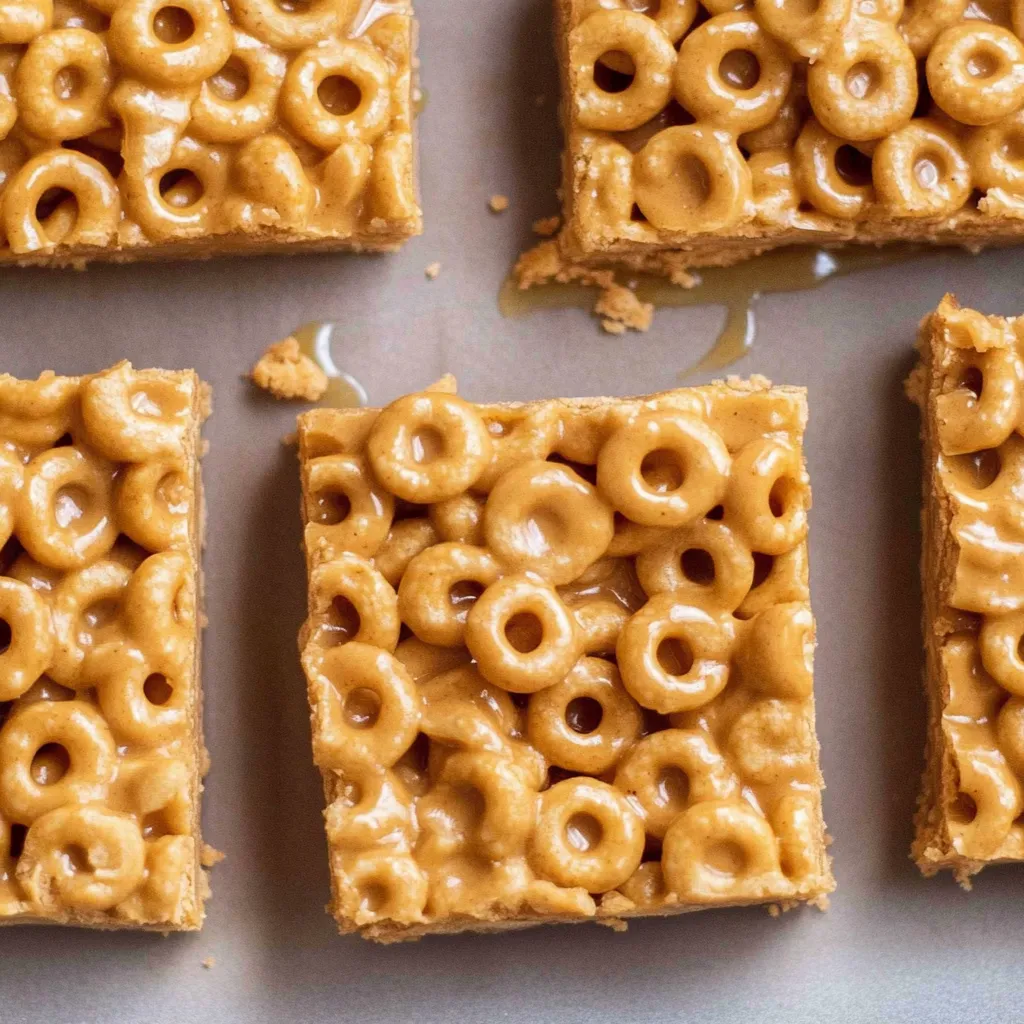
Peanut butter Cheerio bars transform everyday breakfast cereal into an irresistible treat with minimal effort. These sweet, chewy squares combine the familiar toasty oat flavor of Cheerios with rich, creamy peanut butter and natural honey sweetness. With just three pantry staples and no baking required, these bars provide a wholesome alternative to store-bought granola bars that's perfect for busy mornings, lunchbox surprises, or satisfying afternoon cravings.
I first made these when searching for an after-school snack that would keep my nephew's energy up during soccer practice. He devoured them so enthusiastically that he asked to help make the next batch. There's something magical about the way the honey creates the perfect amount of sweetness while binding everything together. When my health-conscious sister requested the recipe, I knew I'd found that rare treat that satisfies both kids and adults alike.
Essential Ingredients
- Cheerios: The star of the show – plain, original Cheerios provide the perfect crispy base with their subtle oat flavor
- Peanut Butter: Creates the creamy binding texture and adds substantial protein – standard varieties work better than natural ones for structural integrity
- Honey: Provides natural sweetness and helps everything stick together into perfect bars
- Vanilla Extract: Optional but recommended – adds depth of flavor that elevates these simple bars
Step-by-Step Instructions
- Step 1: Prepare your workstation.
- Line an 8×8-inch square baking pan with parchment paper, leaving overhang on two sides for easy removal later. Lightly spray the parchment with cooking spray to prevent sticking. Having everything ready before starting is crucial as the mixture can set quickly once combined.
- Step 2: Warm the binding ingredients.
- In a large microwave-safe bowl, combine 1 cup creamy peanut butter and ½ cup honey. If using, add 1 teaspoon vanilla extract. Microwave for 1 minute on medium power. This gentle heating makes the mixture easier to work with and helps it coat the cereal more effectively.
- Step 3: Create a smooth mixture.
- Remove from microwave and whisk thoroughly until the peanut butter and honey are completely blended into a smooth, glossy mixture. The consistency should be flowing but not too thin – similar to warm pancake syrup.
- Step 4: Incorporate the cereal.
- Add 3 cups of Cheerios to the peanut butter-honey mixture and fold gently with a rubber spatula until every piece of cereal is evenly coated. Take your time with this step to ensure there are no dry spots while being careful not to crush the Cheerios.
- Step 5: Press into the pan.
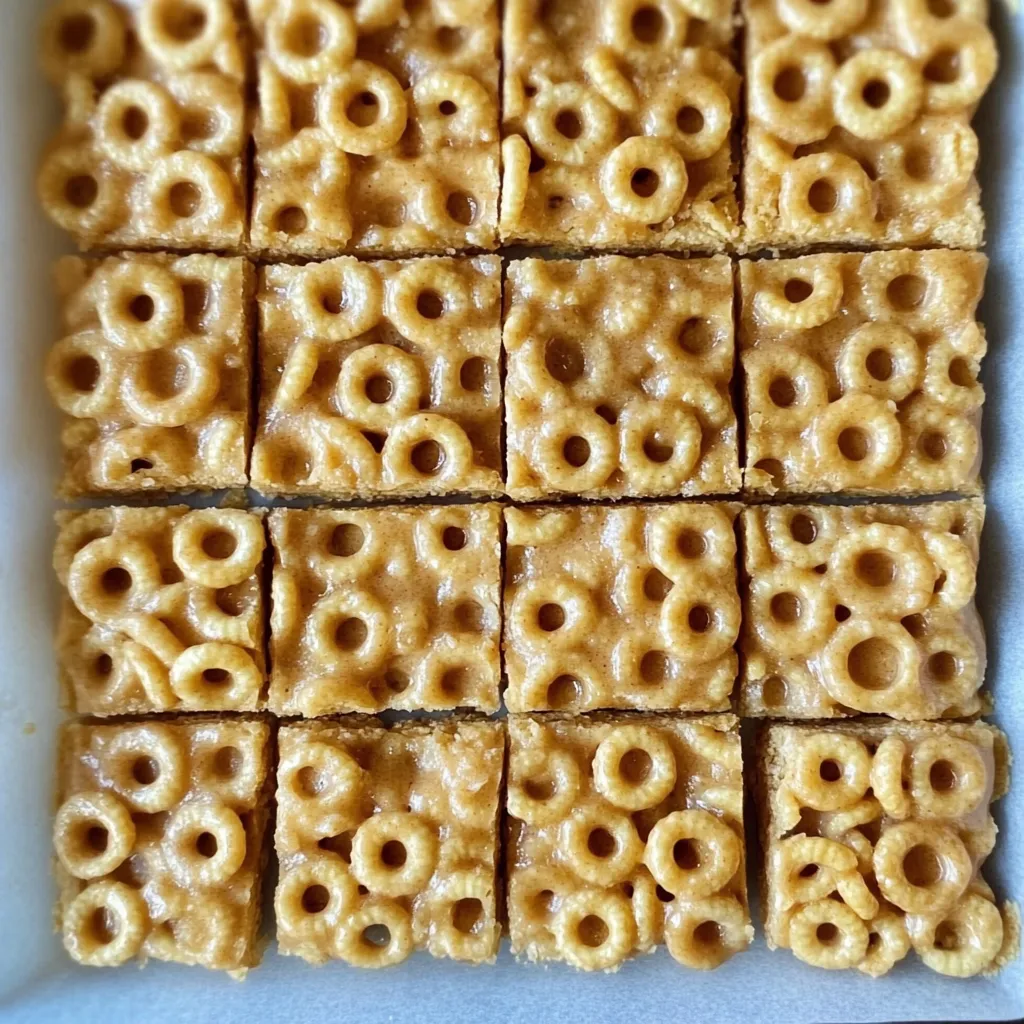
- Transfer the mixture to your prepared pan. Using a spatula sprayed with cooking oil or your slightly dampened hands, firmly press the mixture into an even layer, making sure to reach the corners. For perfectly packed bars, use the bottom of a measuring cup to press down firmly.
- Step 6: Chill until set.
- Refrigerate the pan for 1-2 hours until completely firm. This cooling time is non-negotiable – it allows the bars to set properly so they can be cut cleanly without falling apart. Patience here results in perfect bars.
- Step 7: Cut and serve.
- Once fully chilled, use the parchment paper overhang to lift the entire block out of the pan. With a sharp knife, cut into 9 equal squares or 12-16 smaller pieces if preferred. For cleanest cuts, wipe the knife between slices.
 Pin it
I'm particularly careful about which peanut butter to use in this recipe. My first attempt with a natural, oil-separation variety resulted in bars that never quite set firmly. Standard commercial peanut butter contains emulsifiers that help create that perfect chewy-but-firm texture we're after. When my mother tried making these with an all-natural almond butter, she discovered they needed to be kept refrigerated to maintain their shape. These little details make a big difference in the final result.
Custom Variations
The beauty of this basic recipe is its adaptability. I've created countless variations based on what's in my pantry or specific nutritional goals. My current favorite adds ¼ cup mini chocolate chips and 2 tablespoons ground flaxseed for omega-3s. For extra protein, try mixing in 2 tablespoons of chia seeds or hemp hearts. When making these for a special treat, I sometimes drizzle the finished bars with melted dark chocolate or press colorful sprinkles into the top before chilling – a hit at children's parties.
Make-Ahead and Storage
These bars excel as a make-ahead option for busy weeks. Once cut, store them in an airtight container with parchment paper between layers to prevent sticking. They'll keep at room temperature for 3-4 days, though they maintain the best texture when refrigerated, where they'll last for up to a week. For longer storage, wrap individual bars in plastic wrap and freeze for up to three months – perfect for grab-and-go breakfasts or emergency snacks. Let frozen bars thaw for about 15 minutes before enjoying.
Kid-Friendly Cooking Opportunity
This recipe offers a perfect opportunity to involve young helpers in the kitchen. Kids as young as three can help measure Cheerios and stir the mixture, while older children can manage almost the entire process with minimal supervision. Having them spray their hands with cooking oil before pressing the mixture into the pan turns a potentially sticky situation into a fun sensory activity. This hands-on participation often encourages picky eaters to try the finished product.
Chef's Helpful Tips
Temperature matters: If your honey-peanut butter mixture is too hot, it can make the Cheerios soggy - aim for warm, not hot Texture control: For crunchier bars, pack the mixture less firmly; for chewier bars, compress as much as possible Cutting technique: If cutting proves difficult, place the knife under hot running water for a few seconds, then wipe dry between cuts
I discovered this recipe during a particularly hectic week when my pantry was nearly bare and I needed a nutritious option for breakfasts on the go. What began as a practical solution to an empty cupboard has become one of my most-requested recipes from friends and family. There's something deeply satisfying about creating something so delicious from just a few simple ingredients. The way these humble components transform into something greater than their parts reminds me why I love cooking – sometimes the simplest recipes deliver the most joy.
Frequently Asked Questions
- → Can I use crunchy peanut butter instead of creamy?
- Yes! Crunchy peanut butter works great and adds extra texture to these bars.
- → How do I know when the bars are set enough to cut?
- After chilling for at least an hour, the bars should feel firm to the touch and not sticky on top.
- → Can I use a different cereal instead of Cheerios?
- Absolutely! Rice Krispies, Chex, or other crispy cereals work well in this recipe.
- → Why aren't my bars holding together?
- Make sure you're using the right ratio of wet to dry ingredients and press the mixture firmly into the pan. Chilling properly is also key.
- → Can I add chocolate chips to this recipe?
- Yes! Let the mixture cool slightly before adding mini chocolate chips so they don't completely melt.
- → Are these bars school-friendly?
- These contain peanut butter, so they're not suitable for classrooms with peanut allergies. Try sunflower seed butter as an alternative.