
 Pin it
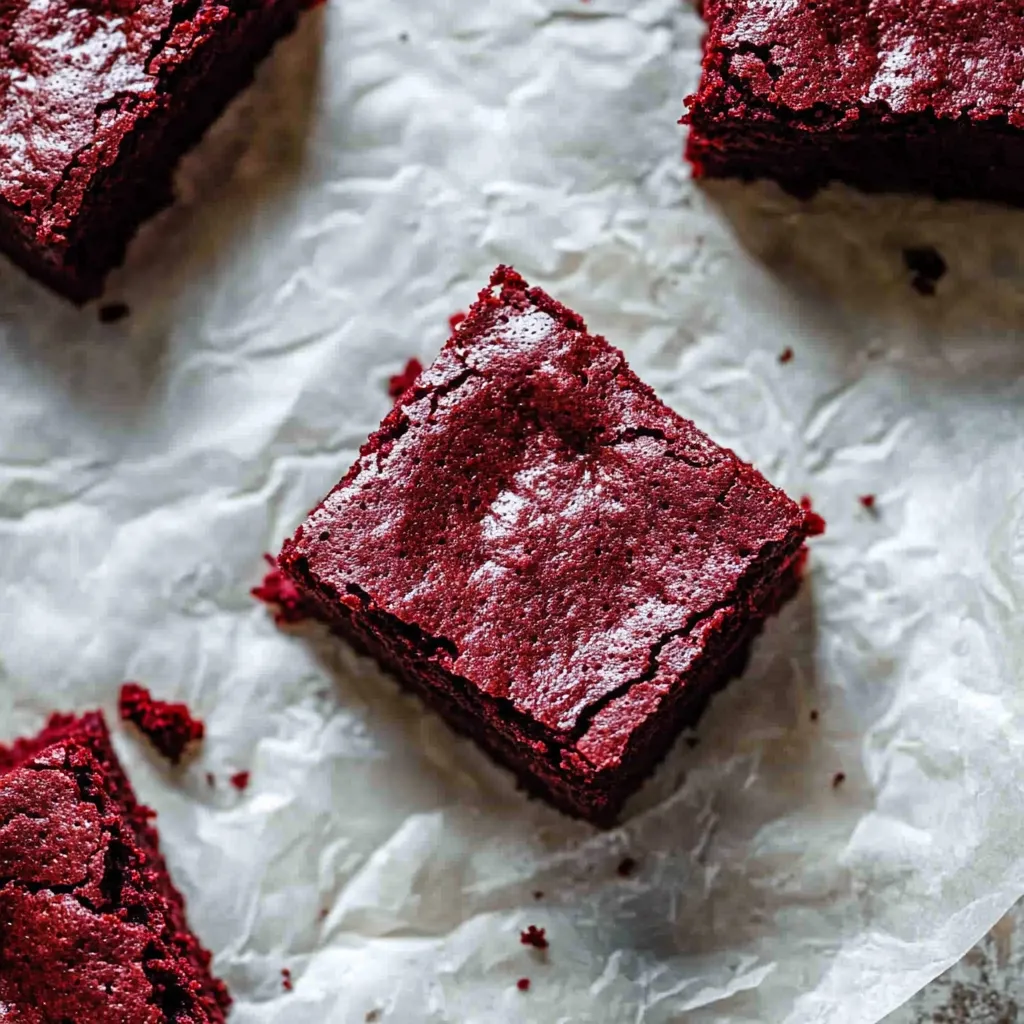
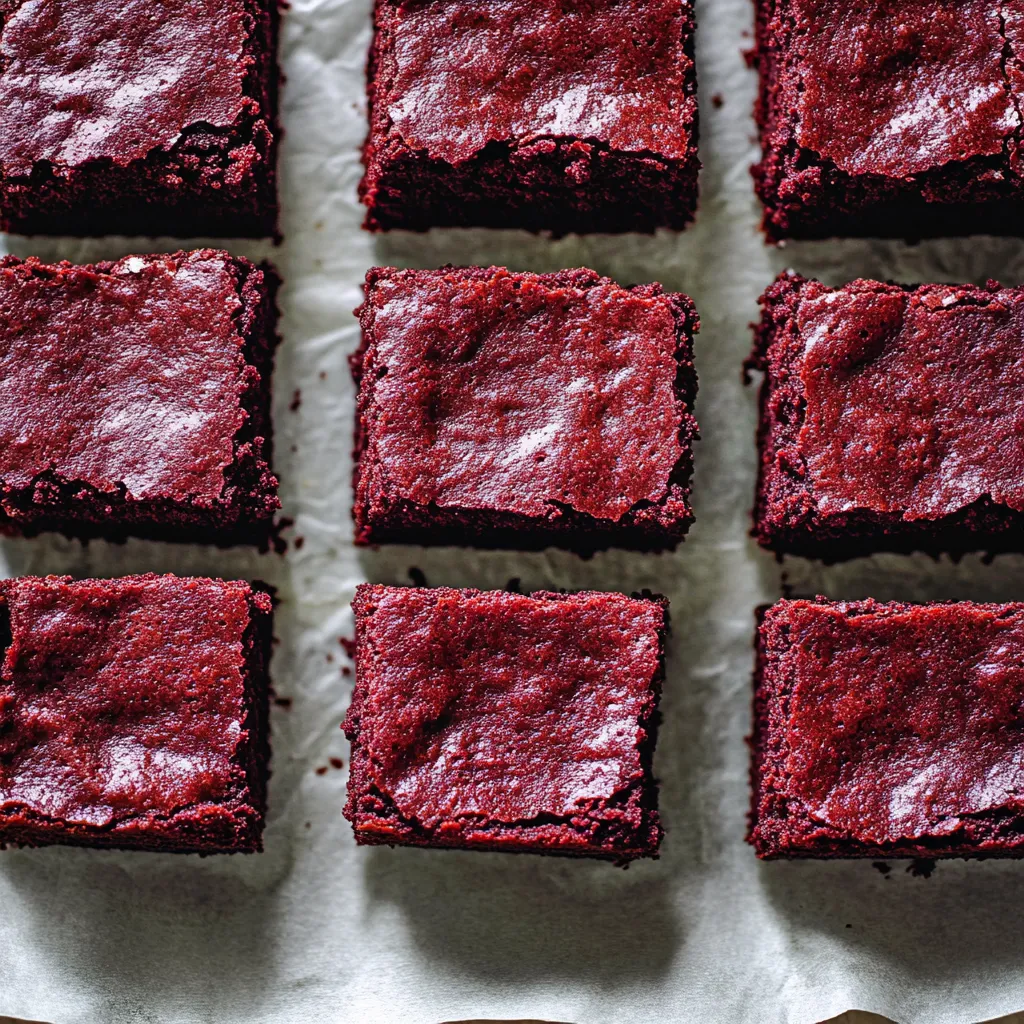
These indulgent red velvet brownies combine the best of both worlds - the rich, fudgy texture of perfect brownies with the distinctive tangy sweetness and striking color of classic red velvet cake. Each square delivers that coveted crackly top and dense, moist interior that makes brownies so irresistible, while the subtle cocoa flavor and bright red color create something truly special. Unlike traditional brownies, these have a unique depth of flavor from the combination of white vinegar and cocoa that gives red velvet its signature taste.
I first made these brownies for a potluck where I wanted to bring something that would really stand out on the dessert table. The combination of that gorgeous red color and the familiar comfort of brownies was an instant hit - people kept asking if they were chocolate brownies or red velvet cake, and the answer is deliciously both. What I love most is how they capture all the flavors I associate with red velvet but in a format that's so much easier to serve and share. My family now requests these for birthdays and holidays because they feel special but aren't fussy to make.
Essential Ingredients and Selection Tips:
- Unsalted butter: Choose high-quality butter for the best flavor; it needs to be melted and still hot when you add the sugars
- Brown and granulated sugar combination: The brown sugar adds moisture and chewiness while granulated sugar creates those crispy edges and crackly tops
- Room temperature eggs: This is crucial; cold eggs will cause the hot butter mixture to seize and create lumps in your batter
- Red food coloring: Gel food coloring provides more vibrant color with less liquid; if using liquid, you'll need about double the amount
- White vinegar: Essential for authentic red velvet flavor and helps create the characteristic tender texture
- Unsweetened cocoa powder: Use just enough to provide subtle chocolate flavor without overpowering the red color
Step-by-Step Instructions:
- Prepare your baking setup properly:
- Preheat your oven to 350°F and line an 8x8 or 9x9 inch baking pan with parchment paper, leaving some overhang for easy removal. This step is crucial for getting clean brownies that don't stick. Lightly grease the parchment paper with butter or cooking spray to ensure the brownies release perfectly. Having everything ready before you start mixing prevents the batter from sitting too long and losing its optimal texture.
- Melt butter to perfect temperature:
- Cut the butter into small, uniform pieces and melt it completely in a microwave-safe bowl or small saucepan over low heat. The butter should be completely liquid and still quite hot when you proceed to the next step. This hot temperature is essential for dissolving the sugars properly and creating the signature crackly top that makes these brownies so appealing.
- Create the sugar base correctly:
- While the butter is still piping hot, immediately whisk in both the brown sugar and granulated sugar, stirring vigorously until the mixture is smooth and the sugars begin to dissolve. The hot butter will help melt the sugars slightly, creating a glossy mixture that forms the foundation for fudgy texture. Continue whisking for about 1-2 minutes until the mixture looks smooth and slightly lighter in color.
- Incorporate eggs and flavorings carefully:
- Allow the butter and sugar mixture to cool for just 2-3 minutes so it won't cook the eggs, then whisk in the room temperature eggs one at a time, ensuring each is fully incorporated before adding the next. Add the vanilla extract, red food coloring, and white vinegar, whisking until the mixture is smooth and uniformly colored. The vinegar might seem like an odd addition, but it's essential for that distinctive red velvet tang and tender texture.
- Combine dry ingredients systematically:
- In a separate bowl, whisk together the all-purpose flour, cocoa powder, salt, and baking soda until no lumps remain. The cocoa powder should be evenly distributed throughout the flour mixture. Gradually add this dry mixture to the wet ingredients, folding gently with a spatula just until the flour disappears. Don't overmix, as this can create tough, dense brownies instead of the fudgy texture you want.
- Pour and spread for even baking:
- Transfer the batter to your prepared baking pan, using a spatula to spread it evenly into all corners. The batter should be thick but spreadable, and the surface should be relatively smooth. Gently tap the pan on the counter a few times to release any air bubbles and ensure the batter is level, which helps create even baking and that perfect crackly top.
- Bake to perfect doneness:
- Place the pan in the center of your preheated oven and bake for 25-30 minutes, checking for doneness with a toothpick inserted into the center. The brownies are ready when the toothpick comes out with just a few moist crumbs clinging to it - you don't want it completely clean, as that means they're overbaked. The top should look set and have developed some attractive cracks.
- Cool properly for best texture:
- Allow the brownies to cool in the pan for about 10 minutes, then use the parchment paper overhang to lift them onto a wire cooling rack. Let them cool for at least another 20-30 minutes before cutting to prevent them from falling apart. For the cleanest cuts, use a sharp knife wiped clean between each slice.
 Pin it
The ingredient I'm most excited about in this recipe is the white vinegar, which might sound strange if you've never made red velvet before. That tiny amount of vinegar is what gives red velvet its distinctive tangy flavor that sets it apart from regular chocolate cake or brownies. It also reacts with the baking soda to create a tender, slightly airy texture that's different from dense chocolate brownies. The first time I tasted a proper red velvet dessert with that subtle tang, I understood why people are so passionate about this flavor combination. It's that perfect balance of sweet and slightly tart that makes each bite so interesting.
Red Velvet Flavor Profile and Color Development
True red velvet flavor comes from the careful balance of cocoa, vanilla, and that distinctive tang from vinegar. The cocoa powder should provide just a hint of chocolate flavor without overwhelming the other elements or making the color too dark. The red food coloring not only creates the signature appearance but also contributes to the overall experience - there's something psychological about that gorgeous red color that makes the brownies taste even more special and indulgent.
Texture Mastery and Baking Technique
The secret to perfect brownie texture lies in the temperature of your ingredients and the mixing method. Hot butter melts the sugars slightly, creating a smooth base that leads to fudgy brownies with shiny, crackly tops. The combination of brown and granulated sugars provides both moisture and structure, while the small amount of baking soda creates just enough lift to prevent the brownies from being too dense while maintaining that fudgy character everyone loves.
Temperature Control and Ingredient Harmony
Getting the temperatures right is crucial for success with these brownies. The butter needs to be hot enough to begin dissolving the sugars but not so hot that it cooks the eggs when they're added. Room temperature eggs incorporate smoothly into the warm mixture, while cold eggs would cause the butter to harden and create an uneven texture. This careful temperature management is what separates amateur brownies from professional-quality results.
Visual Appeal and Presentation
These brownies are naturally stunning with their deep red color and contrasting crackly tops, making them perfect for special occasions. For an extra special presentation, dust them lightly with powdered sugar, drizzle with cream cheese glaze, or serve with vanilla ice cream. The contrast between the rich red interior and any white accompaniments creates a beautiful and appetizing display that's sure to impress guests.
Storage and Serving Suggestions
Red velvet brownies actually improve in flavor and texture after sitting for a few hours as the flavors meld together. Store them in an airtight container at room temperature for up to four days, or wrap individual pieces for lunchboxes and snacks. They also freeze beautifully for up to three months - just thaw at room temperature when ready to serve. For special occasions, cut them into smaller squares and arrange on a platter for easy serving.
Seasonal Adaptations and Occasions
While these brownies are perfect for Valentine's Day and Christmas due to their red color, they're delicious enough to enjoy year-round. For Halloween, you could add orange food coloring instead of red for a fun twist. The rich, indulgent nature makes them ideal for potlucks, bake sales, or anytime you want to bring something that looks as good as it tastes.
These red velvet brownies have become one of my signature desserts because they perfectly capture that sense of occasion that makes dessert feel special. There's something magical about cutting into that deep red interior and seeing people's faces light up when they take their first bite. They represent everything I love about baking - taking familiar flavors and presenting them in a new way that surprises and delights people. Whether I'm making them for a holiday gathering or just because we need something sweet in the house, they never fail to make the day feel a little more festive and indulgent.
Frequently Asked Questions
- → How long do these brownies take to make?
- Total time is 55 minutes - about 15 minutes prep and 30 minutes baking time.
- → Can I use gel food coloring instead of liquid?
- Yes, use 1 teaspoon gel coloring instead of 2.5 teaspoons liquid since gel is more concentrated.
- → How do I know when the brownies are done?
- A toothpick inserted in the center should come out with just a few moist crumbs, not wet batter.
- → What size pan should I use?
- Use a 9x9 inch baking pan lined with parchment paper for easy removal.
- → How should I store leftover brownies?
- Store covered at room temperature for up to 4 days or freeze for up to 3 months.
- → Why do I need vinegar in this recipe?
- Vinegar helps activate the red color and adds a subtle tang that balances the sweetness.