
 Pin it
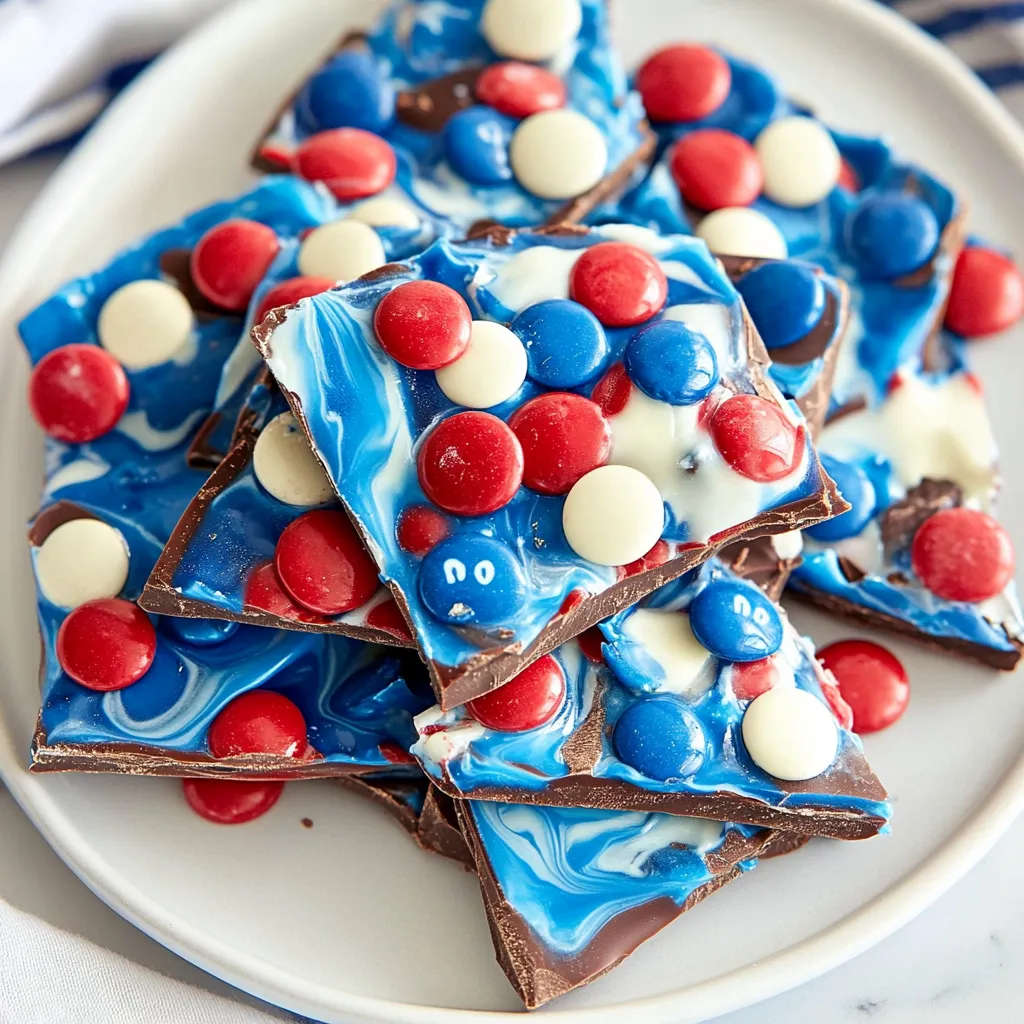
This gorgeous patriotic candy bark brings together layers of rich chocolate in stunning red, white, and blue swirls that look like edible fireworks on your dessert table. With just five simple ingredients and no baking required, you can create an impressive treat that's perfect for Memorial Day, Fourth of July, or any summer celebration where you want something festive and delicious. The best part is how quickly it comes together - from start to finish, you'll have beautiful homemade candy ready to share in under 30 minutes.
My kids and I have been making seasonal candy bark for every major holiday since they were toddlers, and it's become one of our most treasured family traditions. There's something magical about watching their faces light up when we create those beautiful swirled patterns, and they love being in charge of sprinkling on the final decorations. This patriotic version has become our signature contribution to neighborhood barbecues, and people actually ask us to bring it specifically because they know how good it tastes and how beautiful it looks on the dessert table.
Ingredients
- Semi-sweet chocolate morsels (2 cups) - Creates the perfect base layer with rich, balanced sweetness that isn't overpowering when combined with the other chocolates
- White chocolate chips (1 cup) - Use high-quality white chocolate for the best flavor and smooth melting properties that create those gorgeous swirls
- Blue candy melts (1 cup) - These colored coating chocolates melt beautifully and maintain their vibrant color better than food coloring in regular chocolate
- Red candy melts (1/2 cup, optional) - Add these if you want more red in your design, though the M&Ms provide plenty of red color
- Red, white, and blue M&Ms (1/2 cup) - The finishing touch that adds both color and delightful crunch to every bite
- Patriotic sprinkles or star-shaped jimmies - These festive decorations make the bark look even more celebration-ready and add extra sparkle
Instructions
- Set up your workspace efficiently.
- Line a large baking sheet with wax paper or parchment paper, making sure it lies flat without wrinkles that could create uneven bark thickness. Gather three separate microwave-safe bowls for melting the different chocolates, and have your decorations ready to go since timing matters once you start the layering process.
- Melt the semi-sweet chocolate base perfectly.
- Place the semi-sweet chocolate morsels in a microwave-safe bowl and heat in 30-second intervals at 50% power, stirring gently between each interval to prevent scorching. The chocolate should be smooth and completely melted but not hot enough to burn your finger when touched.
- Create the foundation layer.
- Pour the melted semi-sweet chocolate onto your prepared baking sheet and use an offset spatula to spread it into an even rectangle about 1/8 inch thick. Don't make it too thin or it will crack when you cut it, but avoid making it too thick or it becomes difficult to bite through. Place in the refrigerator for 3-5 minutes to set slightly.
- Prepare the white chocolate layer.
- While the base layer chills, melt the white chocolate chips using the same gentle microwave method. Stir until completely smooth and let it cool for just a minute so it's not steaming hot when you pour it over the semi-sweet layer.
- Add the first white chocolate layer.
- Remove the baking sheet from the refrigerator and pour about half of the melted white chocolate over the semi-sweet base. Use a clean offset spatula to spread it evenly, being gentle so you don't disturb the chocolate underneath.
- Melt and layer the blue candy melts.
- Melt the blue candy melts according to package directions, stirring until completely smooth. Pour the melted blue coating over the white chocolate layer and spread it gently into an even layer, working quickly before the layers start to set too firmly.
- Create the signature swirl effect.
- Pour the remaining white chocolate over the blue layer in random drizzles, then use a toothpick or knife tip to gently swirl the colors together. Work with light, flowing motions to create beautiful marbled patterns without overmixing, which would muddy the colors.
- Add the festive decorations immediately.
- While the top layer is still soft and tacky, sprinkle the red, white, and blue M&Ms evenly over the surface, pressing them very lightly so they adhere. Add any patriotic sprinkles or jimmies you're using, working quickly before the chocolate sets completely.
- Chill until completely firm.
- Place the decorated bark in the refrigerator for at least 15-20 minutes, or in the freezer for 5-8 minutes if you're in a hurry. The bark should feel completely solid and no longer soft to the touch when it's ready to cut.
- Cut into perfect serving pieces.
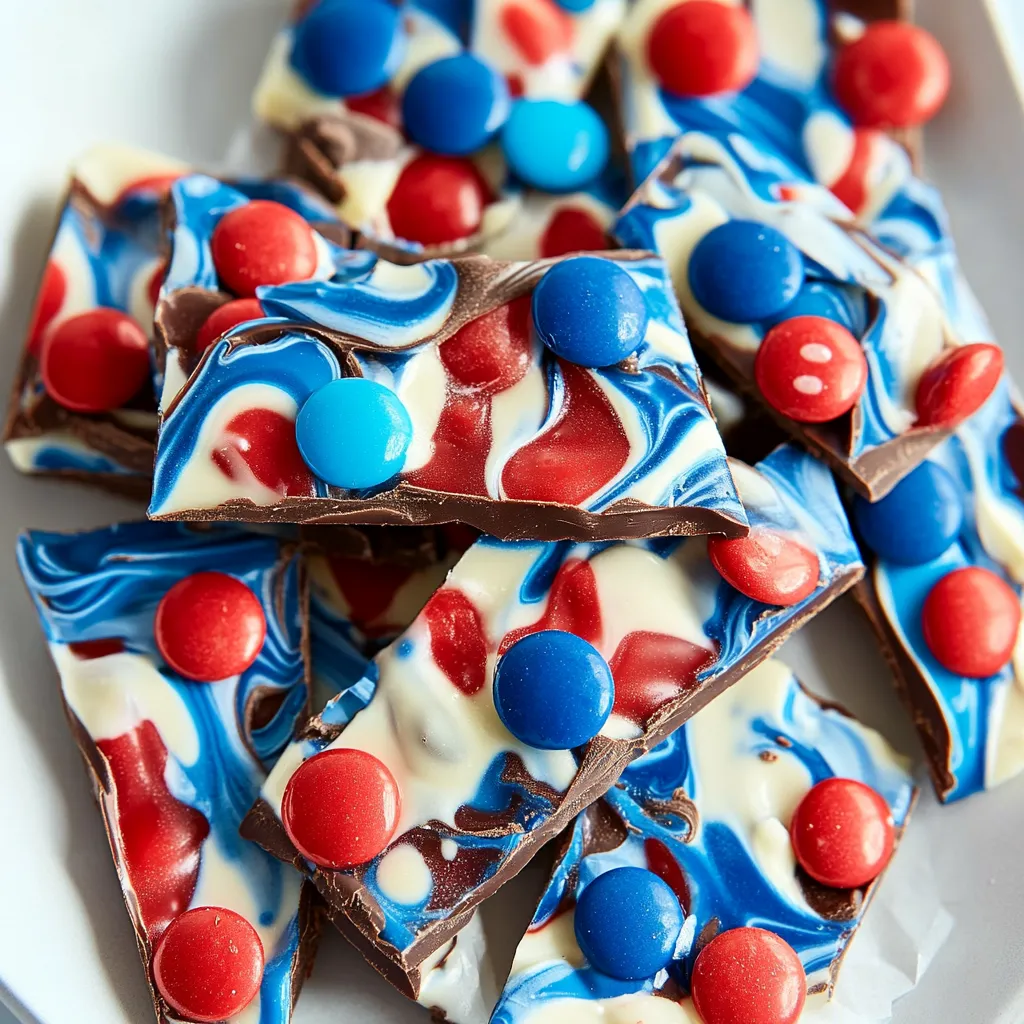
- Using a sharp knife or pizza cutter, cut the bark into irregular pieces that show off the beautiful swirl patterns. Store in an airtight container in a cool place until ready to serve.
 Pin it
Mastering the Perfect Swirl Technique
The key to achieving those stunning marbled effects lies in understanding the timing and temperature of your chocolate layers. Each layer needs to be set just enough to support the next one without being so firm that they won't adhere properly. This sweet spot usually happens after 2-3 minutes in the refrigerator, when the surface feels slightly tacky but not wet.
When creating the swirls, resist the urge to overwork the design. Light, confident strokes with a toothpick or knife tip create the most natural-looking marble patterns. Think of it like creating art - you want deliberate movements that enhance the natural flow of the chocolate rather than forcing it into rigid patterns. The most beautiful bark often comes from happy accidents where the chocolate creates its own organic swirls.
Working with Candy Melts Successfully
Candy melts behave differently than regular chocolate, and understanding their properties helps ensure success every time. They're designed to melt smoothly and hold their color beautifully, but they can become thick and chalky if overheated. Always use lower power settings in the microwave and err on the side of underheating rather than overheating - you can always add more time.
If your candy melts seem too thick for easy spreading, add a teaspoon of coconut oil or shortening to thin them out. This creates a smoother consistency that flows better and creates more professional-looking layers. Never add water or milk to thin candy melts, as this will cause them to seize up and become unusable.
Storage and Gift-Giving Tips
This bark stays fresh and delicious when stored properly in an airtight container at room temperature for up to a week. In warmer climates or during hot weather, storing it in the refrigerator prevents melting and maintains that perfect snap when you bite into it. For the best texture, let refrigerated bark come to room temperature for about 10 minutes before serving.
For gift-giving, package individual pieces in clear cellophane bags tied with patriotic ribbons, or arrange larger pieces in decorative tins lined with parchment paper. The bark travels well and makes thoughtful teacher gifts, neighbor treats, or contributions to potluck dessert tables. I always make extra because people inevitably ask for the recipe after trying it.
Creative Variations Throughout the Year
While the patriotic color scheme is perfect for summer holidays, this same technique works beautifully for every season and celebration. Christmas bark with red and green candy melts becomes a family favorite, while pink and white create gorgeous Valentine's Day treats. Halloween calls for orange and black, and you can even create school color combinations for graduation parties or team celebrations.
The key is maintaining the same layering technique while swapping out colors and decorations to match your theme. Crushed cookies, mini marshmallows, dried fruit, or different types of nuts all make excellent additions. Each variation becomes its own special tradition, and kids love being part of choosing the colors and decorations for different occasions throughout the year.
Troubleshooting Common Issues
If your chocolate layers aren't adhering properly, it usually means one layer got too cold before adding the next one. The solution is working a bit faster or letting the refrigerated layer warm up slightly at room temperature before adding the next chocolate layer. Each layer should feel tacky but not wet when you add the next one.
Chocolate that becomes thick and difficult to spread has usually been overheated. If this happens, try stirring in a small amount of coconut oil to restore the proper consistency. For future batches, use shorter microwave intervals and lower power settings to maintain that smooth, flowing texture that creates the most beautiful layers.
I love how this simple recipe has become such a centerpiece of our holiday traditions. Every time we make it, I'm reminded that some of the most cherished family memories come from the simplest activities - standing together in the kitchen, creating something beautiful with our hands, and sharing the results with people we care about. The fact that it tastes absolutely delicious is just the bonus on top of all those wonderful moments spent together.
This recipe represents everything I love about holiday baking with kids - it's simple enough that they can help with every step, beautiful enough to make them proud of what they've created, and delicious enough that adults genuinely enjoy eating it too. Over the years, it's become our signature contribution to every summer gathering, and I never get tired of seeing people's faces light up when they see those gorgeous swirled colors and take that first satisfying bite of homemade candy bark.
Frequently Asked Questions
- → Can I use regular chocolate instead of chocolate chips?
- Yes, you can use any chocolate you like. Just chop bar chocolate into small pieces for easier melting.
- → How long does this bark stay fresh?
- Store it covered in a cool place or the fridge for up to one week. It tastes best within the first few days.
- → What if I don't have blue candy melts?
- You can use white chocolate and add blue food coloring, or skip the blue and make red and white bark instead.
- → Can I make this ahead of time?
- Absolutely! This bark actually gets better after sitting for a day. Make it up to 3 days before your party.
- → Why is my chocolate not setting properly?
- Make sure each layer is slightly firm before adding the next one. If it's too warm in your kitchen, give it more fridge time.