
 Pin it
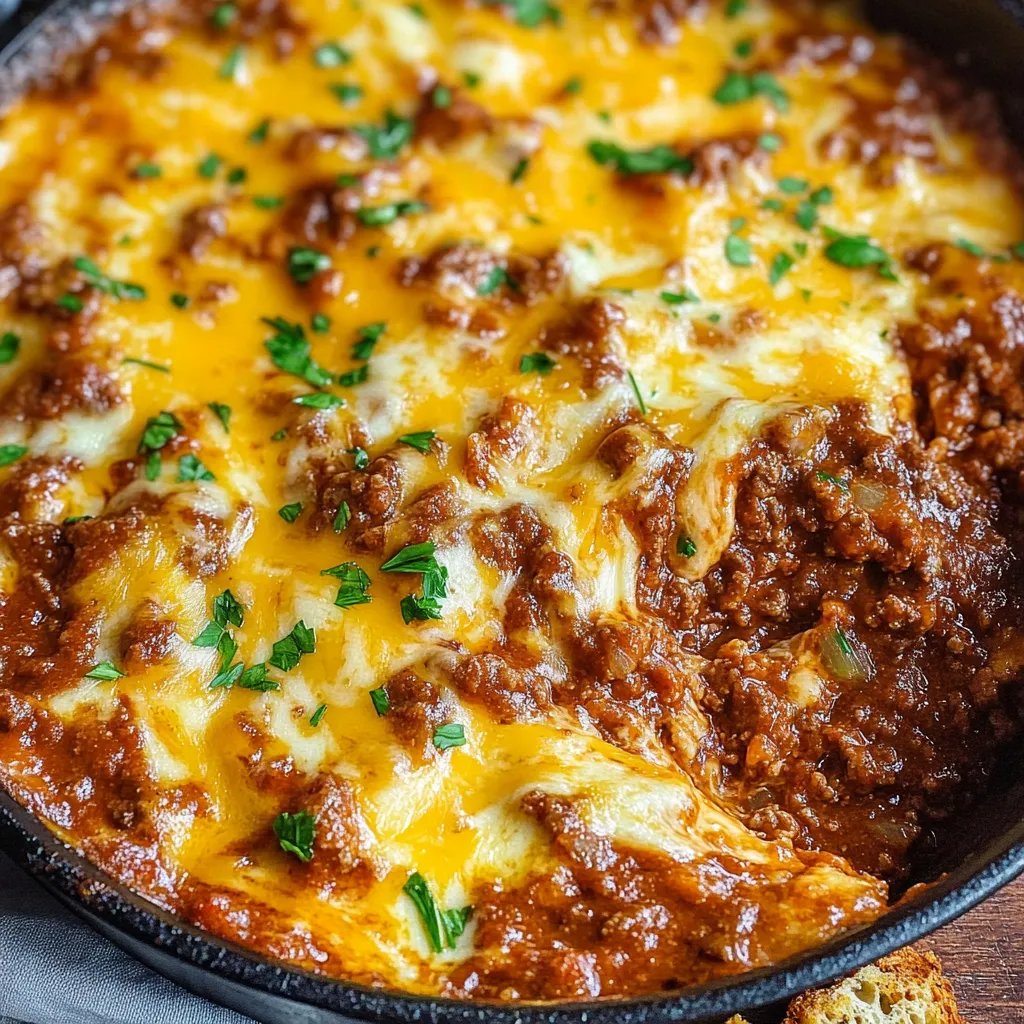
Sloppy joe dip takes everything you love about the messy, tangy-sweet sandwich filling from childhood and transforms it into a hot, bubbly, cheese-laden appetizer that's infinitely easier to eat at parties than actual sandwiches. The ground beef gets cooked with onions, peppers, and garlic, then combined with the classic sloppy joe flavor trinity of ketchup, brown sugar, and Worcestershire sauce before being loaded up with two kinds of cheese - sharp cheddar for flavor and Velveeta for that silky, smooth meltability that stays gooey even as it cools. What makes this particularly smart for entertaining is that you can make the entire meat mixture a day ahead and just add cheese and broil it right before serving, which means one less thing to stress about when guests arrive. The combination of protein-packed beef and substantial cheese makes this filling enough that people don't immediately move on to looking for other food, and serving it with toasted bread slices or sturdy chips means everyone can scoop up as much as they want without the structural failure issues that plague actual sloppy joe sandwiches.
I started making this dip about seven years ago for a Super Bowl party when I wanted something more interesting than the usual Buffalo chicken dip and seven-layer bean dip that shows up at every gathering. The idea of turning sloppy joes into dip seemed obvious once I thought about it - all those tangy, sweet flavors already work great as a spread, so why not make it scoop-able and add more cheese. The first version was decent but too loose and watery. After adjusting the ratios and adding flour to thicken it properly, it became something people actively requested rather than just politely ate. Now it's my signature game day contribution and people are genuinely disappointed if I bring anything else.
Ingredients and What Makes Them Essential
- Extra Lean Ground Beef (1 pound): Ground beef provides the meaty base and protein. Using extra lean (90/10 or 93/7) means you won't have to drain off tons of excess fat that would make the dip greasy. The beef should be at room temperature if possible, which helps it brown more evenly. If you only have regular ground beef, drain it thoroughly after browning.
- Yellow Onion (1 medium, diced): Onions add aromatic sweetness and savory depth. Dice them into small pieces about ¼-inch so they soften quickly and distribute evenly. Yellow onions are perfect because they're sweet without being bland. White onions work too but are slightly sharper.
- Green Bell Pepper (1 medium, diced): Bell pepper adds subtle sweetness, crunch, and authentic sloppy joe flavor - most traditional recipes include it. Green peppers have the classic flavor, but red, yellow, or orange peppers work if you prefer them sweeter. Dice to match your onion size.
- Garlic (3 cloves, minced): Fresh garlic adds pungent, savory depth. Mince it finely so it distributes throughout and doesn't create harsh bites. Don't substitute garlic powder which doesn't provide the same fresh flavor or aromatic quality.
- All-Purpose Flour (2 tablespoons): Flour thickens the dip so it's scoop-able rather than soupy. It gets sprinkled over the browned beef and cooked briefly to remove the raw flour taste before the liquids get added. This is essentially making a quick roux.
- Ketchup (1 cup): Ketchup provides the signature sloppy joe flavor - tangy, sweet, and tomatoey. Use regular ketchup, not fancy organic low-sugar versions which won't taste right. The amount seems like a lot but it's what creates that authentic flavor.
- Light Brown Sugar (3 tablespoons, packed): Brown sugar adds sweetness that balances the tangy ketchup and creates that characteristic sweet-savory sloppy joe taste. Pack it into your measuring spoon for accurate measurement. You can use dark brown sugar if that's what you have.
- Yellow Mustard (2 tablespoons): Mustard adds tangy sharpness and is traditional in sloppy joes. Plain yellow mustard is classic, though Dijon works if that's your preference. Don't skip this - it's essential for authentic flavor.
- Worcestershire Sauce (1 tablespoon): Worcestershire adds complex umami depth with its blend of vinegar, molasses, anchovies, and spices. Just a tablespoon makes everything taste richer and more savory. There's no good substitute.
- Beef Broth (½ cup, low-sodium): Broth adds savory flavor and provides the liquid base. Low-sodium is important so you can control saltiness. You can substitute chicken or vegetable broth if needed, though beef tastes best.
- Sharp Cheddar Cheese (2 cups, shredded, divided): Sharp cheddar provides bold, tangy cheese flavor. Shred it yourself from a block rather than buying pre-shredded for better melting. You'll use half mixed into the dip and half on top for broiling.
- Velveeta (8 ounces, cubed): Velveeta creates that smooth, creamy texture that stays gooey even as the dip cools. Real cheese can break and get grainy when reheated, but Velveeta's emulsifiers keep it silky. Cut it into small cubes so it melts quickly and evenly.
- Salt and Black Pepper (to taste): You'll need to season throughout cooking. Start conservatively since the ketchup, Worcestershire, and cheese all add sodium. Taste and adjust at the end.
- Fresh Parsley (for garnish, optional): Chopped fresh parsley adds a pop of green color that makes the dip look more appealing. This is purely aesthetic but worthwhile.
Step-by-Step Instructions
- Brown the Beef:
- Place a large, oven-safe skillet - cast iron works beautifully, or any heavy skillet that can go under the broiler - over medium-high heat and let it warm up for about a minute. Add your 1 pound of extra lean ground beef to the hot pan. Use a wooden spoon or spatula to break up the meat immediately, separating it into smaller crumbles. Continue cooking, stirring frequently and breaking up any large chunks, for about 6 to 8 minutes until all the beef is browned with no pink remaining. The beef should be in small, uniform pieces rather than large clumps. If you're using regular ground beef instead of extra lean, you'll see quite a bit of fat in the pan - carefully pour it off now, leaving just the meat and a thin coating of fat. If using extra lean, you shouldn't need to drain anything.
- Cook the Vegetables:
- To the same skillet with the browned beef, add your diced onion and diced bell pepper. Stir everything together to combine. Continue cooking over medium-high heat, stirring occasionally - every couple of minutes - for 3 to 4 minutes until the onion turns translucent and soft and the pepper begins to soften. You're not trying to fully cook the vegetables, just soften them and develop their sweetness. After 3 to 4 minutes, add your minced garlic. Stir constantly for about 1 minute until the garlic becomes very fragrant. Watch carefully because garlic can burn quickly, and burnt garlic tastes bitter.
- Thicken the Mixture:
- Sprinkle 2 tablespoons of flour evenly over the beef and vegetable mixture. Stir constantly, making sure the flour gets mixed into everything and coats the meat and vegetables. Continue cooking and stirring for a full minute. This cooking time is crucial - it eliminates the raw flour taste and creates a base that will thicken your dip properly. The mixture will look dry and slightly pasty at this stage, which is exactly right.
- Build the Sloppy Joe Base:
- Add 1 cup of ketchup, 3 tablespoons of brown sugar, 2 tablespoons of mustard, 1 tablespoon of Worcestershire sauce, ½ teaspoon of salt, several grinds of black pepper, and ½ cup of beef broth to the skillet. Stir everything together thoroughly, scraping up any browned bits stuck to the bottom of the pan - those bits add flavor. The mixture will look quite liquidy at this point. Reduce the heat to medium so it's just gently bubbling, not boiling vigorously. Let it cook, stirring occasionally - every 5 minutes or so - for about 20 minutes. During this time, the liquid will reduce and thicken considerably. You want it to cook down until it's thick and coating consistency - when you drag your spoon through it, the trail should fill in slowly rather than immediately. This concentration of flavors is what makes the dip taste so good. If it seems to be reducing too quickly and getting too thick, add a splash more broth. If it's still watery after 20 minutes, continue cooking for another 5 to 10 minutes.
- Add the Cheese:
- Once your meat mixture is thick and flavorful, reduce the heat to low. Add the 8 ounces of cubed Velveeta and 1 cup of the shredded cheddar cheese (reserving the other cup for topping). Stir constantly as the cheese melts into the hot mixture. The Velveeta will melt first, creating that smooth, creamy base. Continue stirring for about 3 to 5 minutes until all the cheese is completely melted and incorporated into the beef mixture. The dip should be thick, creamy, and uniform in color with no streaks of unmelted cheese visible. Taste it now and adjust the seasoning if needed - add more salt, pepper, or even a dash more brown sugar if you want it sweeter.
- Broil and Finish:
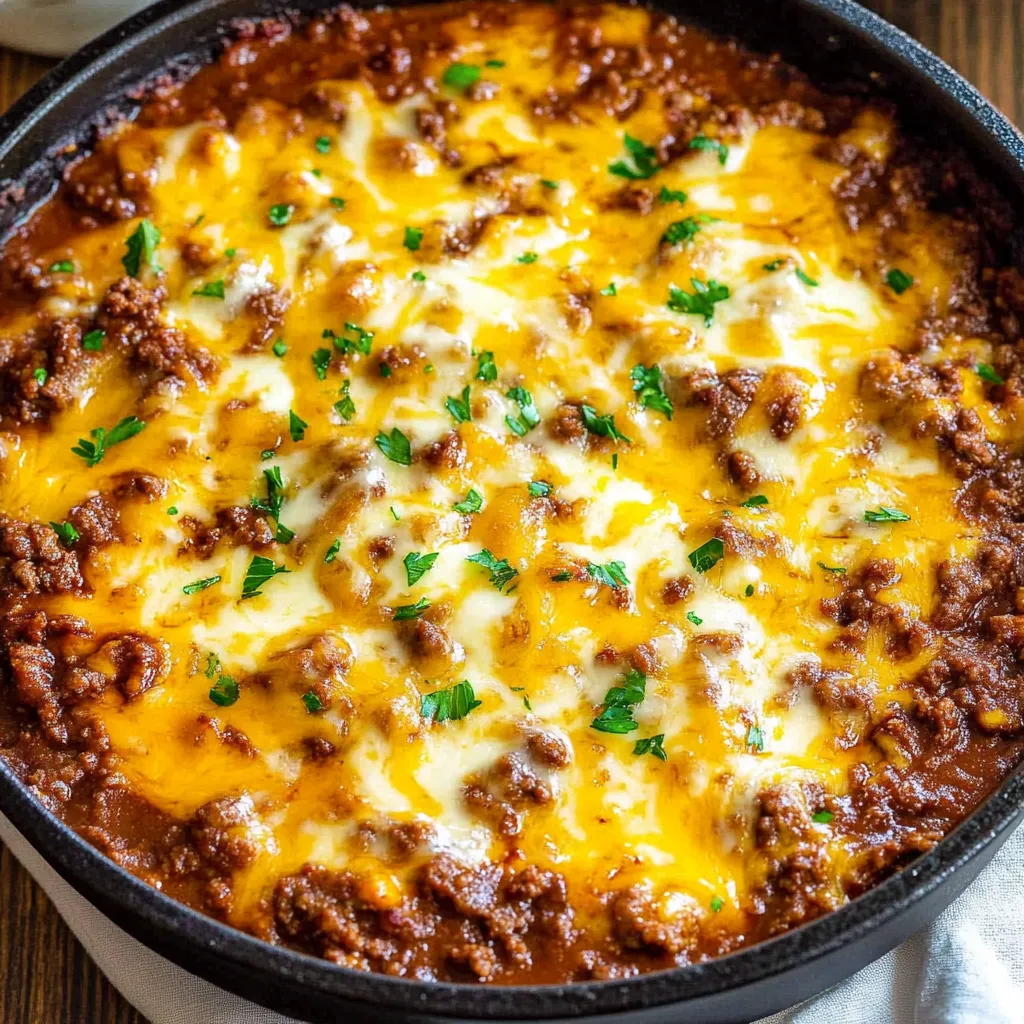
- Turn on your broiler to high and position your oven rack about 6 inches from the heating element. Sprinkle the remaining 1 cup of shredded cheddar cheese evenly over the top of the dip in the skillet, covering the entire surface. Carefully transfer the skillet to the oven - remember the handle will be hot even if the skillet hasn't been in the oven yet, so use an oven mitt. Broil for 3 to 5 minutes, watching carefully through the oven window. You're looking for the cheese to melt completely and brown in spots, creating a golden, bubbly top. The cheese should be melted and slightly browned, not pale. If you see any areas starting to burn or get too dark, pull it out immediately. Once the cheese is melted and golden with bubbling happening around the edges, remove the skillet from the oven. Remember that cast iron or heavy skillets retain heat, so the dip will stay hot for quite a while.
- Garnish and Serve:
- If using, sprinkle chopped fresh parsley over the top of the dip for color. Set the hot skillet on a heat-proof trivet or hot pad on your serving table. Place a serving spoon in the dip. Arrange your dippers around the skillet - toasted baguette slices, sturdy tortilla chips, bagel chips, crackers, or even slider buns cut in half all work beautifully. Serve immediately while the dip is hot and the cheese is gooey. The dip will stay warm in the skillet for about 30 minutes, which gives everyone time to dig in.
 Pin it
My brother-in-law is one of those people who claims he doesn't like "fancy" food and only wants basic, normal stuff. When I brought this dip to a family gathering, he was skeptical because he thought I'd made it too complicated or healthy or something. After trying one bite on a tortilla chip, he went back for seconds, then thirds, then eventually just pulled up a chair next to the skillet and ate it continuously for about twenty minutes. Later he quietly asked me for the recipe, which from him is basically a Michelin star. Now he specifically requests it for every family event and gets visibly disappointed if I bring anything else. Converting the fancy-food skeptic with what's essentially meat and cheese feels like winning something.
Understanding Why Velveeta Works Better Than Real Cheese
Velveeta gets a bad reputation among food snobs, but it serves a specific purpose in recipes like this where you need cheese that stays smooth and creamy under various conditions. Real cheese is made from milk, cultures, and rennet, creating a product where fat and protein exist in a relatively unstable emulsion. When you heat real cheese too much or reheat it repeatedly, the fat can separate from the protein, creating that greasy, broken texture with grainy bits. Velveeta, on the other hand, is technically a "pasteurized prepared cheese product" made from real cheese combined with emulsifiers like sodium citrate and sodium phosphate. These emulsifiers prevent the fat and protein from separating even under high heat or repeated heating cycles. This is why Velveeta creates silky smooth cheese sauces and dips that stay creamy even as they cool or get reheated, while real cheese can become grainy and broken. For a party dip that might sit out for an hour, Velveeta's emulsifying properties are essential. Using it doesn't mean you can't also use real cheese for flavor - the combination of Velveeta for texture and sharp cheddar for taste gives you the best of both worlds.
The Chemistry of Sloppy Joe Flavor
Sloppy joe filling has a distinctive flavor profile that comes from balancing sweet, tangy, savory, and umami elements. The ketchup provides tomato sweetness and vinegar tang. Brown sugar adds caramelized sweetness and molasses notes. Mustard contributes sharp, tangy heat. Worcestershire sauce adds complex umami from its fermented anchovies, molasses, vinegar, and spices. Together, these create layers of flavor that work better in combination than any single element could. The beef provides savory, meaty richness while the onions and peppers add aromatic sweetness. During the 20-minute simmering, moisture evaporates and flavors concentrate, intensifying everything. The Maillard reaction between proteins and sugars creates new flavor compounds that taste deeper and more complex than raw ingredients. This is why sloppy joe filling that's been properly simmered tastes so much better than just mixing ketchup with cooked ground beef - the cooking time allows all these elements to meld and develop.
Why Proper Thickening Matters for Dip Consistency
The difference between great dip and disappointing watery dip comes down to proper thickening technique. When you sprinkle flour over the browned beef and cook it for a minute, you're creating a roux - the foundation of countless sauces and gravies. The flour's starch granules toast slightly in the hot fat remaining in the pan, which removes that raw flour taste. When you add liquid (ketchup, broth, and Worcestershire), those starch granules absorb the liquid and swell dramatically, creating thickness. The 20-minute simmering time allows the starch to fully hydrate and reach maximum thickening power while also reducing excess liquid through evaporation. If you rush this step, the flour hasn't had time to fully develop its thickening properties and the liquid hasn't reduced enough, leaving you with thin, runny dip that slides off chips. Proper simmering creates a thick, coating consistency that clings to whatever you dip in it. The ratio of flour to liquid in this recipe is carefully balanced - too much flour and the dip tastes pasty, too little and it stays watery. The cheese added at the end contributes additional thickness and body.
Make-Ahead Strategy and Food Safety
Making this dip ahead saves significant stress when entertaining, but requires following food safety guidelines. You can prepare everything through adding the first round of cheese - essentially completing the entire meat mixture - then let it cool to room temperature. Never cover and refrigerate food while it's still hot, which creates condensation and can promote bacterial growth. Once cooled, transfer to an airtight container or leave it in the skillet and cover tightly with plastic wrap or aluminum foil. Refrigerate for up to 24 hours. When ready to serve, if the mixture is in a container, transfer it back to your oven-safe skillet. The cold dip will be quite thick and congealed, which is normal. You can gently reheat it on the stovetop over medium-low heat, stirring frequently, until it's hot throughout and loosens up, then proceed with topping with cheese and broiling. Or place the cold skillet directly under the broiler, though this takes longer and requires watching carefully to prevent burning before the center heats through. The advantage of making ahead is that all the flavors have time to meld and deepen overnight.
Variations and Customization Ideas
While the classic version is delicious, this dip template works with numerous variations. For spicy sloppy joe dip, add diced jalapeños with the peppers, stir in cayenne pepper or red pepper flakes to taste, and use pepper jack cheese instead of cheddar. For BBQ sloppy joe dip, substitute half the ketchup with your favorite BBQ sauce. For Southwest sloppy joe dip, add cumin, chili powder, and corn, and use a Mexican cheese blend. For pizza sloppy joe dip, add Italian seasoning, diced tomatoes, and use mozzarella and Parmesan. For breakfast sloppy joe dip, use breakfast sausage instead of beef, add scrambled eggs, and serve with biscuits. For pulled pork version, substitute the ground beef with shredded pulled pork. For vegetarian sloppy joe dip, use plant-based ground "meat" or finely diced mushrooms and walnuts. For white sloppy joe dip, skip the ketchup entirely and use cream of mushroom soup plus sour cream for a completely different flavor profile. The basic technique of browning meat, sautéing vegetables, thickening with flour, and adding cheese works with countless flavor combinations.
Serving Suggestions and Presentation Ideas
While serving this dip straight from the skillet is perfectly acceptable and keeps it hot, thoughtful presentation elevates it from good to impressive. If you have a decorative cast iron skillet, use it for serving - the rustic look works perfectly for this casual food. Place the hot skillet on a wooden cutting board or slate trivet for protection and visual appeal. Arrange your dippers artfully around the skillet rather than just dumping chips in a bowl - fan out toasted baguette slices in a circle, alternate different colored tortilla chips, or stand crackers up for height. Garnish the dip itself with more than just parsley - try sliced green onions, crumbled bacon, diced tomatoes, or a drizzle of hot sauce in a decorative pattern. For parties, set out small plates and napkins nearby so people can take portions rather than double-dipping. Label the dip with a small card if you're serving multiple appetizers, or if it contains common allergens. For outdoor gatherings, keep the dip warm in a small slow cooker set to warm. Individual servings work too - portion the dip into small oven-safe ramekins, top each with cheese, and broil for personalized servings.
Equipment Considerations and Substitutions
The oven-safe skillet requirement is important but can be worked around if needed. Cast iron skillets are ideal because they conduct heat evenly, go from stovetop to broiler without issue, retain heat well, and look great for serving. However, any heavy-bottomed, all-metal skillet works - stainless steel, carbon steel, or even an old-fashioned aluminum skillet. The key is no plastic, rubber, or wooden handles that could melt or burn under the broiler. If your favorite skillet has a plastic handle, you can cook the entire mixture in it, then transfer the dip to a broiler-safe baking dish for the final cheese-melting step. A 9-inch pie plate, cast iron braiser, or shallow casserole dish all work. You lose the one-pan convenience but the dip still works perfectly. For slow cooker preparation, brown the meat and vegetables in any skillet, transfer everything to your slow cooker, add the remaining ingredients except the cheese, cook on low for 2 hours, then stir in the Velveeta and half the cheddar. Transfer to a broiler-safe dish, top with remaining cheese, and broil as directed.
Storage, Reheating, and Freezing Guidelines
Leftover sloppy joe dip keeps well and reheats beautifully, making it excellent for meal prep or planned leftovers. Let the dip cool completely to room temperature, then transfer it to an airtight container and refrigerate for up to 3 days. The dip will solidify quite a bit when cold due to the cheese and fat, which is completely normal. To reheat, you have several options. For oven reheating, transfer the cold dip to an oven-safe dish, cover with foil, and bake at 350°F for 20 to 30 minutes until hot and bubbly throughout, stirring halfway through. For stovetop reheating, place it in a saucepan over medium-low heat, stirring frequently and adding a splash of broth if needed to loosen it. For microwave reheating, transfer a portion to a microwave-safe bowl and heat in 1-minute intervals, stirring between each interval. For freezing, let the dip cool completely, transfer to a freezer-safe container, and freeze for up to 3 months. Thaw overnight in the refrigerator before reheating. The texture may be slightly different after freezing - the cheese might look a bit separated - but stirring vigorously while reheating usually brings it back together.
 Pin it
After making this sloppy joe dip probably fifty times over the past several years for various gatherings, it's become my most reliable crowd-pleaser because literally everyone likes it. People who claim they don't like ground beef eat it. People who think they don't like Velveeta eat it. Kids eat it. Picky eaters eat it. The combination of familiar sloppy joe flavors with gooey melted cheese is apparently universally appealing in ways that more adventurous appetizers aren't. I appreciate how easy it is to scale up by doubling the recipe for large parties, and how it holds its temperature well so I'm not constantly running back to the kitchen to reheat it. The make-ahead capability means I can prep it completely the day before and just broil it right before serving, which removes one source of party-day stress. This dip represents exactly what game day food should be - satisfying, shareable, crowd-pleasing, and simple enough to execute well even when you're distracted by the actual game or managing twenty other party details.
Frequently Asked Questions
- → Can I make this dip ahead of time?
- Yes, you can prepare the beef mixture up to 2 days in advance. Store it in the fridge, then add the cheese and broil when you're ready to serve.
- → What should I serve with sloppy joe dip?
- Tortilla chips, crackers, toasted baguette slices, or even pretzel bites all work great. You can also use celery sticks or bell pepper strips.
- → Can I use a different type of cheese?
- Absolutely. Monterey Jack, pepper jack, or mozzarella work well. Just keep some cheddar for the best flavor that's closest to traditional sloppy joes.
- → How do I reheat leftover dip?
- Microwave it in 30-second intervals, stirring between each, or reheat it in a 350°F oven for about 15 minutes until hot and bubbly.
- → Can I make this without a cast iron skillet?
- Yes, any oven-safe skillet works fine. You can also cook it on the stove, then transfer to a baking dish before adding the cheese and broiling.
- → Is this dip spicy?
- No, it's not spicy at all. It has a sweet and tangy flavor from the ketchup and brown sugar. Add hot sauce or diced jalapeños if you want some heat.