
 Pin it
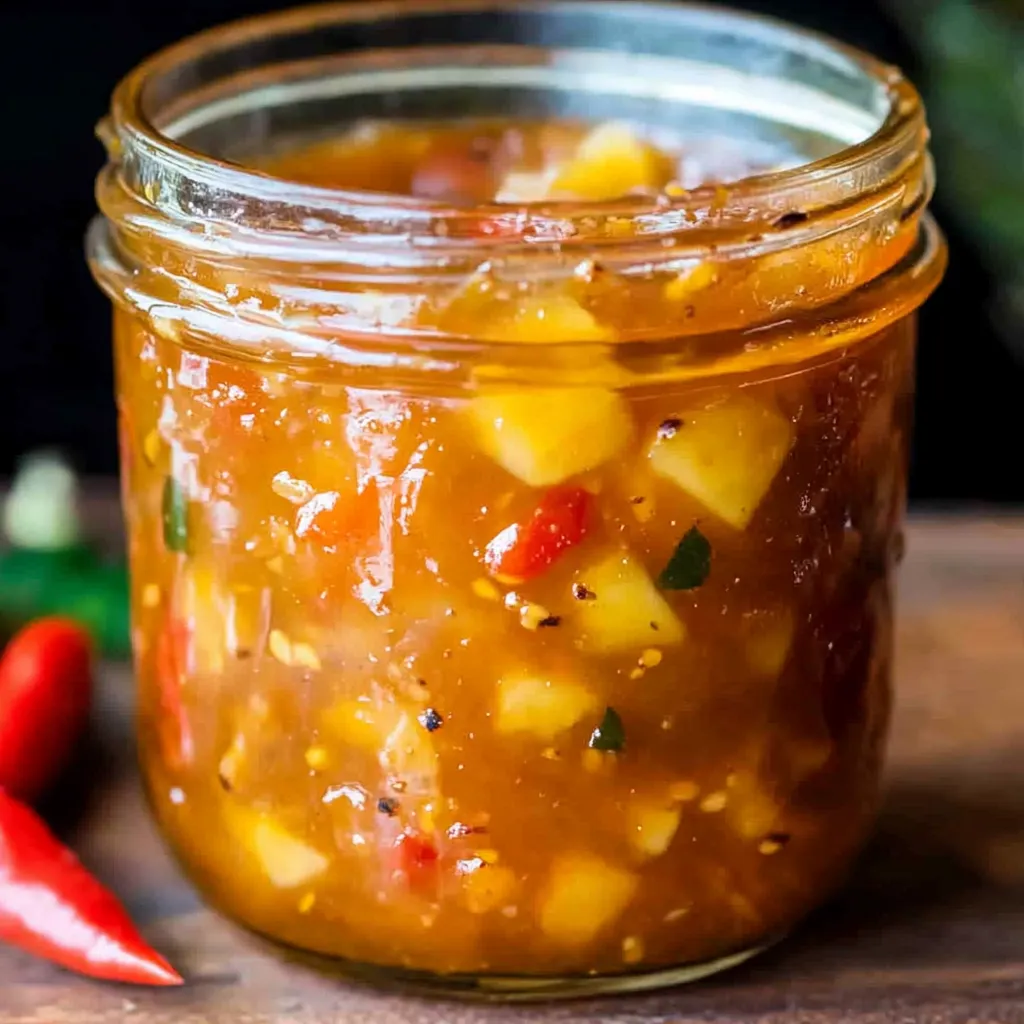
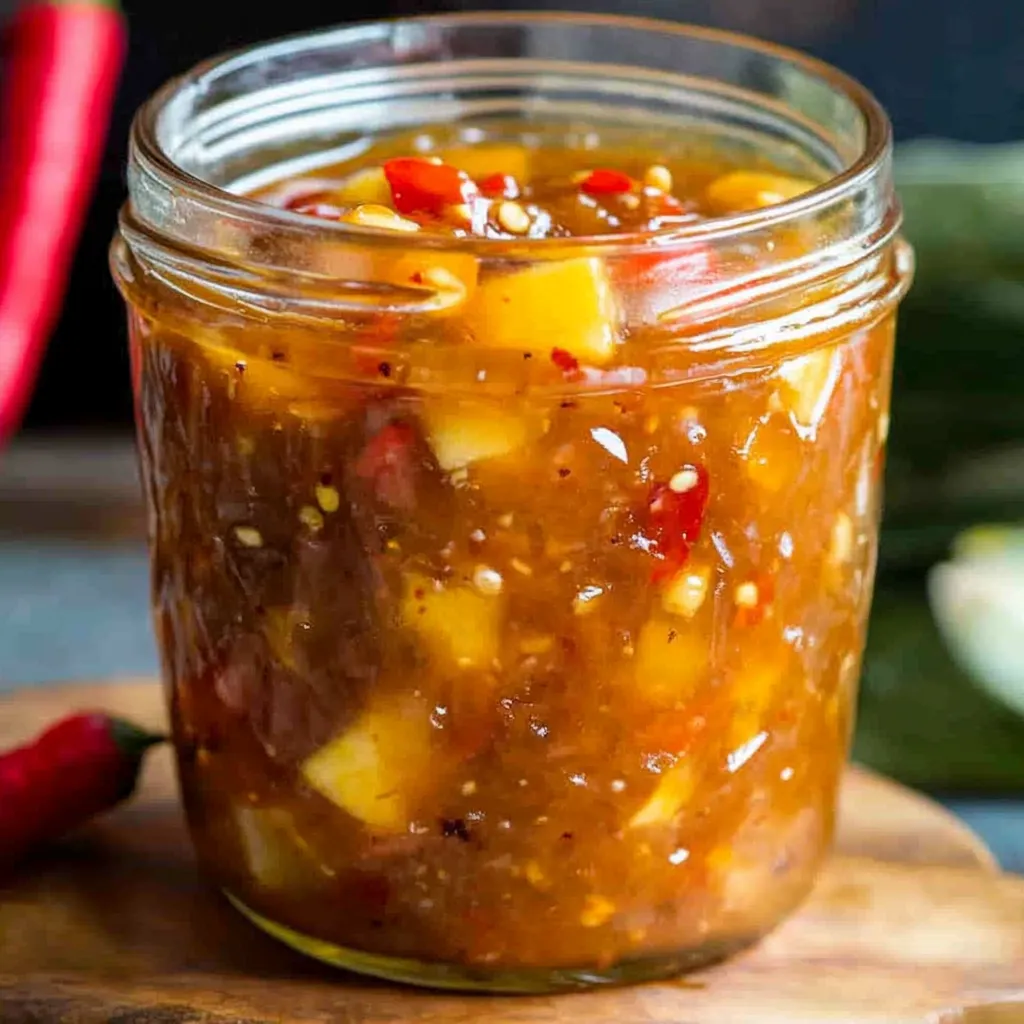
This sweet chilli pineapple sauce transforms ordinary meals into something exciting with its perfect balance of sweet tropical fruit, tangy vinegar, and fiery chili heat all in one glossy, vibrant sauce. Making it at home means you control exactly what goes in - no mysterious preservatives, artificial colors, or additives that you can't pronounce, just fresh ingredients that come together in about twenty minutes on your stovetop. The pineapple brings natural sweetness and a fruity brightness that you just don't get from store-bought versions, while the garlic and chili create layers of flavor that make every bite interesting. What's remarkable is how versatile this sauce becomes once you have a jar in your fridge - it works as a dipping sauce, a glaze for grilled meats, a spread for sandwiches, or a flavor booster for stir-fries and rice bowls.
The first batch of homemade pineapple chili sauce usually converts people permanently away from bottled versions. There's something about that fresh pineapple flavor that really shines through - bright and tropical in a way that processed sauce just can't replicate. The texture is smoother, the color is more natural, and you can actually taste each component rather than just generic sweetness and heat. Once you see how simple it is to throw everything in a pan and simmer for a few minutes, buying sauce starts to feel unnecessary.
Ingredients - What You Need and Why
- Fresh pineapple: provides natural sweetness, tropical flavor, and the liquid base for your sauce; choose a ripe pineapple that smells sweet at the bottom, has golden-yellow skin, and gives slightly when pressed; core it completely and blend the chunks into juice, or leave some small pieces for a chunkier texture if you prefer
- Fresh garlic cloves: add aromatic depth and a subtle sharpness that balances the sweetness; use fresh garlic rather than jarred or powdered for the best flavor, and mince it finely so you get flavor throughout without big chunks; about three to four cloves gives you noticeable garlic presence without overpowering
- Birds eye chilies: these small, potent chilies deliver serious heat along with fruity, bright chili flavor; they're the traditional choice for Thai-style sauces and bring that authentic kick; if you can't find them, red chili flakes work fine, or sambal oelek for convenience; start with fewer chilies than you think you need, as you can always add more heat but can't take it away
- Soy sauce: contributes savory umami depth and that distinctly Asian flavor profile that makes this sauce so addictive; just a small amount adds complexity without making the sauce taste salty or turning it too dark; use regular soy sauce or tamari if you need it gluten-free
- Apple cider vinegar or rice wine vinegar: the acidity brightens all the other flavors and provides that tangy bite that balances the sweetness; rice vinegar is milder and more traditional for Asian sauces, while apple cider vinegar has a slightly fruitier tang; either works beautifully depending on what you have
- Granulated white sugar: sweetens the sauce and helps create that glossy, syrupy consistency; white sugar dissolves quickly and doesn't affect the color; you can adjust the amount based on how sweet your pineapple is and your personal preference
- Salt: enhances all the other flavors and prevents the sauce from tasting flat or one-dimensional; start with a small amount since the soy sauce already adds saltiness, then adjust at the end
- Cornflour (cornstarch) and water: mixed together into a slurry, this acts as a thickening agent that transforms the thin liquid into a glossy, clingy sauce that coats food beautifully; always mix cornflour with cold water before adding to prevent lumps
How to Make Sweet Chilli Pineapple Sauce - Step by Step
- Prepare the pineapple:
- Start by selecting a ripe pineapple - you'll know it's ready when the skin has turned mostly golden-yellow rather than green, it smells sweet and fragrant at the base, and one of the inner leaves from the crown pulls out easily with a gentle tug. Place the pineapple on its side on a cutting board and slice off the top and bottom with a sharp chef's knife. Stand it upright and carefully cut down the sides, following the curve of the fruit to remove all the spiky skin in strips. You'll still see some brown "eyes" remaining - you can dig these out individually with the tip of a knife or cut slightly deeper V-shaped grooves to remove entire rows at once. Cut the pineapple into quarters lengthwise, then slice out the tough, fibrous core from each quarter. Chop the remaining yellow flesh into chunks about one inch in size. Transfer these chunks to a blender or food processor and pulse until you have a smooth juice with small bits of pulp. You'll need about one and a half to two cups of this pineapple puree for the sauce. If you prefer a chunkier sauce with visible pineapple pieces, blend most of it smooth and reserve a handful of finely diced chunks to add later.
- Prepare the aromatics and chilies:
- Peel three to four garlic cloves and mince them finely with a sharp knife, making sure the pieces are small and uniform so they distribute evenly throughout the sauce without creating harsh bites of raw garlic flavor. For the birds eye chilies, rinse them under cool water, then slice off the stems. You can leave the seeds in for maximum heat, or slice the chilies lengthwise and scrape out the seeds with the tip of your knife if you want a milder sauce with chili flavor but less fire. Mince the chilies finely, and be careful not to touch your face or eyes after handling them, as the capsaicin oils can burn. If you're using dried chili flakes instead of fresh chilies, measure out about one to two teaspoons depending on your heat tolerance. Have all your other ingredients measured and ready to go - quarter cup of vinegar, two tablespoons of soy sauce, three-quarters to one cup of sugar depending on how sweet you like it, and a pinch of salt. This preparation makes the actual cooking process quick and smooth.
- Combine ingredients and bring to a boil:
- Take a deep, medium-sized saucepan and add your pineapple puree, minced garlic, chopped chilies, vinegar, soy sauce, sugar, and salt. Stir everything together with a wooden spoon or whisk to combine and help the sugar start dissolving. Place the pan over medium-high heat and bring the mixture to a full boil, stirring occasionally to prevent anything from sticking to the bottom or scorching. You'll notice the sugar gradually dissolving and the mixture becoming more liquid as it heats. Once it reaches a rolling boil where bubbles are actively breaking the surface all across the pan, reduce the heat to medium-low to maintain a gentle simmer. The sauce should be bubbling steadily but not violently. Let it simmer for about five minutes, stirring every minute or so. During this time, the raw garlic and chili flavors will mellow, the pineapple will break down further, and all the flavors will start melding together. The liquid will reduce slightly and the kitchen will fill with an amazing sweet and spicy aroma.
- Make the cornflour slurry:
- While your sauce is simmering, prepare your thickening agent. In a small bowl, combine two tablespoons of cornflour with three tablespoons of cold water. Use a fork or small whisk to stir them together vigorously until you have a completely smooth, milky white liquid with no lumps whatsoever. The cornflour must be fully dissolved and suspended in the water, not clumped at the bottom. This step is crucial because if you add dry cornflour directly to the hot sauce or try to mix it with hot water, you'll end up with lumps that are nearly impossible to smooth out. The slurry should have the consistency of heavy cream - pourable but thick. If you want a thicker final sauce, you can increase the cornflour slightly, or for a thinner, more pourable sauce, use a bit less. Keep this slurry nearby so it's ready to add as soon as your simmering time is up.
- Thicken the sauce:
- After the sauce has simmered for five minutes and the flavors have developed, give your cornflour slurry one more quick stir to make sure nothing has settled at the bottom. Pour it into the simmering sauce in a steady stream while stirring constantly with your other hand. As soon as the slurry hits the hot liquid, you'll see it start working immediately - the sauce will begin to thicken and turn glossy within seconds. Continue stirring continuously for the next three minutes, making sure to scrape the bottom and sides of the pan so nothing sticks or burns. The sauce will transform from a thin, watery consistency to a thicker, more syrupy texture that coats the back of your spoon. It should look shiny and translucent rather than cloudy. If it seems too thick, you can thin it with a tablespoon or two of water. If it's not thick enough for your liking, make another small batch of slurry with one tablespoon cornflour and two tablespoons water and repeat the process. Keep in mind that the sauce will thicken more as it cools, so it should look slightly thinner than you want while it's still hot.
- Cool and store:
- Turn off the heat and carefully transfer the hot sauce to a heatproof bowl or leave it in the pan to cool down to room temperature. The cooling process takes about twenty to thirty minutes, and during this time the flavors will continue to develop and mature. You might notice the sauce thickening even more as it cools. Once it's reached room temperature, taste it and adjust the seasoning if needed - you might want to add a pinch more salt, a splash more vinegar for tanginess, or another spoonful of sugar if it's too tart. Transfer the finished sauce to clean glass jars or airtight containers. Glass is ideal because it won't absorb flavors or odors and you can see exactly how much sauce you have left. If you're planning to use it within the week, store it in the refrigerator where it'll stay fresh. For longer storage, portion it into smaller containers, label them with the date, and freeze for up to three months. Leave a bit of headspace in containers when freezing since liquids expand as they freeze.
 Pin it
Fresh pineapple has become one of those ingredients that completely changes how I think about sauces and marinades. The natural sweetness is so much more complex than just adding sugar - there's this bright, tropical quality with slight tanginess that makes everything taste fresher and more vibrant. When you combine pineapple with chili heat, something magical happens where each flavor makes the other more pronounced. The sweetness of the pineapple cools down the burn from the chilies just enough to keep it enjoyable rather than painful, while the chilies prevent the pineapple from being cloying or too sweet. Having a jar of this sauce in the fridge means weeknight dinners suddenly have more possibilities, whether you're glazing chicken, perking up leftover rice, or just needing something to make vegetables more exciting.
Understanding the Balance of Sweet, Sour, Spicy, and Savory
This pineapple chili sauce is a perfect example of how balancing multiple flavor profiles creates something more interesting than any single taste could achieve on its own. The four fundamental flavors working together here - sweet from the pineapple and sugar, sour from the vinegar, spicy from the chilies, and savory from the soy sauce and garlic - create what's known in cooking as a "complete" flavor profile. Each element makes the others more noticeable and enjoyable rather than competing. The sweetness doesn't just taste sugary because the vinegar's acidity cuts through it, while the heat from the chilies becomes more tolerable because the sugar tempers it. This principle is central to many Asian cuisines, particularly Thai cooking, where achieving this perfect balance is considered essential to a successful dish. When you're tasting your sauce and something feels "off" but you can't identify what, it usually means one of these four elements is out of proportion with the others. Too sweet means add more vinegar, too sour means add sugar, too spicy means more pineapple puree, and if it tastes flat overall, you need more salt or soy sauce to bring out all the other flavors.
Using This Sauce in Different Cuisines
While this sauce has Asian origins, its versatility means it crosses cultural boundaries beautifully and enhances dishes from many different cuisines. In Asian cooking, use it as a dipping sauce for spring rolls, dumplings, or wontons, or brush it on skewered meat during the last few minutes of grilling for a sticky, caramelized glaze. It works wonderfully in stir-fries - add a few tablespoons near the end of cooking to coat vegetables, tofu, or protein in that sweet-spicy goodness. For Western applications, it makes an incredible burger condiment that's far more interesting than plain ketchup, or spread it on grilled cheese sandwiches before cooking for a sweet and spicy twist. Mix it with mayonnaise to create a quick sauce for fish tacos or fried seafood. Use it as a pizza sauce base for Hawaiian-style pizza with ham and pineapple, or as a glaze for baked chicken wings that rivals any restaurant version. It even works in unexpected ways - toss roasted Brussels sprouts or cauliflower with a few tablespoons for caramelized, flavor-packed vegetables, or stir a spoonful into your next batch of coleslaw dressing for tropical flair. The sauce's ability to complement both rich, fatty foods and lighter vegetables makes it genuinely useful across your entire cooking repertoire.
The Chemistry of Thickening Sauces
Understanding how cornflour works to thicken your sauce helps you troubleshoot and adjust on the fly. Cornflour is pure starch, and starch molecules are tightly wound chains that unravel when heated in liquid. As they unravel, they tangle with each other and trap water molecules, creating that thick, glossy texture we associate with good sauce. This process happens very quickly once the starch reaches about 180°F, which is why you see immediate thickening as soon as the slurry hits your simmering sauce. The key to smooth results is ensuring the starch granules are fully separated in cold water before they hit the heat - this is why making a slurry is essential. If you add dry cornflour directly to hot liquid, the outside of each particle instantly gelatinizes and forms a waterproof coating around the dry starch inside, creating lumps that won't dissolve no matter how much you stir. Different starches behave differently - arrowroot creates a clearer, more delicate gel that breaks down under prolonged heat, while tapioca starch creates a slightly stringy texture. Cornflour is ideal here because it creates a glossy, stable sauce that holds up to reheating and doesn't break down as it sits in your refrigerator.
Adapting the Recipe for Dietary Needs
This sauce is naturally accommodating to various dietary requirements with minimal adjustments. For those following a gluten-free diet, simply swap regular soy sauce for tamari, which provides the same savory depth without any wheat-based ingredients. The rest of the recipe is already gluten-free, making this an easy switch. It's naturally vegan and vegetarian as written, containing no animal products whatsoever, which makes it perfect for plant-based eating. If you're watching sugar intake or following a low-sugar diet, you can significantly reduce the sugar amount - try cutting it in half and relying more on the pineapple's natural sweetness, though the texture will be slightly thinner and less syrupy. For low-sodium diets, use reduced-sodium soy sauce or replace it entirely with coconut aminos, which add umami flavor with much less salt. People with corn allergies who can't use cornflour can substitute arrowroot powder or tapioca starch in the same proportions for thickening, though the final texture will be slightly different. The sauce is also naturally low in fat and contains no dairy, making it suitable for those avoiding lactose or following low-fat eating patterns. Because you control every ingredient, you can adjust it precisely to fit whatever dietary framework you're working within.
Preserving and Canning for Long-Term Storage
If you want to make large batches of this sauce and preserve it properly for months at room temperature rather than just refrigerating or freezing, you can use basic water bath canning techniques. Start by sterilizing your canning jars and lids by boiling them for ten minutes, then keeping them hot until ready to fill. Make your sauce according to the recipe, and while it's still hot - ideally above 180°F - carefully ladle it into the hot jars, leaving about half an inch of headspace at the top. Wipe the rims clean with a damp cloth to ensure a proper seal, then place the lids on and screw the bands down fingertip-tight. Process the filled jars in a boiling water bath for fifteen minutes, adjusting for altitude if you're above 1000 feet elevation. The acidity from the vinegar combined with the sugar content creates an environment that prevents bacterial growth, making this sauce a good candidate for water bath canning rather than requiring pressure canning. Properly sealed jars will keep in a cool, dark pantry for up to a year. Once opened, treat them like refrigerated sauce and use within a week or two. This method is perfect if you have an abundance of pineapples from your garden or find them on sale, allowing you to preserve that peak summer flavor for enjoyment all year long.
Creative Flavor Variations to Explore
Once you're comfortable with the basic recipe, experimenting with different flavor additions can create entirely new sauce profiles while maintaining that sweet-spicy-tangy foundation. Add fresh ginger - about a tablespoon of minced ginger root brings warmth and a slight bite that complements the pineapple beautifully, creating a more complex heat alongside the chilies. Try incorporating lime juice along with or instead of some of the vinegar for a brighter, more citrus-forward version that's excellent with seafood. A tablespoon of fish sauce adds deeper umami and makes the sauce taste more authentically Thai, though it does make it non-vegetarian. For a smoky version, add a teaspoon of smoked paprika or a finely diced chipotle pepper in adobo sauce, which creates an interesting contrast with the tropical pineapple. Fresh herbs like cilantro or Thai basil stirred in at the end add freshness and aromatic complexity. You could replace half the pineapple with mango for a different tropical fruit profile, or add passion fruit pulp for intense tartness. Some cooks like adding a splash of rum or coconut milk for richness, while others incorporate lemongrass that's been pounded and simmered with the sauce then removed. These variations let you create multiple sauce versions from the same basic technique, each suited to different dishes and preferences.
Troubleshooting Common Sauce-Making Problems
Even straightforward sauces can present challenges, but understanding what went wrong helps you fix it for next time. If your sauce turned out too thin and watery even after adding the cornflour slurry, several things might have happened - your sauce may not have been hot enough when you added the slurry, so bring it back to a full simmer and add a bit more slurry. Alternatively, you may have used too much pineapple juice relative to the other ingredients, so next time use slightly less or increase the cornflour. If the sauce is too thick and gloppy, you added too much cornflour or cooked it too long - thin it out by whisking in water or pineapple juice a tablespoon at a time until you reach the desired consistency. When sauce tastes too spicy, you can't remove the heat, but you can balance it by adding more sugar and pineapple to dilute the chili concentration. If it's not spicy enough, simply add more minced fresh chilies or a pinch of cayenne pepper and simmer for another minute. Sauce that tastes flat or boring usually needs more salt or a splash more vinegar to brighten it. If you notice lumps despite making a slurry, strain the sauce through a fine-mesh sieve to remove them. Sauce that turns brown instead of staying bright needs less soy sauce next time, or you can compensate with a tiny drop of natural red food coloring made from beets.
 Pin it
This sweet chilli pineapple sauce has completely changed how I approach condiments and flavor-building in everyday cooking. What started as curiosity about making Thai-style sauce at home turned into the realization that homemade versions aren't just possible - they're actually better and simpler than buying bottles. The freshness of real pineapple creates this vibrant, tropical quality that bottled sauces try to replicate with artificial flavors but never quite achieve. There's also something empowering about knowing you can whip up a batch in less time than it takes to order takeout, using ingredients you probably already have. The sauce keeps beautifully, making it practical rather than just a novelty, and once you have a jar in your fridge, you'll find yourself reaching for it constantly - a spoonful in stir-fries, a brush on grilled meats, a dip for everything from vegetables to dumplings. It's become one of those recipes that gets shared with friends who taste it and immediately ask for the instructions, because everyone recognizes that something this flavorful and useful shouldn't be relegated to store-bought versions anymore.
Frequently Asked Questions
- → How long does homemade sweet chili sauce last?
- Keep it in the fridge for up to a week in an airtight jar. You can also freeze it for 3 months if you want to make a big batch.
- → Can I make this sauce less spicy?
- Sure! Just cut back on the chilies or use only 1 tablespoon of chili flakes instead of 2. You can always add more heat later if needed.
- → What can I use this sauce for?
- It's great for dipping spring rolls, chicken wings, or shrimp. You can also brush it on grilled meats or use it as a stir-fry sauce.
- → Can I substitute the pineapple juice?
- Pineapple juice gives it that sweet tropical flavor, but you could try orange juice or mango juice if that's what you have on hand.
- → Why did my sauce turn out too thick?
- If it's too thick, just add a tablespoon of water at a time and stir until you get the consistency you want. Reheat gently if needed.
- → Is this sauce gluten-free?
- Regular soy sauce has gluten, but you can use tamari instead and it'll be completely gluten-free. Everything else in the recipe is naturally gluten-free.