
 Pin it
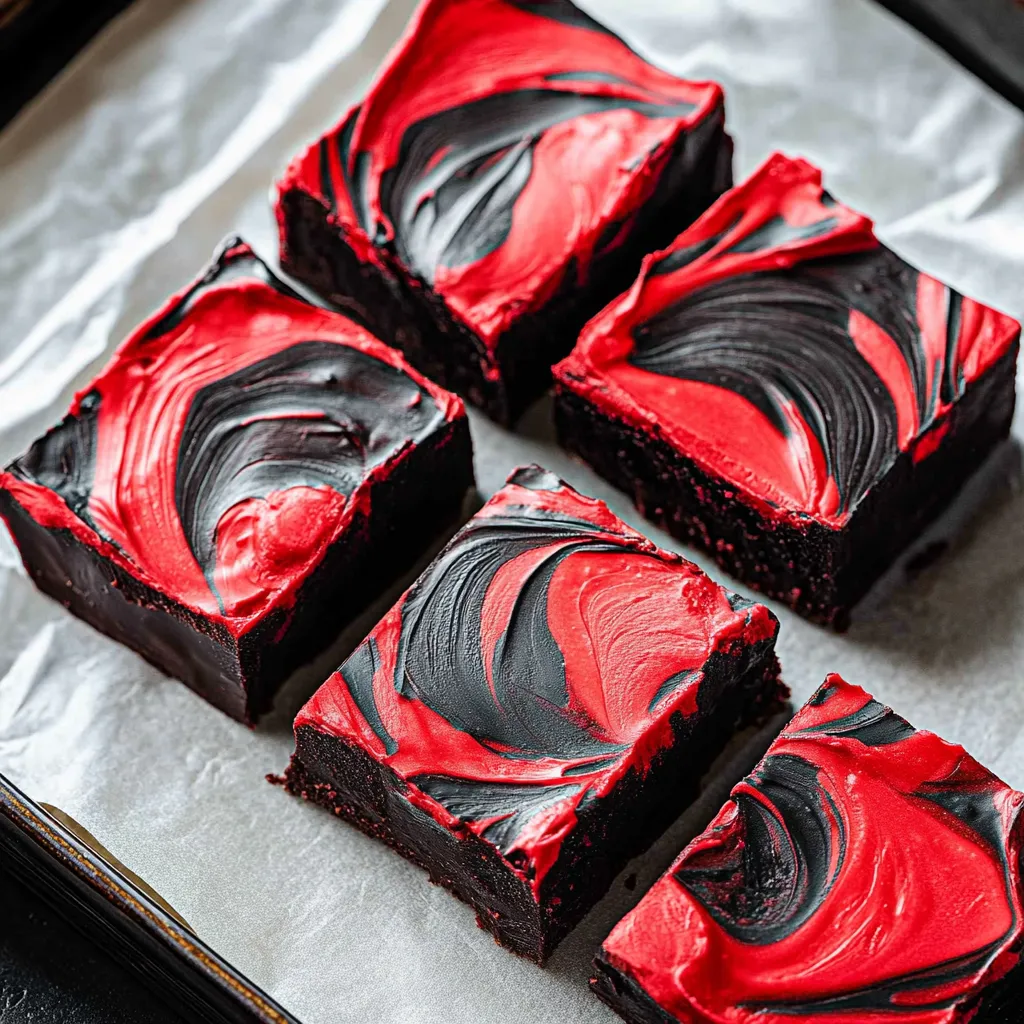
This vampire fudge creates a dramatically striking Halloween treat with bold swirls of blood red and midnight black that capture the gothic elegance of vampire lore while delivering rich, creamy sweetness in every bite. The magic happens when melted candy melts get combined with vanilla frosting to create that perfect fudge texture, then get transformed with oil-based food coloring into those haunting colors that immediately signal Halloween sophistication. What makes this recipe particularly wonderful is how it achieves such dramatic visual impact through surprisingly simple techniques that require no candy thermometer or complicated temperature monitoring.
I developed this recipe when I wanted to create something that captured the sophisticated drama of vampire aesthetics while remaining simple enough to make with kids. The combination of how striking it looks and how reliably it turns out made it my go-to Halloween treat for both family enjoyment and impressive party contributions.
Essential Ingredients and Selection Tips
- Quality candy melts: Ghirardelli offers superior taste and working properties compared to basic brands; choose white and dark chocolate varieties for flavor contrast
- Store-bought vanilla frosting: Provides the ideal consistency and stability; homemade frosting can be too variable for reliable results
- Oil-based food coloring: Essential for achieving intense colors without causing the mixture to seize; water-based colorings will ruin the texture
- Proper preparation materials: Parchment paper or foil lining makes removal effortless and prevents sticking
Detailed Step-by-Step Instructions
- Prepare your workspace efficiently:
- Line an 8x8 inch baking dish with parchment paper, leaving overhang on two sides for easy removal. If using foil, spray lightly with cooking spray. Having everything ready before you start melting ensures smooth workflow.
- Melt candy melts to perfect consistency:
- Place white and dark chocolate candy melts in separate microwave-safe bowls. Microwave each in 30-second intervals, stirring thoroughly between sessions, until completely smooth and glossy. This gradual heating prevents overheating and seizing.
- Prepare the binding frosting:
- Remove the lid and foil seal from vanilla frosting and microwave on high for about 45 seconds until warm and easily stirrable. This step makes it blend more smoothly with the melted candy melts.
- Create the vampire color palette:
- Divide the warm frosting equally between the two bowls of melted candy melts. Add red oil-based food coloring to the white chocolate mixture and black coloring to the dark chocolate mixture. Stir each until the colors are completely uniform and vibrant.
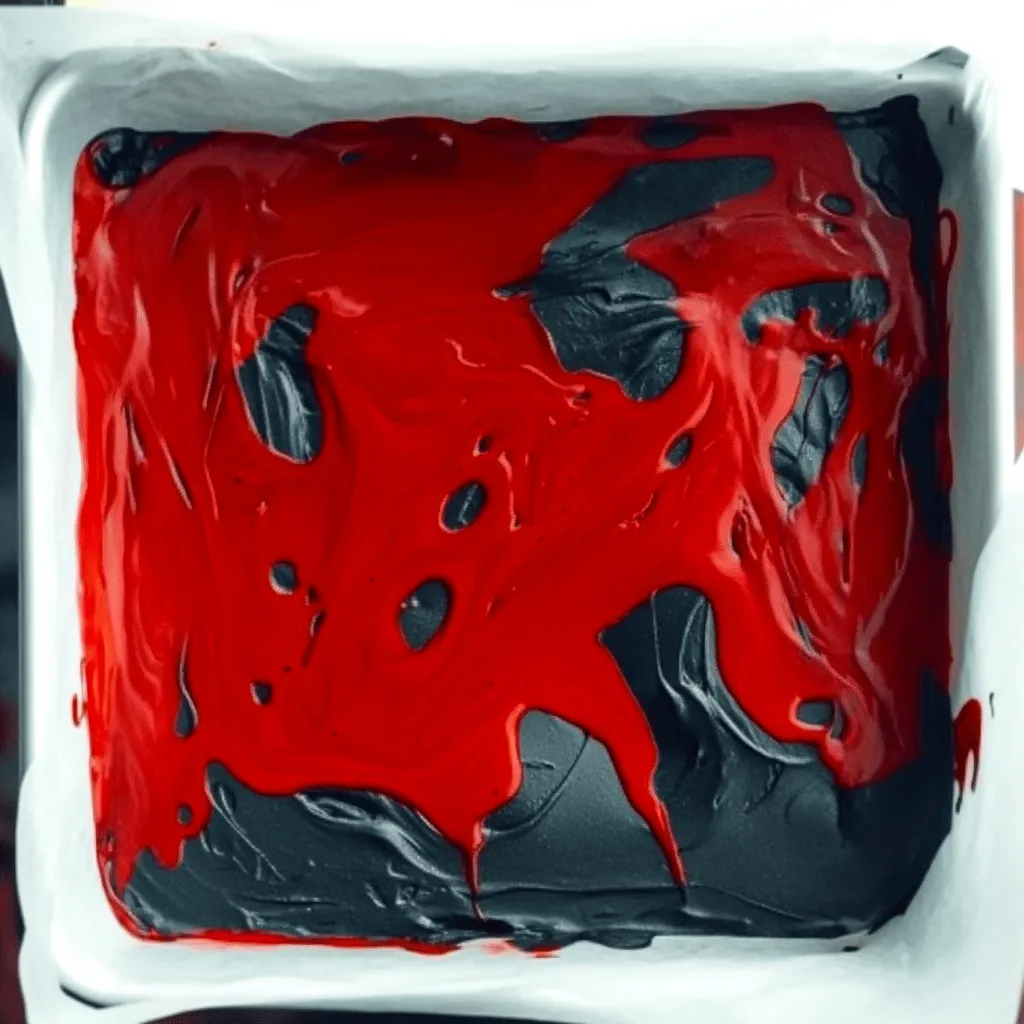
- Build the dramatic swirl pattern:
- Drop alternating spoonfuls of red and black fudge mixture into the prepared pan, creating a random pattern across the surface. Don't worry about perfect placement - randomness creates more natural-looking swirls.
- Create the signature swirl effect:
- Use a toothpick, knife tip, or skewer to gently swirl through the mixtures, creating marbled patterns without overmixing. The goal is distinct color areas with beautiful transitions between them. Tap the pan gently on the counter to level and release air bubbles.
- Set properly for clean cuts:
- Cover with plastic wrap and refrigerate for at least one hour, or until completely firm when pressed lightly. Proper setting ensures clean cuts and prevents the fudge from sticking to your knife.
- Execute professional cutting technique:
- Use the parchment overhang to lift the entire block onto a cutting board. With a sharp knife dipped in warm water and dried between cuts, slice into uniform squares or use Halloween-themed cookie cutters for shaped pieces.
 Pin it
My family considers this the ultimate Halloween treat because it looks so sophisticated and dramatic while tasting absolutely delicious. The combination of that rich, creamy texture with the bold visual impact creates something that feels both spooky and indulgent.
Advanced Swirling Techniques
For more dramatic patterns, try creating concentric circles with one color and then drawing a toothpick from center to edge in straight lines. Some bakers prefer creating heart shapes by dropping one color into another and drawing through it. Experiment with different patterns to find your signature style.
Color Intensity and Customization
Start with less food coloring than you think you need, as oil-based colors are very concentrated. You can always add more, but you can't remove excess. For different vampire-themed effects, consider deep purple instead of black, or burgundy instead of bright red for more sophisticated color schemes.
Storage and Gift-Giving Strategies
This fudge stores beautifully at room temperature for up to two weeks when properly covered. For gift-giving, cut into squares and place in decorative Halloween boxes or clear containers that showcase the dramatic colors. The bold appearance makes it perfect for Halloween party contributions.
Scaling and Equipment Considerations
This recipe doubles easily for larger batches, though you may need to work in smaller portions during the swirling step to maintain control. Use larger pans for thinner fudge that can be cut with cookie cutters, or stick with the 8x8 size for thick, luxurious squares.
Troubleshooting Common Issues
If your candy melts become too thick during mixing, return them to the microwave for 10-15 seconds to restore workability. If colors become muddy from overmixing, try creating distinct color zones rather than attempting to separate the mixed areas.
This vampire fudge represents the perfect Halloween treat because it combines dramatic visual impact with foolproof techniques that guarantee success. It proves that the most memorable holiday treats don't require advanced candy-making skills - just understanding how simple ingredients can create extraordinary results. Whether you're creating treats for trick-or-treaters or elegant Halloween party fare, this fudge delivers that ideal combination of spooky sophistication and irresistible flavor.
Frequently Asked Questions
- → How long does vampire fudge last?
- Store vampire fudge at room temperature for 1-2 weeks in an airtight container, or refrigerate for up to 3-4 weeks for firmer texture.
- → Can I use regular food coloring instead of oil-based?
- Oil-based food coloring works best as it won't seize the chocolate and gives more vibrant colors. Water-based coloring may cause the chocolate to clump.
- → What can I substitute for vanilla frosting?
- You can use cream cheese frosting or make your own with butter, powdered sugar, and vanilla extract. Just make sure it melts smoothly.
- → How do I get clean swirl patterns?
- Pour the two colors alternately, then drag a toothpick through once or twice. Don't over-swirl or the colors will muddy together.
- → Can I freeze vampire fudge?
- Yes, wrap the fudge block in plastic wrap and freeze for 2-3 months. Thaw overnight in the refrigerator before cutting and serving.
- → What size pan should I use?
- An 8x8 inch baking pan works perfectly for this recipe. Line it with parchment paper for easy removal.