
 Pin it
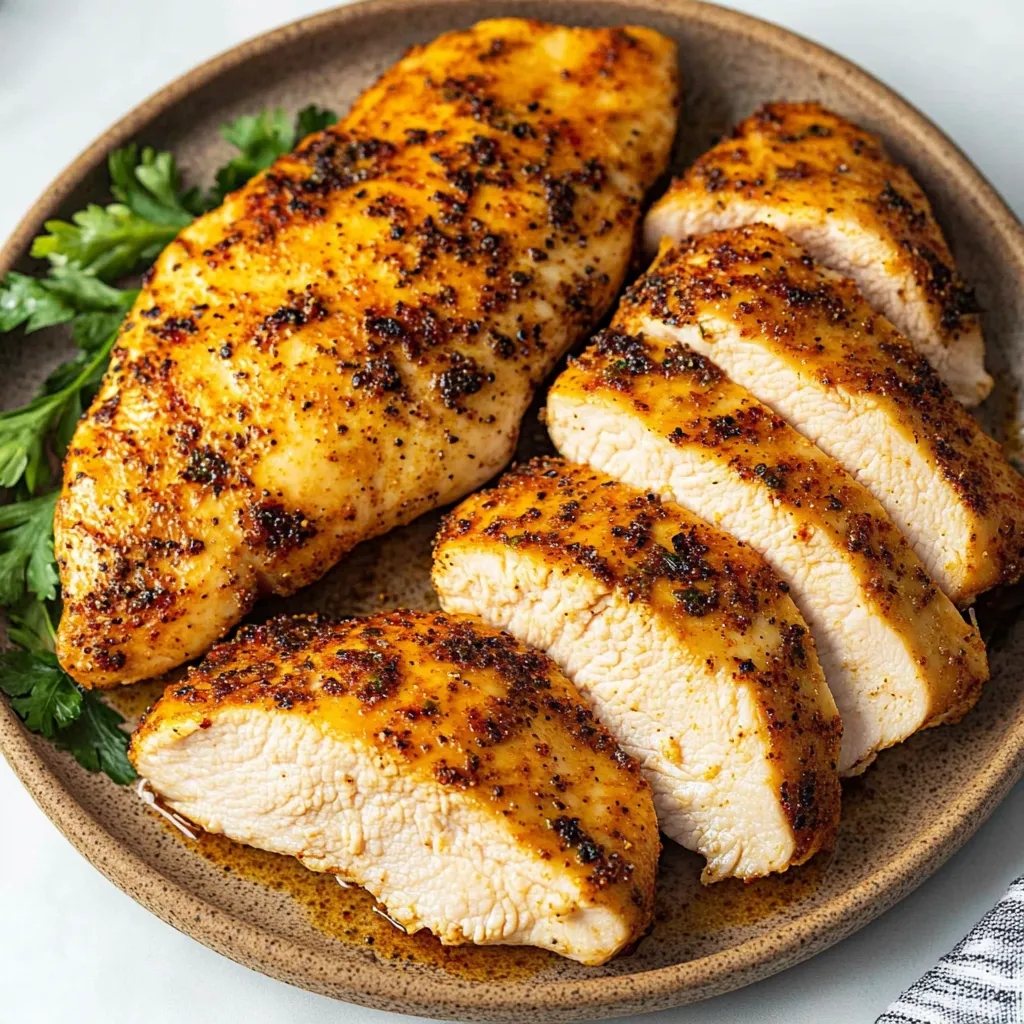
This perfectly seasoned air fryer chicken breast delivers juicy, tender results that completely transform your perception of boneless, skinless chicken. The secret lies in proper brining and precise temperature control, creating chicken that's flavorful throughout rather than just on the surface. High-heat air circulation develops a golden exterior while keeping the interior incredibly moist and succulent.
I used to avoid chicken breast because it always turned out dry and flavorless no matter what I tried. But once I discovered the brining technique and started using the air fryer, everything changed. The first time I bit into chicken breast that was actually juicy and seasoned all the way through, I couldn't believe it was the same protein I'd been struggling with for years. Now it's become my go-to for meal prep because it stays tender even when reheated.
Essential Ingredients and Selection Tips
- Quality chicken breasts: Choose similar-sized pieces for even cooking; organic or free-range often have better flavor and texture
- Coarse salt: Essential for brining; kosher salt or sea salt work best for drawing out moisture and seasoning throughout
- Extra virgin olive oil: Helps seasonings adhere and adds moisture; don't use cooking spray as a substitute
- Fresh seasonings: Paprika, garlic powder, onion powder, and black pepper create the perfect blend; replace spices older than a year
- Instant-read thermometer: Absolutely essential for preventing overcooking; digital models are most accurate and fastest
- Even thickness: Pound thicker pieces to uniform thickness for consistent cooking throughout
Detailed Step-by-Step Instructions
- Prepare chicken for optimal results:
- If chicken breasts are uneven in thickness, place them between plastic wrap and gently pound the thicker portions to create uniform thickness of about 3/4 inch. This ensures even cooking and prevents some areas from being overcooked while others remain raw.
- Execute the crucial brining step:
- Sprinkle chicken breasts generously with coarse salt on both sides (about 1/2 teaspoon per breast). Place on a plate and refrigerate for at least 30 minutes, or up to 2 hours for best results. This dry brining process seasons the meat throughout and helps retain moisture during cooking.
- Bring to room temperature:
- Remove brined chicken from refrigerator 15-20 minutes before cooking to allow it to come to room temperature. This ensures more even cooking and prevents the outside from overcooking while the center remains cold. Pat dry with paper towels to remove excess moisture.
- Create the perfect seasoning blend:
- In a small bowl, combine 1 teaspoon paprika, 1/2 teaspoon garlic powder, 1/2 teaspoon onion powder, and 1/4 teaspoon black pepper. This blend provides color, flavor, and aromatic depth without overpowering the chicken's natural taste.
- Season and oil properly:
- Drizzle chicken breasts with 1 tablespoon olive oil, rubbing to coat all surfaces evenly. Sprinkle the seasoning blend over both sides, pressing gently to help it adhere. The oil helps the seasonings stick and promotes even browning during cooking.
- Preheat and position:
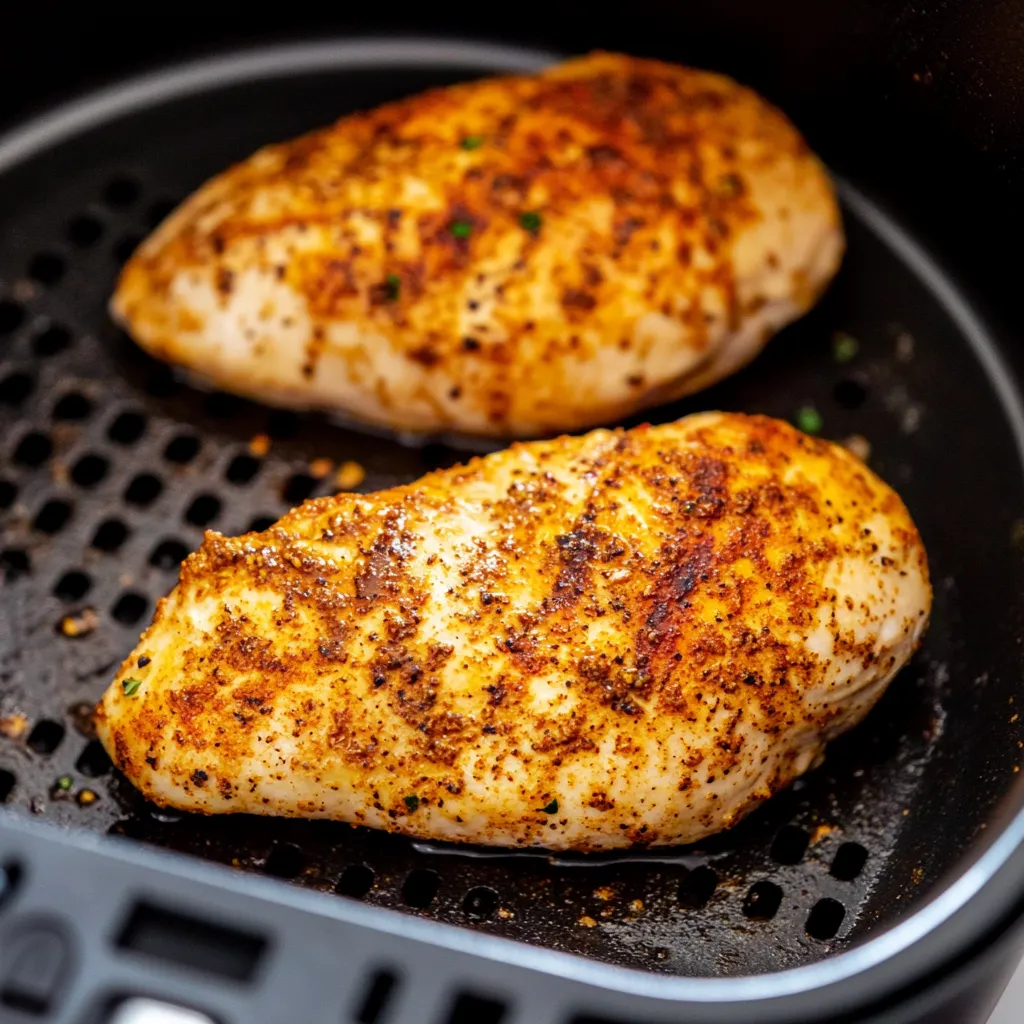
- Preheat your air fryer to 375°F for 3-5 minutes. Place seasoned chicken breasts in the basket smooth-side down, ensuring they don't touch each other. Proper spacing allows hot air to circulate around each piece for even cooking and browning.
- Cook with precision timing:
- Cook for 6 minutes, then carefully flip the chicken using tongs. Continue cooking for 2-8 additional minutes depending on size: small breasts (5-7 oz) need 2-4 more minutes, medium breasts (8-10 oz) need 4-6 minutes, and large breasts (11+ oz) need 6-8 minutes.
- Test for perfect doneness:
- Use an instant-read thermometer inserted into the thickest part of the largest breast. Remove when the internal temperature reaches 155-160°F - carryover cooking will bring it to the safe 165°F during resting. Let rest for 5-10 minutes before slicing to allow juices to redistribute.
 Pin it
The transformation this method creates never fails to amaze me. What used to be my least favorite protein has become something I genuinely look forward to eating. I love how the air fryer creates that perfect golden exterior while the brining ensures every bite is seasoned and juicy. My family actually requests chicken breast now, and I feel confident serving it to guests knowing it will be perfectly cooked every time.
Understanding Brining Science
Brining works through osmosis and protein modification. Salt draws moisture from the chicken initially, then the salt dissolves and is reabsorbed along with the moisture, seasoning the meat throughout. The salt also breaks down some protein structures, allowing the meat to hold more moisture during cooking.
Air Fryer Convection Principles
Air fryers use rapid air circulation to create convection cooking, which cooks food faster and more evenly than traditional ovens. The high heat and air movement create a Maillard reaction on the surface for browning while the shorter cooking time prevents moisture loss from the interior.
Temperature Control and Food Safety
Chicken breast is safe at 165°F, but removing it at 155-160°F and allowing carryover cooking prevents overcooking while ensuring safety. The residual heat continues cooking the protein even after removal from the air fryer, bringing it to the proper temperature during resting.
Protein Structure and Moisture Retention
Chicken breast is lean with little connective tissue, making it prone to drying out. The combination of brining, proper temperature control, and resting time helps maintain the protein's moisture-holding capacity while developing flavor throughout rather than just on the surface.
Sizing and Cooking Variations
Different sized breasts require adjusted cooking times to reach the same internal temperature. Uniformity in thickness is more important than weight - a thick breast will take longer to cook through than a thin one of the same weight, potentially leading to overcooked exteriors.
This recipe has completely changed how I approach chicken breast cooking. The reliability and consistency give me confidence to meal prep and serve to guests, while the superior flavor and texture make it something my family actually craves rather than tolerates. It's become the foundation for countless quick, healthy meals throughout our week.
Frequently Asked Questions
- → How long do I cook chicken breast in the air fryer?
- Cook for 6 minutes on the first side, flip, then 2-8 more minutes depending on thickness. Total time is usually 8-14 minutes.
- → What temperature should I set my air fryer?
- Set your air fryer to 375°F. This gives you a golden outside while keeping the inside juicy and tender.
- → Do I need to pound the chicken flat?
- Yes, pounding to even thickness helps the chicken cook uniformly. Use a meat mallet, rolling pin, or your palm to flatten it gently.
- → Can I skip the salt step?
- You can skip it, but salting for 30 minutes makes the chicken much more tender and flavorful. It's worth the extra time if you have it.
- → How do I know when the chicken is done?
- Use a meat thermometer and remove when it hits 155-160°F. The chicken will finish cooking as it rests and reach a safe 165°F.
- → What if my chicken comes out dry?
- Dry chicken usually means it was overcooked. Check the temperature early and often, and always let it rest after cooking to keep juices in.
- → Can I use frozen chicken breast?
- Thaw the chicken completely first. Frozen chicken won't cook evenly and the seasonings won't stick properly to the surface.