
 Pin it
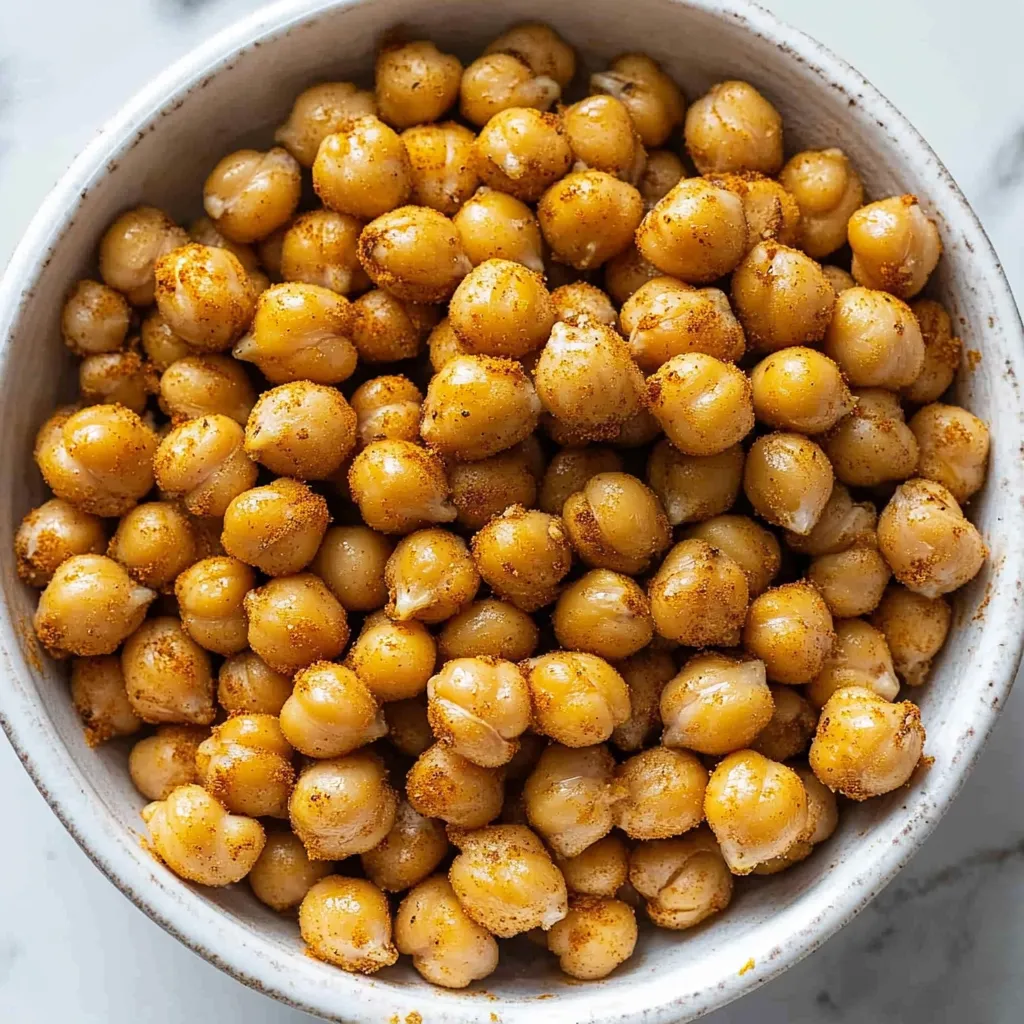
Drying canned chickpeas thoroughly and tossing them with olive oil and spices before air frying creates incredibly crispy, crunchy snacks in just 12 minutes. The high heat concentrates their nutty flavor while the seasonings add bold taste - garlic and cumin create savory depth that's absolutely addictive. These work perfectly as healthy snacking alternative to chips, or cooled and sprinkled on salads for protein and crunch. The chickpeas emerge crispy on the outside with slightly creamy centers, transforming humble canned beans into something genuinely crave-worthy.
Air fryer chickpeas became my pantry staple solution for when I'm craving something crunchy and salty but want to avoid chips. The first time I made these, I couldn't believe how crispy they got without any deep frying. The key is thoroughly drying the chickpeas - any moisture prevents proper crisping. Now I keep multiple cans of chickpeas specifically for making these because they satisfy snack cravings while being genuinely healthy. The garlic and cumin combination tastes incredible, but I've experimented with everything from ranch seasoning to cinnamon sugar.
Ingredients and Why They Matter
- Canned chickpeas (1 can, 15 ounces, drained and rinsed): Also called garbanzo beans; dried chickpeas cooked from scratch work too
- Olive oil (1 tablespoon): Helps seasonings stick and promotes crisping; avocado oil substitutes
- Ground cumin (1 teaspoon): Earthy, warm flavor
- Garlic powder (1 teaspoon): Savory depth
- Salt (½ teaspoon, or to taste): Essential seasoning
- Black pepper (¼ teaspoon): Subtle heat
Seasoning Variations:
- **Ranch:** Ranch seasoning packet or dill, garlic powder, onion powder
- **Spicy:** Cayenne pepper, chili powder, paprika
- **Italian:** Dried oregano, basil, parmesan
- **Sweet:** Cinnamon, sugar, nutmeg
- **BBQ:** Smoked paprika, brown sugar, garlic powder
How To Make It
- Drain and dry chickpeas:
- Open the can of chickpeas and pour them into a fine-mesh strainer. Rinse thoroughly under cold running water to remove the thick liquid and excess sodium. Shake the strainer vigorously to remove as much water as possible. This next step is absolutely crucial - spread the rinsed chickpeas on a clean kitchen towel or several layers of paper towels. Pat them completely dry, rolling them gently to absorb all surface moisture. Then let them air dry for 10-15 minutes if you have time. The drier they are, the crispier they'll get. You can even rub them between paper towels to remove the thin skins that come loose - removing skins helps them crisp even more, though it's optional.
- Season the chickpeas:
- Transfer the completely dry chickpeas to a medium mixing bowl. Drizzle with the olive oil and toss to coat every chickpea evenly. The oil helps seasonings stick and promotes crisping in the air fryer. Add the cumin, garlic powder, salt, and black pepper. Toss everything together thoroughly for about 30 seconds, mixing until every chickpea is uniformly coated with seasonings. They should look evenly colored with no bare spots. Taste one and adjust seasoning if needed - add more salt, spices, or a touch more oil if they seem dry.
- Preheat air fryer:
- Preheat your air fryer to 390-400°F for about 3 minutes. The exact temperature depends on your model - some run hotter than others. Preheating ensures the chickpeas start crisping immediately when added rather than sitting in a cold basket and steaming.
- Air fry in single layer:
- Spread the seasoned chickpeas in a single layer in the air fryer basket. Don't pile them up or overcrowd - they need space for hot air to circulate around them for even crisping. If your basket is small, cook in two batches rather than overcrowding. Set the timer for 12-15 minutes, depending on how crispy you want them and how your specific air fryer performs.
- Shake frequently:
- After 4 minutes, pause the air fryer and shake the basket vigorously to redistribute the chickpeas. This prevents them from sticking and ensures even browning on all sides. Continue shaking every 3-4 minutes throughout cooking. The chickpeas are done when they're golden brown, slightly shriveled, and very crispy when you bite into one. They should feel dry and crunchy rather than soft. If they're not crispy enough after 12 minutes, continue cooking in 2-minute increments, shaking between each, until they reach desired crispiness.
- Cool and serve:
- Transfer the hot chickpeas to a bowl. They'll continue crisping slightly as they cool. Let them cool for at least 5 minutes before eating - they're extremely hot right out of the air fryer. Taste and add more salt if needed. Eat warm as a snack, or let them cool completely and use as a crunchy salad topping, soup garnish, or anywhere you'd use croutons. Store leftovers in an airtight container at room temperature.
 Pin it
Air fryer chickpeas seemed too simple to be this good until trying them and understanding that the air fryer's rapid air circulation removes moisture while concentrating flavors. The chickpeas essentially roast at high heat, driving out water content and caramelizing their natural sugars. What starts as soft, bland canned beans becomes nutty, crispy snacks. The transformation happens because the dry heat and constant air flow evaporate surface moisture that would otherwise make them soggy.
Drying Technique Importance
This bears repeating because it's absolutely critical - wet chickpeas will steam in the air fryer instead of crisping. The moisture turns to steam that prevents proper browning and texture development. Taking time to thoroughly dry them, even letting them air dry for **10-15 minutes** after patting, makes dramatic difference in final crispiness. Some people even dry them overnight in the refrigerator for maximum crispiness. The skins that come loose can trap moisture, so removing them helps too.
Removing Skins
As you dry the chickpeas, you'll notice thin, papery skins start coming loose. These skins can prevent maximum crispiness because they hold moisture. While removing them is **optional**, it does improve texture. After drying, rub the chickpeas gently between paper towels or in the towel - loose skins will come off easily. You don't need to remove every single skin, but getting most of them off helps. Some people find this tedious, so skip it if you don't mind slightly less crispy results.
Oil's Role
The **tablespoon of olive oil** serves multiple purposes. It helps seasonings stick to the chickpeas rather than falling off. It conducts heat efficiently for better browning. It adds flavor and richness. Most importantly, it promotes crisping by helping drive away moisture. You can use less oil for a lighter version, but don't skip it entirely or the chickpeas won't crisp as well. Avocado oil works great and has higher smoke point if you're cooking at very high temperatures.
Seasoning Endless Options
The base recipe uses cumin and garlic for savory, Middle Eastern-inspired flavor, but the possibilities are truly endless. Make **ranch chickpeas** with ranch seasoning mix. Try **everything bagel seasoning** for fun twist. Use curry powder and turmeric for Indian flavors. Sprinkle with parmesan and Italian herbs. For a **sweet version**, toss with cinnamon and coconut sugar after cooking. Match seasonings to whatever you're serving them with or whatever you're craving.
Texture Expectations
Air fryer chickpeas won't be as uniformly crunchy as commercial roasted chickpeas you buy in bags, which are often fried. These will be **crispy on the outside with slightly creamy centers** - some people actually prefer this texture. If you want them completely crunchy throughout, cook a few minutes longer until they feel very hard when you bite into them. Just watch carefully because there's a fine line between perfectly crispy and burnt.
Storage and Reheating
Store completely cooled chickpeas in an airtight container at room temperature for up to **5 days**. They'll lose some crispiness as they sit because they absorb moisture from the air. To re-crisp, pop them back in the air fryer at **350°F for 2-3 minutes**. Don't refrigerate them - the moisture in the fridge will make them soggy. Make smaller batches and eat them fresh for best texture, or plan to re-crisp leftovers before eating.
Serving Suggestions
These versatile chickpeas work in countless ways beyond just snacking. Sprinkle over **salads** for protein and crunch instead of croutons. Add to **grain bowls** for texture. Top **soups** for garnish. Mix into **trail mix** with nuts and dried fruit. Serve as **appetizers** at parties. Pack in **lunchboxes** as healthy snacks. Kids especially love them because they're finger food that tastes like chips. The protein and fiber keep you full much longer than empty-calorie snacks.
 Pin it
These air fryer chickpeas represent the kind of recipe that proves healthy snacking doesn't mean boring or tasteless. The combination of crispy texture, bold seasonings, and satisfying protein creates something genuinely crave-worthy that happens to be good for you. When you serve these at a gathering and watch them disappear faster than chips, you know you've created something that changes minds about healthy food. Sometimes the best recipes are the ones that make nutritious ingredients taste indulgent, and these crispy chickpeas definitely accomplish that goal perfectly every single time you make them.
Frequently Asked Questions
- → Do I need to dry the chickpeas before air frying?
- Yes, pat them dry with a paper towel after rinsing. This helps them get extra crispy in the air fryer.
- → How long do air fryer chickpeas stay crispy?
- They stay crunchy for up to a week when stored in an airtight container at room temperature.
- → Can I use different seasonings?
- Absolutely! Try paprika, chili powder, or even cinnamon and sugar for a sweet version. The base recipe works with any spices you like.
- → What temperature should I set my air fryer to?
- Set your air fryer to 400°F for the best results. This high heat makes them crispy on the outside.
- → Do I need to shake the basket while cooking?
- Yes, shake it once or twice during cooking so all the chickpeas crisp up evenly on every side.
- → Can I make these without oil?
- You can skip the oil, but they won't get quite as crispy. A little oil helps the seasonings stick and adds crunch.