
 Pin it
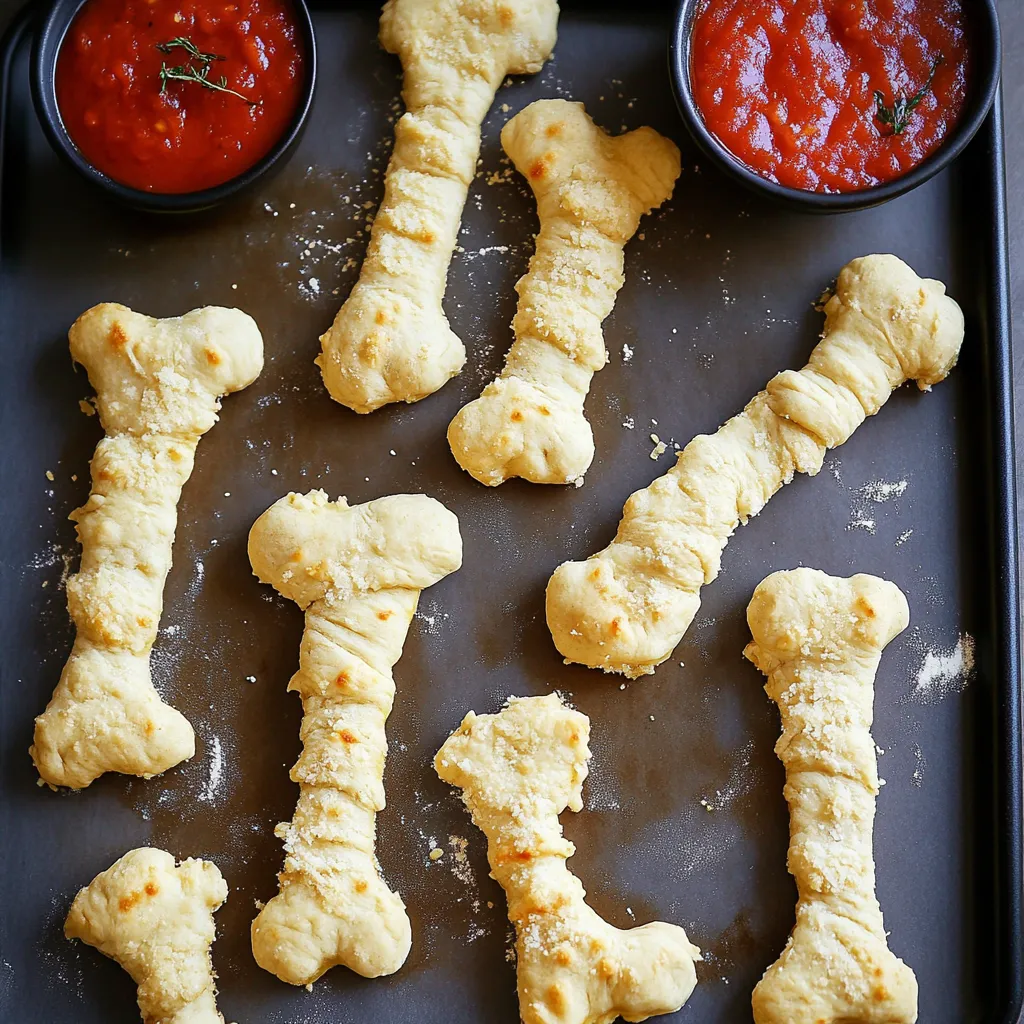
These spooky cheesy Halloween breadstick bones transform simple pizza dough into an absolutely delicious and perfectly themed treat that's guaranteed to be the hit of any Halloween gathering. With their bone-like shape, golden cheese coating, and marinara "blood" for dipping, they're creepy enough to impress kids and tasty enough to satisfy adults who are just as excited about Halloween snacks.
I absolutely live for October because it means I finally get to unleash all the creepy, fun food ideas I've been storing up all year long. These breadstick bones came to me during a particularly inspired moment when I was staring at leftover pizza dough and thinking about how to make something Halloween-themed that my whole family would actually want to eat. The first time I made them, my kids were equal parts grossed out and delighted, which is exactly the reaction you want from Halloween food.
Ingredients and Why They Matter
- All-purpose flour for dusting: keeps the pizza dough from sticking to your work surface while you roll and shape each bone
- Store-bought or homemade pizza dough: provides the perfect chewy, bread-like base that shapes easily and bakes up golden and delicious
- Melted unsalted butter: helps the cheese stick to the dough while adding rich flavor and promoting that beautiful golden-brown color
- Grated Parmesan cheese: adds a nutty, salty flavor that complements the mozzarella and creates a more complex cheese taste
- Shredded mozzarella cheese: melts beautifully and creates those irresistible cheese pulls that make these breadsticks absolutely addictive
- Marinara sauce for dipping: serves as the perfect "blood" for dipping and adds a classic pizza flavor combination
Step-by-Step Instructions
- Prepare your workspace and oven:
- Preheat your oven to 375°F and line two large baking sheets with parchment paper. Lightly dust your clean countertop or large cutting board with all-purpose flour to prevent the dough from sticking. If using store-bought pizza dough, remove it from the refrigerator about 30 minutes before you plan to work with it so it comes to room temperature and becomes easier to shape.
- Divide and portion the dough:
- Remove the pizza dough from its packaging and place it on your floured work surface. Using a bench scraper or sharp knife, divide the dough into 10 equal portions. I like to first cut the dough in half, then cut each half into 5 pieces to ensure they're all roughly the same size. Roll each portion into a smooth ball using your palms.
- Shape the basic bone structure:
- Working with one ball of dough at a time, roll it into a rope that's about 8 inches long, keeping the ends slightly thicker than the middle section. This creates the basic bone shape before you add the details. Place each shaped rope on your prepared baking sheets, spacing them about 2 inches apart to allow for spreading during baking.
- Create the bone ends:
- Using clean kitchen scissors, make a cut about 1 inch deep into each end of every breadstick rope. Then use your fingers to gently pull and stretch these cut sections outward, creating the knobby ends that make them look like actual bones. Don't worry about making them perfect - slightly irregular shapes actually look more realistic and spooky.
- Add the butter and cheese layers:
- Melt 3 tablespoons of unsalted butter in a small microwave-safe bowl. Using a pastry brush or clean fingers, coat each breadstick bone thoroughly with the melted butter, making sure to get into all the crevices of the bone ends. Sprinkle each buttered breadstick generously with grated Parmesan cheese, pressing it lightly to help it adhere.
- First baking phase:
- Place both baking sheets in the preheated oven and bake for exactly 15 minutes. The breadsticks should be starting to turn golden brown and feel set when gently touched. Remove them from the oven but don't turn off the heat - you'll be putting them back in shortly.
- Final cheese topping and baking:
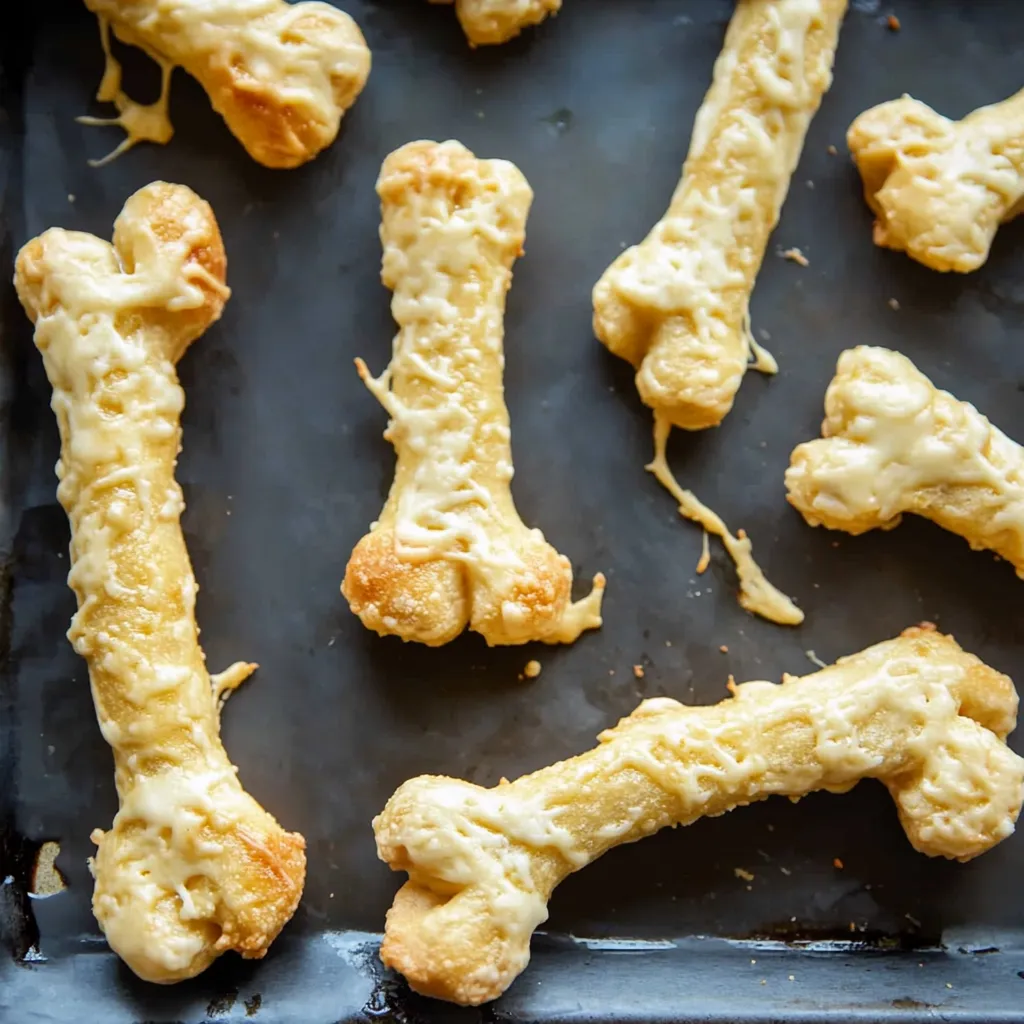
- Sprinkle the shredded mozzarella cheese evenly over all the breadsticks while they're still hot from the first baking. Return them to the oven for an additional 5-7 minutes, until the mozzarella is completely melted and starting to turn golden in spots. Remove from the oven and let them cool for just a few minutes before serving with warm marinara sauce for dipping.
 Pin it
I learned the hard way that trying to rush the dough-warming process never works out well. The first time I made these, I was impatient and tried to work with cold dough straight from the refrigerator. The results were frustrating - the dough kept snapping back into shape, and I couldn't get those nice bone ends to form properly. Now I always plan ahead and let the dough sit out for at least 30 minutes, which makes the whole process so much smoother and more enjoyable.
Perfecting the Bone Shape and Appearance
Getting that authentic bone look is easier than you might think, but there are a few tricks that make all the difference. When you're rolling out the dough ropes, don't worry about making them perfectly uniform - real bones aren't perfectly shaped either. The key is creating that distinctive wider area at each end with a slightly narrower middle section that mimics the natural shape of bones.
The scissor cuts are what really sell the bone illusion. Make sure your cuts go deep enough - about an inch - and then really stretch those cut sections outward to create the knobby bone ends. I like to give each end a little twist as I stretch it, which creates more realistic irregular shapes. The more you manipulate these ends, the more bone-like they become.
Cheese Selection and Application Techniques
The combination of Parmesan and mozzarella creates the perfect balance of flavor and texture for these breadsticks. The Parmesan adds that sharp, nutty taste that makes them more interesting than plain mozzarella sticks, while the mozzarella provides that satisfying cheese pull that everyone loves. Using freshly grated Parmesan makes a noticeable difference in both flavor and how well it adheres to the buttered dough.
Applying the butter generously is crucial for getting the cheese to stick properly and for achieving that golden-brown color. Don't be shy with it - you want every surface covered. The butter also adds flavor and helps create that slightly crispy exterior that contrasts beautifully with the soft, chewy interior. I always brush the butter into the crevices of the bone ends where cheese might otherwise fall off during baking.
Creative Variations and Serving Ideas
While these breadsticks are perfect as-is, there are so many fun ways to customize them for different occasions or preferences. For extra spookiness, you can brush them with garlic butter and sprinkle with herbs to give them a more "moldy bone" appearance. Adding a pinch of Italian seasoning to the Parmesan creates more complex flavors that complement the marinara dipping sauce beautifully.
The dipping sauce possibilities are endless beyond traditional marinara. A creamy garlic sauce creates a nice contrast to the "blood" theme, or you could serve multiple sauces in small bowls labeled with spooky names. Ranch dressing, cheese sauce, or even a spicy arrabbiata sauce all work wonderfully. For parties, I like to serve them on a dark platter with dry ice (safely contained) for extra dramatic effect.
Make-Ahead and Storage Strategies
These breadsticks are definitely best served fresh and warm, but you can do quite a bit of prep work ahead of time to make party day easier. You can shape all the bones in the morning, place them on the baking sheets, cover with plastic wrap, and refrigerate until you're ready to brush with butter and bake. Just let them come back to room temperature for about 15 minutes before baking.
If you end up with leftovers (which is rare in my house), they reheat surprisingly well in a 350°F oven for about 8-10 minutes. The microwave will work in a pinch, but the oven method keeps them from getting soggy and maintains that slightly crispy exterior. I've even had success freezing the fully baked and cooled breadsticks, then reheating them straight from frozen - just add a few extra minutes to the reheating time.
These cheesy Halloween breadstick bones have become an absolute staple in our October meal rotation because they perfectly capture that fun, spooky spirit while being genuinely delicious food that everyone wants to eat. There's something so satisfying about watching kids' faces light up when they see these "bones" on the table, followed immediately by their excitement when they taste how amazing they are. They've proven that Halloween food doesn't have to sacrifice taste for novelty - sometimes the best themed foods are the ones that just happen to look spooky while tasting absolutely incredible.
Frequently Asked Questions
- → Can I use store-bought pizza dough?
- Yes! Store-bought pizza dough works perfectly fine and saves time. Just make sure it's at room temperature before rolling.
- → How do I make the bone shape?
- Roll dough into ropes with thicker ends, then use kitchen scissors to cut 1-inch slits at each end and pull apart to create the bone look.
- → What cheese works best?
- The recipe uses Parmesan and mozzarella, but you can try cheddar or any melting cheese you have on hand.
- → How long do these stay fresh?
- They're best eaten warm and fresh, but you can store leftovers in the fridge for 2-3 days and reheat in the oven.
- → Can I make these ahead of time?
- You can shape the breadsticks and refrigerate them for a few hours, then add cheese and bake when ready to serve.
- → What dipping sauces work well?
- Marinara is classic, but ranch, garlic butter, or cheese dip all taste great with these breadsticks.