
 Pin it
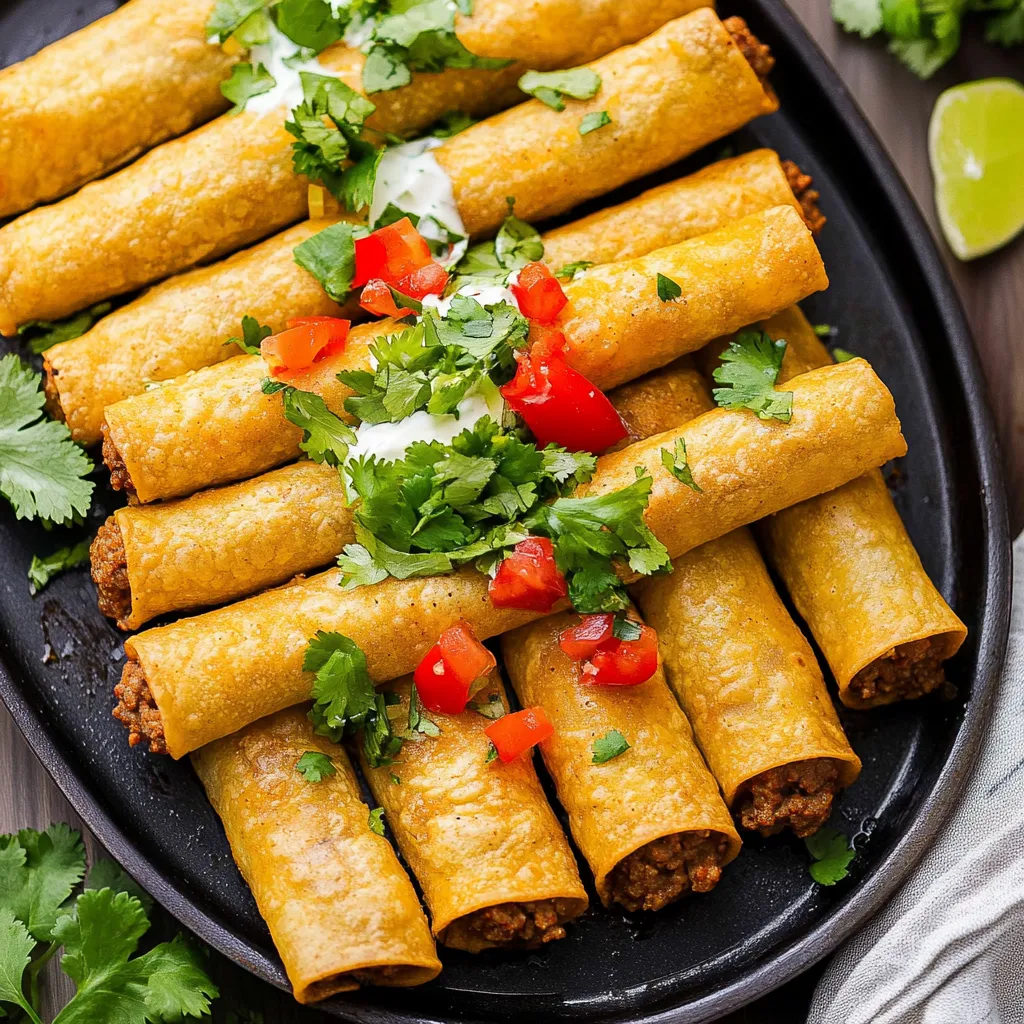
Beef taquitos are one of those crowd-pleasing snacks where seasoned ground beef and shredded cheese get rolled tightly in small corn tortillas, then baked or air-fried until the tortillas become golden and crispy while the filling stays hot and melty inside. The technique is straightforward once you understand that softening the tortillas briefly in the oven before filling prevents them from cracking when you roll them, and that placing them seam-side-down without toothpicks allows the weight of the taquito to keep itself sealed during cooking. What makes these particularly appealing is how homemade versions taste dramatically better than frozen store-bought taquitos with their preservatives and mystery fillings, and how they work equally well as game-day appetizers, after-school snacks, or quick weeknight dinners when served with rice and beans.
I started making beef taquitos about eight years ago after buying frozen ones from the grocery store and being disappointed by their bland filling and soggy texture even after proper baking. The first batch I made at home cracked and split when I tried to roll them because I didn't soften the tortillas first, and cold, stiff corn tortillas break rather than bend. After learning that warming tortillas for just three minutes makes them pliable enough to roll tightly without cracking, and that brushing them with oil creates crispy texture during baking, they became reliably successful. Now I make double batches regularly because they disappear within minutes of leaving the oven.
Ingredients and What Makes Them Essential
- Lean Ground Beef (1 pound): Ground beef forms the filling base. Use 90% lean for good flavor without excessive grease. You can substitute ground turkey or pork for different flavor.
- Yellow Onion (1 small, minced): Onion adds savory depth and texture. Mince it finely so it distributes throughout the filling.
- Garlic (3 cloves, minced): Fresh garlic provides pungent, aromatic flavor. Don't substitute jarred garlic or powder which taste different.
- Diced Green Chiles (one 4-ounce can): Green chiles add mild heat and tangy flavor. Use canned diced green chiles, not jalapeños which are too spicy.
- Taco Seasoning (2 tablespoons): Provides the essential Mexican spice blend. Use store-bought or homemade taco seasoning.
- Small Corn Tortillas (12 to 15, about 6-inch diameter): Corn tortillas are traditional for taquitos because they crisp better than flour tortillas. The small size is perfect for individual taquitos.
- Shredded Mexican Blend Cheese (1½ cups): Cheese provides melty richness. Mexican blend contains cheddar, Monterey Jack, and sometimes queso quesadilla. You can use straight cheddar or pepper jack for more heat.
- Olive Oil (for brushing): Oil creates golden, crispy exterior during baking. Use about 3 tablespoons total.
- Kosher Salt and Black Pepper (to taste): Season the beef filling as needed.
Step-by-Step Instructions
- Cook the Beef Filling:
- Place a large skillet over medium-high heat. Add 1 pound of ground beef and 1 minced onion. Cook, breaking up the meat with a wooden spoon or spatula, for about 6 to 8 minutes until the beef is browned and no longer pink. If using higher-fat ground beef, drain excess grease. Add 3 cloves of minced garlic, the 4-ounce can of diced green chiles (drained), and 2 tablespoons of taco seasoning. Stir everything together and cook for another 2 minutes until fragrant and well combined. Taste and season with salt and pepper if needed. Remove from heat and set aside to cool slightly while you prepare the tortillas.
- Prepare the Tortillas:
- Preheat your oven to 350°F. Line a large baking sheet with aluminum foil and brush it lightly with olive oil to prevent sticking. This is important - ungreased foil causes the tortillas to stick. Working in batches, arrange 4 to 5 corn tortillas in a single layer on the prepared baking sheet. Brush the tops of the tortillas lightly with olive oil. Place in the preheated oven for 3 to 4 minutes - just long enough to soften them and make them pliable. They should be warm and flexible, not crispy. Remove from the oven and set aside. Repeat with the remaining tortillas, working in batches until all are softened. This step is crucial - cold, stiff tortillas will crack when you try to roll them.
- Assemble the Taquitos:
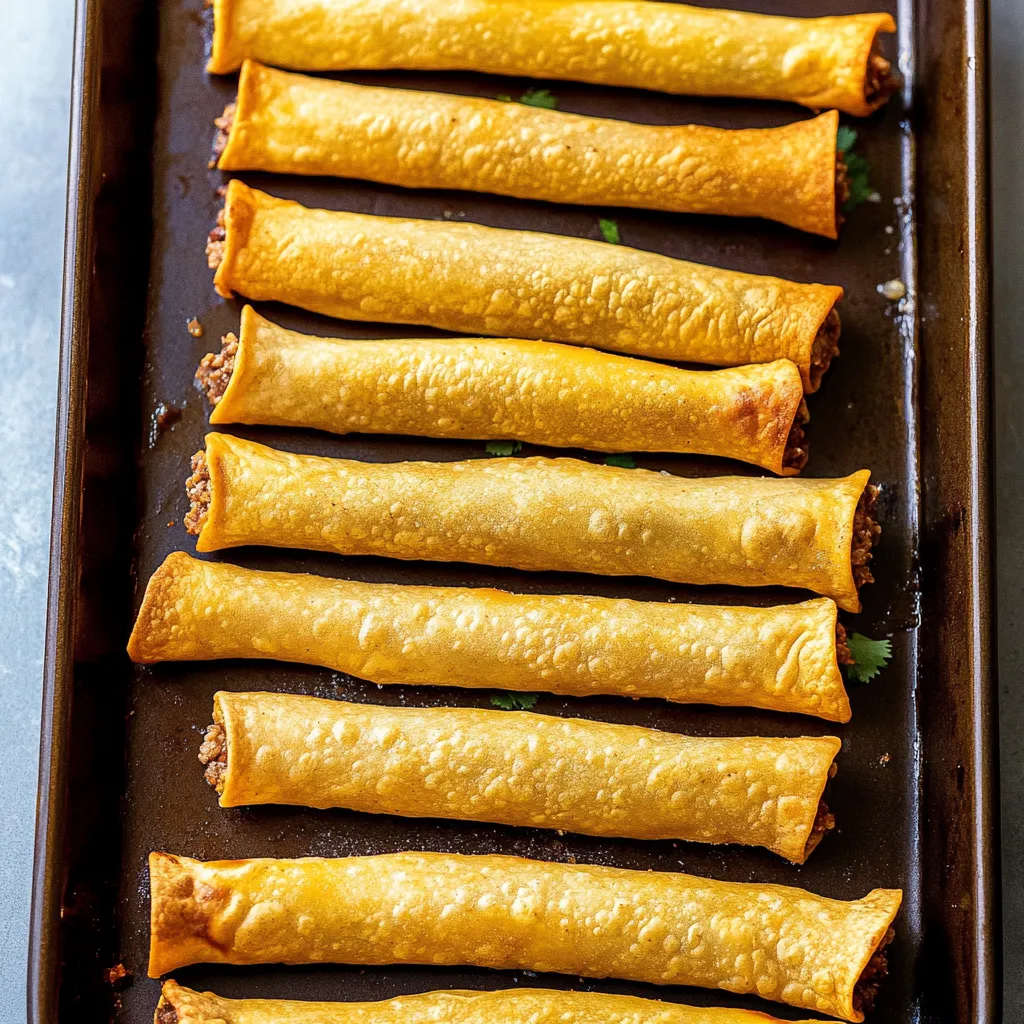
- Increase oven temperature to 400°F. Working with one softened tortilla at a time, place about 2 tablespoons of the beef filling across the lower third of the tortilla (the part closest to you). Don't overfill or the taquito will be hard to roll and the filling will squeeze out the ends. Sprinkle about 1 tablespoon of shredded cheese over the beef. Starting at the edge closest to you (where the filling is), roll the tortilla up tightly like a cigar, keeping the filling enclosed. Place the rolled taquito seam-side-down on the prepared baking sheet. The weight of the taquito will keep it sealed - you don't need toothpicks. Repeat with remaining tortillas and filling, placing taquitos close together but not touching on the baking sheet. Once all taquitos are assembled and on the baking sheet, brush the tops with more olive oil to promote browning and crisping.
- Bake:
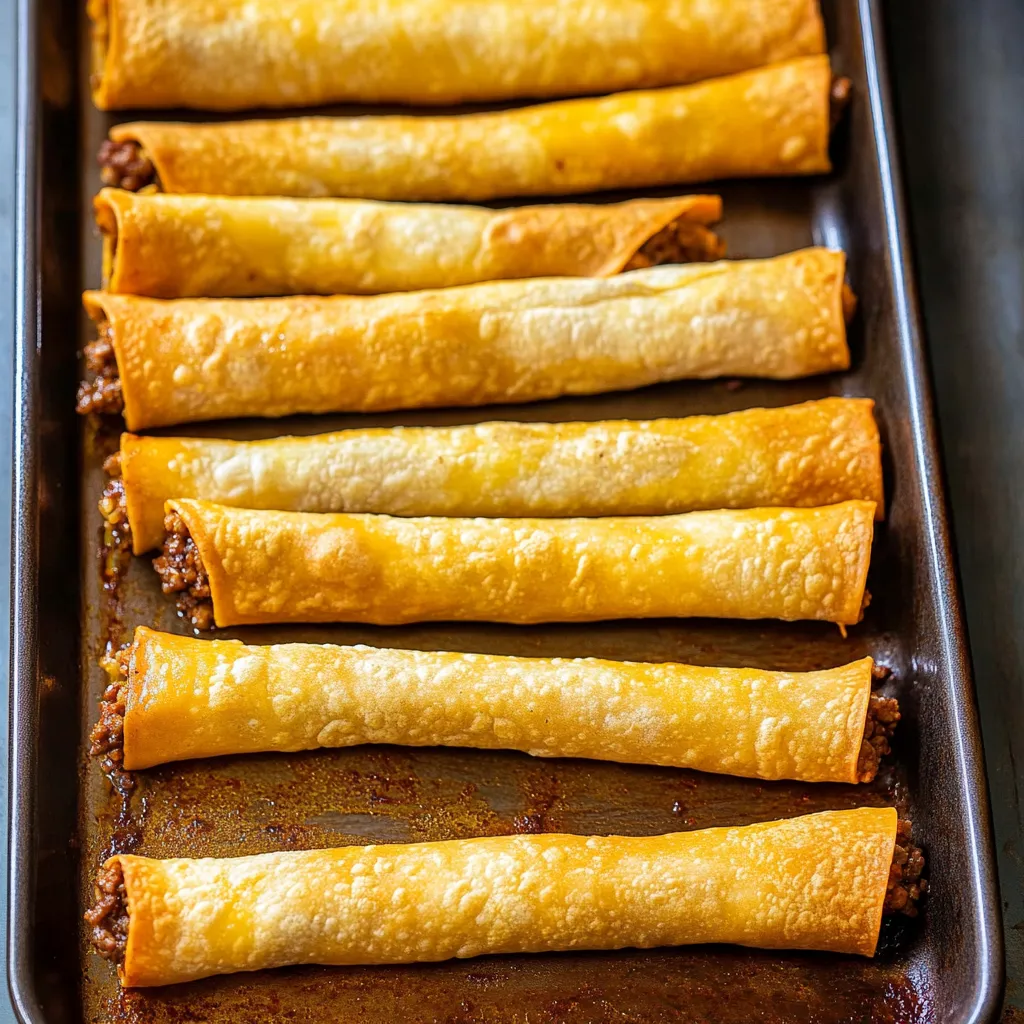
- Place the baking sheet in the 400°F oven and bake for 15 minutes. Remove from the oven and carefully turn each taquito over using tongs so the other side can brown. Return to the oven and bake for an additional 10 minutes until both sides are golden brown and crispy. Total baking time is 25 minutes.
- Serve:
- Remove from the oven and let cool for about 2 to 3 minutes before serving - the filling will be very hot. Serve with sour cream, salsa, guacamole, cilantro lime sauce, or your favorite dipping sauces.
- Air Fryer Method:
- If using an air fryer, assemble taquitos as directed above. Brush them with oil. Place taquitos in the air fryer basket in a single layer with space between each one - don't overcrowd or they won't crisp properly. You'll likely need to work in batches. Air fry at 400°F for 5 to 8 minutes, then carefully flip each taquito using tongs. Air fry for another 5 minutes until golden and crispy. Total time is 10-13 minutes.
 Pin it
My brother who claims frozen taquitos from 7-Eleven are "perfectly fine" and that homemade versions aren't worth the effort tried these at a family gathering without knowing I'd made them. He ate six and asked where I bought them, clearly expecting me to name a restaurant or specialty store. When I told him I made them in my kitchen, he looked skeptical and insisted they couldn't be homemade because they were too good. Converting the frozen-food-defender through proper technique feels like a genuine victory.
Understanding Corn Versus Flour Tortillas
The recipe specifies corn tortillas, and this matters for texture and authenticity. Corn tortillas are made from masa harina (treated corn flour) and water, creating a distinctive corn flavor and texture that crisps beautifully when baked or fried. They become genuinely crispy and crunchy with a slight toasted corn flavor. Flour tortillas are made from wheat flour, water, and fat, creating softer, more pliable texture that doesn't crisp as well. When baked, flour tortillas tend to get chewy rather than crispy. For taquitos specifically, where crispy exterior is essential, corn tortillas are superior. They also won't become soggy as quickly when served with wet toppings. The small size (6-inch) is traditional - larger tortillas would create unwieldy taquitos that are hard to eat in a few bites.
Why Softening Tortillas First Prevents Cracking
The instruction to warm tortillas in the oven for 3-4 minutes before rolling isn't optional - it's what prevents the frustrating cracking and splitting that ruins taquitos. Corn tortillas contain no fat or gluten, making them naturally stiff and brittle when cold or at room temperature. When you try to roll cold corn tortillas, they crack and break rather than bending. Warming them briefly activates residual moisture in the tortillas and makes them temporarily pliable and flexible. During this warm state, they can be rolled tightly without cracking. As they cool after rolling and during baking, they firm up again and hold their rolled shape. This brief warming step - just 3-4 minutes, not long enough to make them crispy - is the difference between successful taquitos and broken tortilla pieces with exposed filling.
The Importance of Seam-Side-Down Placement
The instruction to place taquitos seam-side-down on the baking sheet without toothpicks relies on physics. The weight of the filled taquito pressing against the baking sheet keeps the seam closed during cooking. As the tortilla heats and crisps, it sets in that rolled position. The seam essentially "glues" itself through the dehydration that occurs during baking. If you placed taquitos seam-side-up, gravity would cause them to unroll. Toothpicks work but aren't necessary with this method and add annoying extra steps of inserting before baking and removing before eating. The seam-side-down method is simpler and works perfectly as long as you rolled the taquitos tightly initially.
Storage, Reheating, and Freezing
Cooked taquitos store and reheat reasonably well. Let them cool completely, then store in an airtight container in the refrigerator for up to 4 days. To reheat, use the oven method for best results: place on a baking sheet in a 350°F oven for about 10 minutes until heated through and re-crisped. The microwave works but makes them soggy rather than crispy - if using microwave, wrap in a barely damp paper towel and heat in 30-second intervals. Air fryer reheating works excellently: place in a single layer and air fry at 375°F for about 5 minutes. For freezing, freeze cooked and cooled taquitos in a single layer on a baking sheet until solid, then transfer to freezer bags. Freeze for up to 1 month. Reheat from frozen in a 350°F oven for about 15 minutes.
Variations and Different Fillings
While seasoned ground beef is classic, you can create variations using the same rolling and cooking technique. For chicken taquitos, use shredded cooked chicken with taco seasoning. For bean and cheese, use refried beans and cheese. For carnitas, use shredded pork with salsa verde. For breakfast taquitos, use scrambled eggs, cheese, and bacon or sausage. For potato taquitos, use seasoned mashed potatoes with cheese. For shredded beef, use leftover pot roast or barbacoa. Each variation maintains the crispy-rolled format while creating different flavor profiles. The key is ensuring the filling is relatively dry - too much moisture makes the tortillas soggy and they won't crisp properly.
Serving Suggestions and Accompaniments
Taquitos work beautifully in various meal contexts. As appetizers, serve with multiple dipping sauces - sour cream, salsa, guacamole, queso, cilantro lime sauce, or chipotle crema. For snacks, serve with carrot and celery sticks and ranch dip alongside. As a meal, serve 3-4 taquitos per person with Mexican rice, refried beans, and a simple salad. For parties, arrange on a large platter with small bowls of various sauces for dipping. For kids' meals, serve with fruit and veggies. The crispy taquito format makes them easy to eat with hands, though having plenty of napkins available is wise since the filling can be messy.
Troubleshooting Common Problems
When beef taquitos don't turn out right, there's usually a fixable cause. If tortillas crack when rolling, you didn't soften them enough or they cooled - warm them longer and work quickly while warm. If they unroll during baking, you didn't roll tightly enough or placed them seam-side-up - roll tighter and place seam-down. If they're soggy instead of crispy, you didn't brush with enough oil or oven temperature is too low - use more oil and verify temperature. If filling leaks out, you overfilled them - use only 2 tablespoons filling per taquito. If they stick to foil, you didn't grease it - always brush foil with oil first. If they burn, oven is too hot - reduce to 375°F. Most issues relate to tortilla preparation, rolling technique, or oil application.
 Pin it
After making beef taquitos probably fifty times over the past eight years, they've become one of my most reliable crowd-pleasers because they consistently disappear within minutes while being genuinely practical to make in large batches. I appreciate how homemade versions with real ingredients taste dramatically better than frozen store-bought ones with their mystery fillings. The ability to use leftover taco meat makes these an excellent way to repurpose dinner into next-day snacks. Knowing the simple secrets - soften tortillas first, roll tightly, place seam-down - transforms something that could be frustrating into something reliably successful. This represents exactly what crowd-pleasing food should be - impressive enough for parties, practical enough for weeknight dinners, genuinely delicious rather than just convenient, and appealing to both kids and adults without requiring separate versions for different preferences.
Frequently Asked Questions
- → Can I use flour tortillas instead of corn?
- Yes, flour tortillas work fine, but corn tortillas give you that authentic crispy texture and keep them gluten-free. Just make sure to warm them first so they don't crack.
- → How do I keep the taquitos from falling apart?
- The key is warming the tortillas before rolling and placing them seam-side down on the baking sheet. The cheese also helps seal them as it melts.
- → Can I make these ahead of time?
- Absolutely! Roll them up and store in the fridge for up to 24 hours before baking. You can also freeze uncooked taquitos for up to 3 months.
- → What can I serve with beef taquitos?
- Salsa, guacamole, sour cream, and pico de gallo are all great choices. Some people love them with queso or ranch dressing too.
- → Can I fry these instead of baking?
- Yes, you can fry them in oil for an even crispier result. Heat about an inch of oil in a pan and fry each taquito for 2-3 minutes per side until golden.
- → How do I store leftovers?
- Keep them in an airtight container in the fridge for up to 3 days. Reheat in the oven at 350°F for about 10 minutes to get them crispy again.