
 Pin it
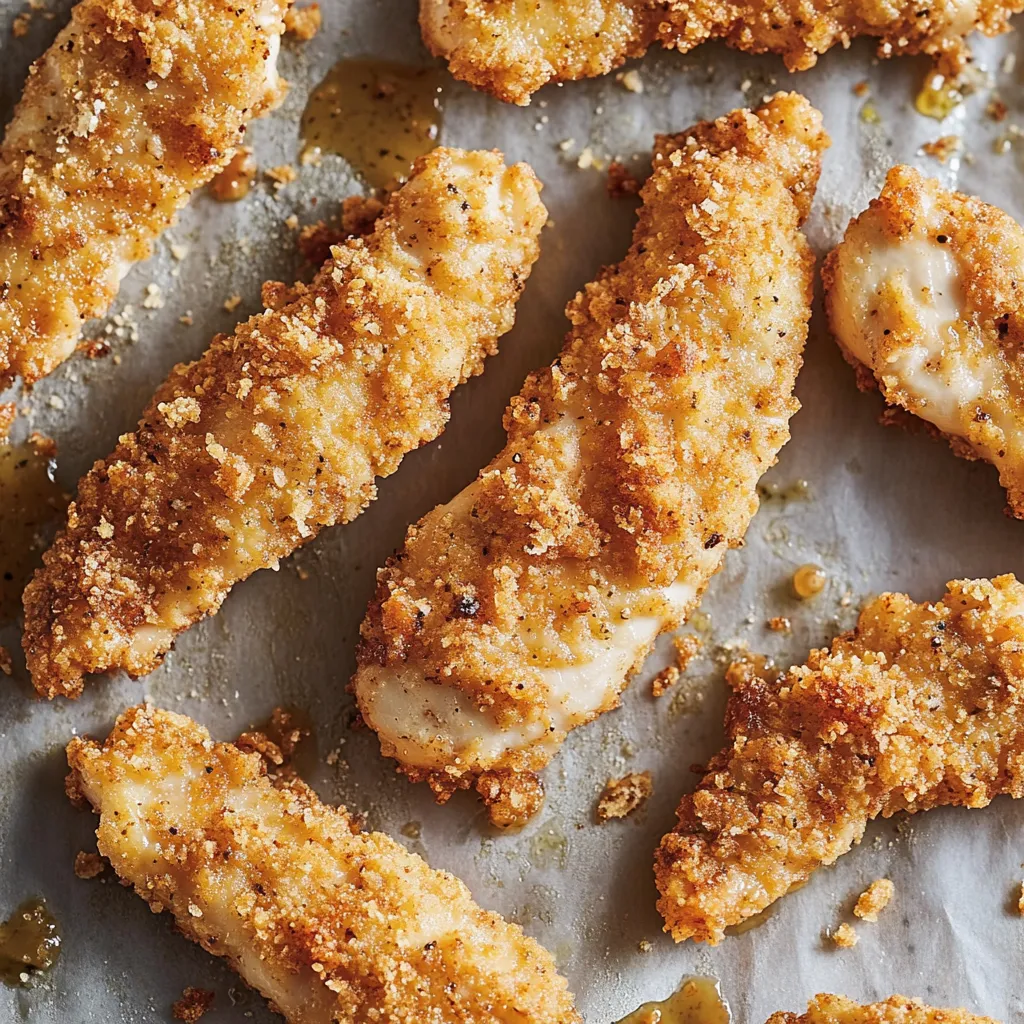
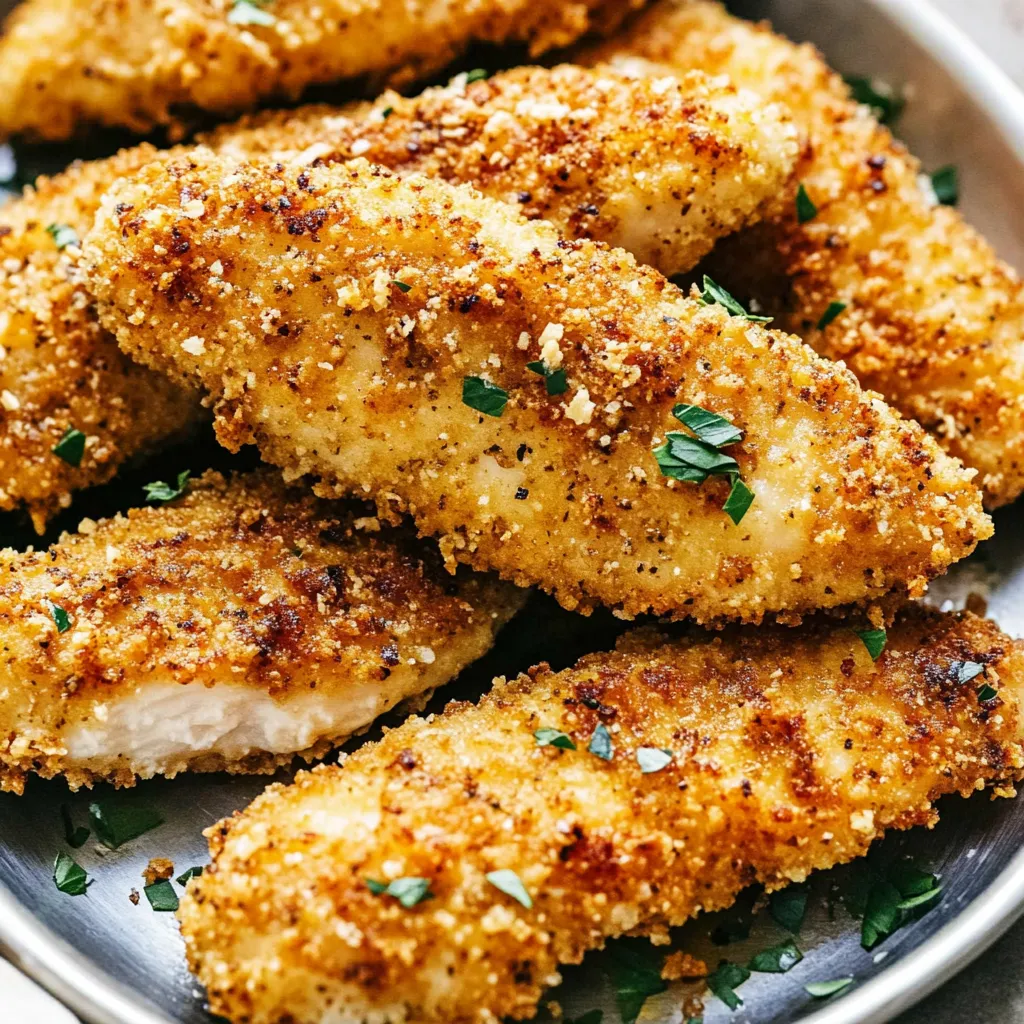
Crispy on the outside, juicy on the inside, these garlic parmesan chicken tenders elevate a family favorite to new heights. The secret lies in the light, airy panko coating that creates the perfect crunch while baking, eliminating the need for deep frying without sacrificing that satisfying texture.
I first made these chicken tenders when trying to create a healthier version of my children's restaurant favorite. The response was immediate – even my pickiest eater cleaned his plate and asked if we could have them again tomorrow. My husband, who typically reaches for the hot sauce with chicken, ate these without any additions, saying the flavor spoke for itself.
Ingredients
- Chicken tenders – These boneless strips are perfectly sized for even cooking and ideal for handling. Their natural tenderness ensures juicy results every time.
- All-purpose flour – Creates the essential first layer that helps all subsequent coatings adhere properly. It also seals in moisture for juicier chicken.
- Olive oil – Helps the panko coating crisp beautifully in the oven while adding subtle flavor. It also helps the seasonings and garlic distribute evenly over each tender.
- Fresh garlic – Minced garlic provides aromatic flavor that permeates the entire coating. Its savory punch transforms ordinary tenders into something special.
- Dried basil – Adds herbaceous notes that complement both the garlic and parmesan. The dried version provides consistent flavor throughout the year.
- Paprika – Contributes subtle warmth and beautiful color to the finished tenders. Its mild flavor enhances without overwhelming.
- Panko breadcrumbs – The star ingredient that creates that unmistakable crispy, light texture. Its airy structure results in a crunchier coating than regular breadcrumbs could provide.
- Parmesan cheese – Adds salty, nutty richness that browns beautifully in the oven. The cheese also helps create those irresistible crispy edges everyone fights over.
Step-by-Step Instructions
- Prepare your workspace –
- Preheat your oven to 400°F and line a baking sheet with parchment paper or lightly grease it. The high temperature is key for achieving that crispy exterior.
- Trim the chicken –
- Remove any visible fat from the chicken tenders. If using chicken breasts, slice them into even strips about 1-inch wide for consistent cooking.
- Set up your dredging station –
- Arrange three shallow bowls in a row for the three-step coating process. This assembly line makes the process neat and efficient.
- Prepare the flour mixture –
- In the first bowl, combine the flour with salt and pepper, whisking to distribute the seasonings evenly. This seasoned flour creates the foundation of flavor.
- Mix the garlic oil –
- In the second bowl, combine olive oil with minced garlic, stirring well. The oil helps the garlic stick to the chicken while creating the moisture that the final coating will adhere to.
- Create the coating mixture –
- In the third bowl, combine panko breadcrumbs, grated parmesan cheese, dried basil, and paprika. Mix thoroughly to ensure even distribution of the cheese and seasonings throughout the panko.
- Coat the chicken –
- Working with one tender at a time, dredge it first in the flour mixture, shaking off any excess. Next, dip it into the garlic oil, ensuring it's evenly coated. Finally, press it into the panko mixture, gently pressing to ensure the coating adheres well on all sides.
- Arrange for optimal crispiness –
- Place the coated tenders on the prepared baking sheet, leaving space between each piece for air circulation. This spacing ensures even browning and crispiness all around.
- Bake to golden perfection –
- Place the tenders in the preheated oven and bake for 15 minutes. Then flip each piece and continue baking for another 5-8 minutes until the coating is golden brown and the internal temperature reaches 165°F.
- Rest briefly before serving –
- Allow the tenders to rest for about 2 minutes after removing from the oven. This brief rest helps the juices redistribute for maximum tenderness.
 Pin it
The transformation that happens in the oven is remarkable – what goes in as pale, coated chicken emerges golden brown with a satisfyingly crunchy exterior that gives way to perfectly juicy meat. The aroma of garlic, parmesan, and herbs fills the kitchen, making it nearly impossible to wait until they're done.
My Italian grandmother always insisted that the simplest ingredients create the most satisfying meals when prepared with care. When I first served her these chicken tenders, skeptical that anything baked could match her fried version, she took one bite and smiled. "This is clever cooking," she said, "getting all that crunch without the mess." Coming from her, there was no higher praise.
Perfect Pairings
These versatile tenders pair beautifully with countless sides. For a complete meal, serve alongside roasted vegetables, a fresh garden salad, or homemade sweet potato fries. They're also delicious sliced and added to pasta with marinara sauce or tucked into a wrap with crisp lettuce and your favorite sauce.
Dipping Sauce Delights
- Creamy garlic aioli
- Pesto mayo
- Marinara sauce
- Buffalo sauce cut with a bit of ranch or blue cheese
Make-Ahead and Storage Tips
For busy weeknights, prepare the chicken up through the coating step and refrigerate on a baking sheet for up to 4 hours before baking. To make mornings easier, pack cooled leftovers in lunch boxes with an ice pack – they're delicious cold or at room temperature.
After countless batches of these tenders over the years, I've found they consistently deliver that perfect combination of crispy exterior and juicy interior that makes chicken tenders so beloved. There's something particularly satisfying about achieving that ideal texture through baking rather than frying – not just for the health benefits but for the ease of preparation and cleanup. Whether serving them to discerning adults or picky children, these garlic parmesan chicken tenders never fail to impress, proving that simple ingredients prepared thoughtfully create the most memorable family meals.
Frequently Asked Questions
- → Can I use chicken breasts instead of tenders?
- Yes! Slice boneless chicken breasts into strips about 1-inch thick. They may need 2-3 minutes extra cooking time depending on thickness.
- → What can I serve with these chicken tenders?
- These go great with roasted potatoes, a simple salad, steamed vegetables, or mac and cheese for a kid-friendly meal.
- → Can I make these ahead of time?
- You can bread the chicken up to 2 hours ahead and refrigerate until ready to bake. For best crispiness, they should be eaten fresh from the oven.
- → What's a good substitute for panko breadcrumbs?
- Regular breadcrumbs work fine, though the texture won't be quite as crispy. For a gluten-free option, try crushed corn flakes or gluten-free breadcrumbs.
- → How do I know when the chicken is done?
- Chicken is safely cooked when it reaches an internal temperature of 165°F. If you don't have a thermometer, cut into the thickest part - the meat should be white with no pink.