
 Pin it
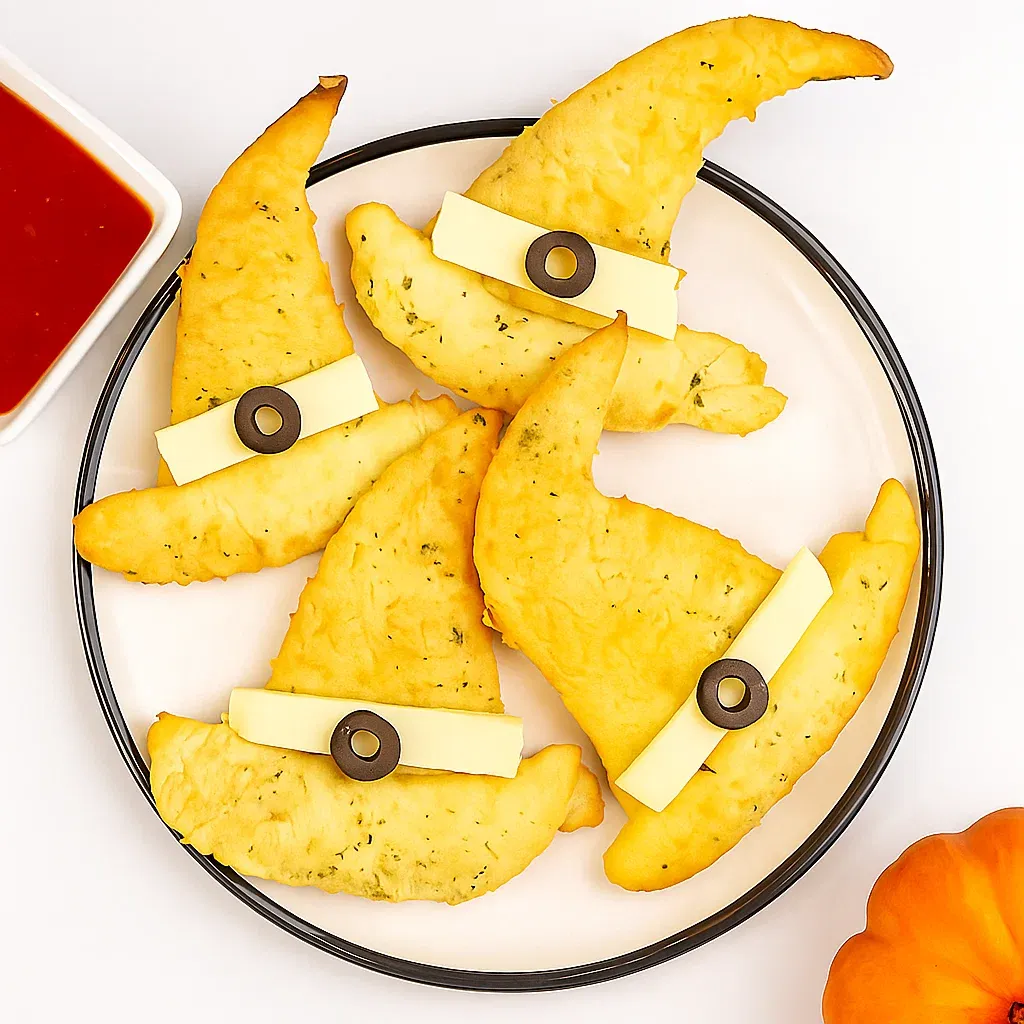
These Halloween crescent roll witches hats are hands down the easiest and most fun Halloween appetizer I've ever made, and kids absolutely go crazy over them every single time. The fact that you're basically just shaping refrigerated crescent roll dough, brushing it with garlic butter, and adding a couple of simple toppings means anyone can make these, even my youngest who's just learning to help in the kitchen. I started making them three years ago for our neighborhood Halloween party, and now people specifically ask if I'm bringing "those witch hat things" because they're such a hit.
My daughter loves making these because she gets to be in charge of adding the cheese strips and olive buckles, and watching her concentrate so seriously on placing each olive perfectly in the center is one of my favorite parts of Halloween prep. She's even started asking if we can make them for non-Halloween occasions just because she enjoys the process so much.
Ingredients You'll Need
- Refrigerated crescent roll dough (one standard 8-ounce can): Make sure you get the perforated kind that separates into individual triangles, not the sheet dough that stays in one piece
- Butter (a couple tablespoons, melted): Creates the rich, garlicky coating that makes these taste like garlic bread; let it cool slightly before brushing so it doesn't melt the dough
- Garlic powder (about half a teaspoon): Provides that classic garlic bread flavor without needing to mince fresh garlic
- Italian seasoning (about half a teaspoon): Adds herby complexity with oregano, basil, and other seasonings; you can make your own blend or use store-bought
- Grated Parmesan cheese (a couple tablespoons for sprinkling): Adds salty, nutty flavor and creates a nice crust on top; freshly grated or the stuff in the green can both work fine
- White cheddar cheese (thinly sliced into strips): Forms the band around the witch's hat; white cheddar looks best with the color contrast, but any cheese works
- Sliced black olives (eight slices, one per hat): Creates the buckle detail on the hat band; canned sliced olives are perfect and easy
Step-by-Step Instructions
- Preheat oven and prepare your baking sheet:
- Turn your oven to 375 degrees Fahrenheit and let it preheat completely while you shape the witch hats, which ensures even baking and proper browning. Line a large baking sheet with parchment paper or a silicone baking mat, which prevents sticking and makes cleanup incredibly easy. Having everything ready before you open the crescent roll can means you can work quickly before the dough warms up too much from your hands.
- Unroll and separate the crescent roll dough:
- Open your can of crescent rolls by pressing a spoon against the seam where the label indicates, which usually makes it pop open with a satisfying sound that kids love. Carefully unroll the dough onto your work surface and separate it along the perforated lines into eight individual triangles, being gentle so you don't tear the dough. Each triangle will become one witch hat, so make sure you get all eight separated cleanly.
- Shape the brim and point of each hat:
- Take one triangle and starting from the wide end, roll it up about two or three times on itself, which creates that rolled brim at the bottom of the witch's hat. Don't roll it too tightly or the brim will look thick and clunky instead of like a hat brim. Take the pointed end of the triangle and gently round it with your fingers so it's not super sharp and pointy, which makes it look more like a natural hat shape. The hat should look like a cone sitting on a rolled base, with a slightly rounded tip at the top. Repeat this shaping process with all eight triangles, placing each shaped hat on your prepared baking sheet spaced about two inches apart.
- Mix garlic butter and brush onto each hat:
- In a small bowl, combine your melted butter with the garlic powder and Italian seasoning, stirring everything together until the seasonings are evenly distributed throughout the butter. Use a pastry brush to generously brush this garlic butter mixture all over each shaped crescent roll, making sure to get the top, sides, and especially the rolled brim portion. Don't be stingy with the butter because that's what makes these taste so delicious and creates that golden-brown color during baking.
- Sprinkle with Parmesan cheese:
- After brushing all the hats with garlic butter, take your grated Parmesan cheese and sprinkle it evenly over the top of each one, letting it stick to the buttered surface. The cheese will get slightly toasted during baking and create a nice salty, crispy coating that adds incredible flavor. Some cheese will fall onto the parchment paper, which is fine and actually creates tasty crispy cheese bits you can snack on later.
- Bake until golden brown:
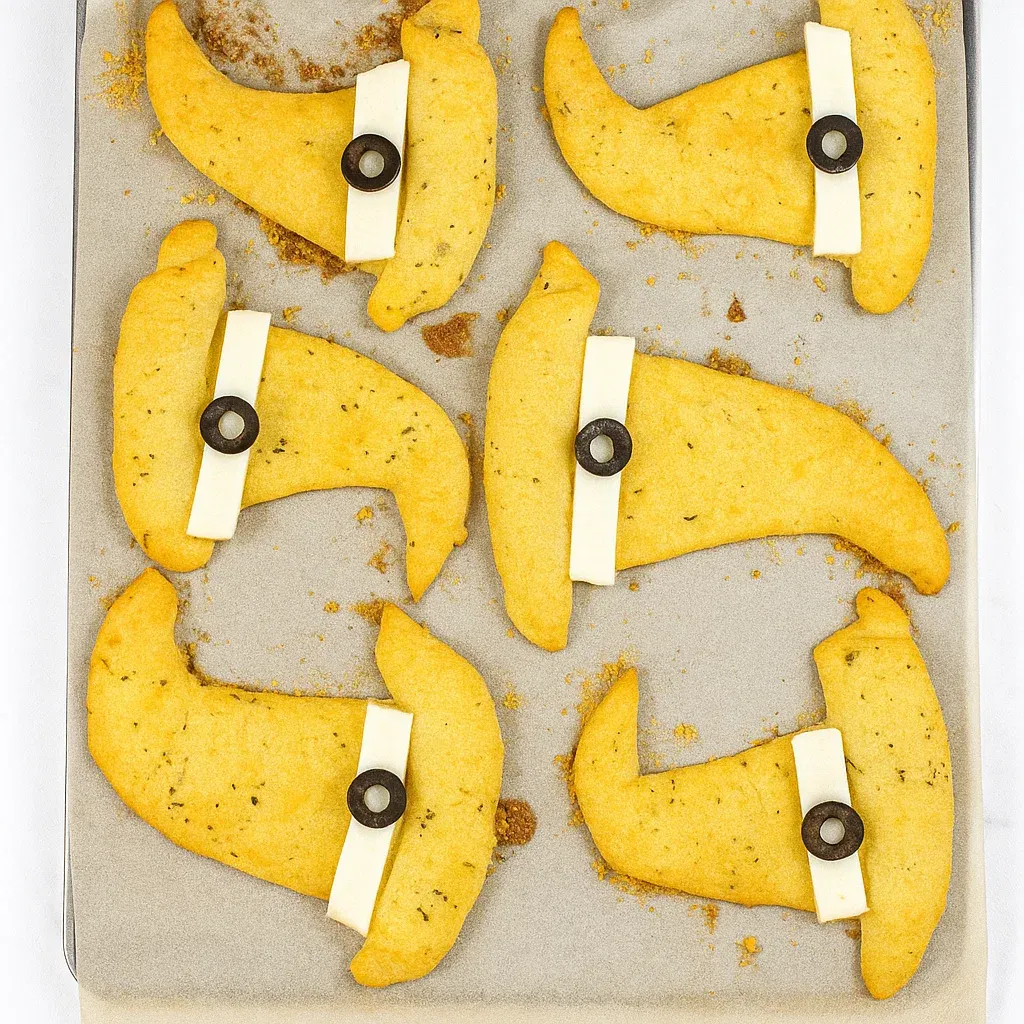
- Slide your baking sheet into the preheated oven and bake for eight to ten minutes, checking around the eight-minute mark to see how they're browning. These bake faster than regular crescent rolls because they're not rolled all the way up, so watch them carefully during those last couple of minutes to prevent burning. They're done when they're puffed up and golden brown all over, with the cheese on top looking slightly toasted. Pull them out as soon as they reach that perfect golden color because they can go from done to overdone very quickly.
- Cool completely before decorating:
- Transfer the baked witch hats to a cooling rack or leave them on the baking sheet, but let them cool completely to room temperature before adding the final decorations. This cooling period is important because if you add the cheese strips and olives while the hats are still hot, the cheese will melt and slide off, and the olives will roll away. It usually takes about fifteen to twenty minutes for them to cool enough to decorate safely.
- Add cheese strips and olive buckles:
- Once your witch hats are completely cool, cut thin strips of white cheddar cheese about an inch long and half an inch wide to create the hat bands. Place one cheese strip horizontally across the brim area of each hat where the rolled part meets the cone part, pressing it gently so it sticks. Take one olive slice and place it right in the center of each cheese strip to create the buckle detail, pressing down lightly so it adheres. The contrast between the golden crescent roll, white cheese band, and black olive buckle creates that classic witch hat look that everyone recognizes immediately.
 Pin it
I accidentally tried decorating these while they were still warm the first time I made them, and watching the cheese immediately melt and the olives roll off onto the counter taught me that lesson the hard way. Now I force myself to wait even though it's tempting to decorate them right away.
Making These Kid-Friendly
The entire process of making these witch hats is perfect for involving kids of all ages in the kitchen, with different steps appropriate for different skill levels. Toddlers and preschoolers can help separate the triangles and sprinkle the Parmesan cheese, which makes them feel involved without handling anything dangerous. Elementary-aged kids can do the shaping and brushing with minimal supervision, practicing their fine motor skills while creating something fun. Tweens and teens can usually handle the entire recipe independently, making these a great confidence-building cooking project. Just supervise the oven part regardless of age, and everyone can participate in the decorating at the end.
Sweet Versus Savory Versions
While the savory garlic butter version is my favorite and what I make most often, these are incredibly versatile and work just as well as a sweet treat. For sweet witch hats, brush the shaped dough with melted butter mixed with cinnamon and sugar instead of garlic and herbs, which creates a dessert version that tastes like cinnamon rolls. You could even spread a thin layer of Nutella or chocolate hazelnut spread in the brim before rolling it for a hidden chocolate surprise. For decorating sweet versions, use colored frosting as the hat band and chocolate chips or colorful sprinkles as the buckle. Both versions are delicious, so consider making a batch of each if you want variety.
Scaling for Parties
These are so affordable and quick to make that preparing them for large Halloween parties is incredibly easy and won't break your budget or schedule. Each can of crescent rolls costs just a couple of dollars and makes eight witch hats, so figure out how many guests you're having and buy accordingly. You can easily bake multiple sheets at once if your oven has room, just rotating them halfway through for even browning. I've made over fifty of these for school parties, working in batches, and it only took about an hour total. They also sit well at room temperature for several hours, so you can make them in the afternoon for an evening party without worrying about freshness.
Creative Variations
Once you've mastered the basic witch hat shape and technique, experimenting with different flavors and fillings keeps things interesting. Rolling thin slices of pepperoni or salami into the brim before shaping turns them into pizza-style witch hats that are even more substantial. Adding a sprinkle of everything bagel seasoning instead of just Parmesan creates a different flavor profile. Some people brush them with just butter and add shredded mozzarella for a cheesy breadstick version. You could even stuff the brim with cream cheese mixed with herbs for a more sophisticated appetizer. The shape works with almost any flavor combination you can imagine.
Storage and Serving
These witch hats are absolutely best served fresh the day you make them when the crescent roll dough is at its lightest and flakiest. If you need to store them, keep them in an airtight container at room temperature for two to three days, though they'll gradually lose their crispy texture and become softer. Never refrigerate them because the moisture in the fridge makes them soggy and unappetizing within hours. If you want to prep ahead, you can bake the plain garlic butter witch hats earlier in the day and add the cheese and olive decorations right before serving. They're also perfectly fine served at room temperature rather than warm, which makes them convenient for parties.
Troubleshooting Common Issues
The most common problem people encounter is the dough puffing up so much during baking that the witch hat shape becomes less defined and rounded. This happens when the dough is too warm when it goes in the oven, so work quickly and keep the shaped hats cool before baking. If your rolled brim unrolls during baking, you didn't roll it tightly enough initially, so make sure those first couple of rolls are snug. Cheese strips sliding off means you decorated before the hats were completely cool, so practice patience even though waiting is hard. Burning happens when you don't watch them carefully in those last few minutes, so set a timer and check them early.
 Pin it
These Halloween crescent roll witches hats have become such a beloved tradition in our house that my kids start asking about them in early September, and I love how something so simple brings them so much joy. The combination of being genuinely tasty, incredibly easy, fun to make together, and festive-looking means they check every box for the perfect Halloween treat, and watching guests at parties smile when they see them never gets old.
Frequently Asked Questions
- → Can I make these witch hats ahead of time?
- You can bake them a few hours early and store them at room temperature. Add the cheese and olive decorations right before serving for the best look.
- → What can I use instead of black olives?
- Try using small pieces of roasted red pepper, sun-dried tomatoes, or even chocolate chips for a sweet version instead of the olives.
- → How do I keep the crescent rolls from unrolling while baking?
- Make sure to roll the wide end tightly a couple of times and press gently to seal. The butter mixture also helps hold the shape during baking.
- → Can I add other seasonings to the butter mixture?
- Absolutely! Try adding onion powder, dried basil, or a pinch of red pepper flakes for extra flavor. Just keep the total amount around 1 teaspoon.
- → How should I store leftover witch hats?
- Keep them in an airtight container in the fridge for up to 2 days. Reheat in a 350°F oven for 3-5 minutes to crisp them back up.
- → Are these good for kids to help make?
- Yes! Kids love shaping the dough and adding the decorations. Just have an adult handle the oven and melted butter parts.