
 Pin it
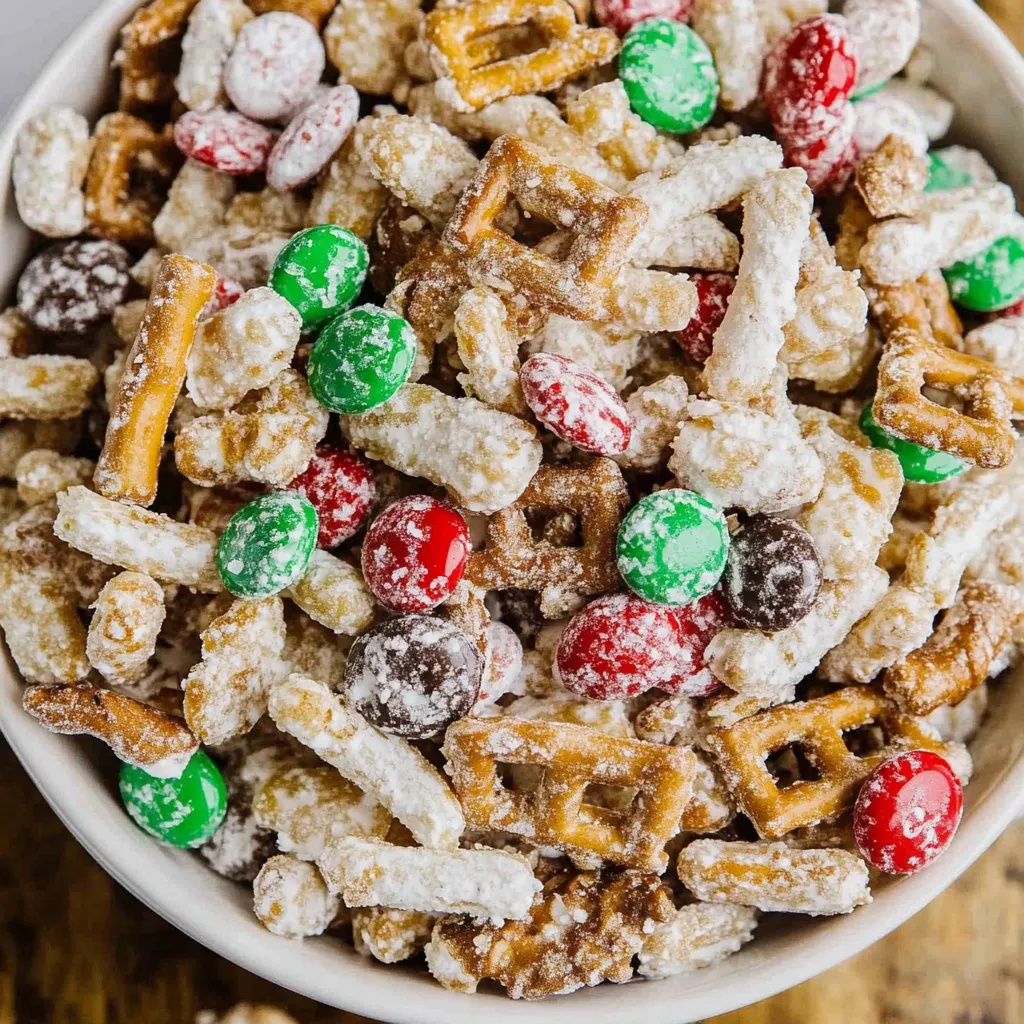
This reindeer chow delivers everything you want from holiday snack mix - crunchy Rice Chex and Cheerios providing light, airy texture that shatters satisfyingly when you bite down, salty pretzel sticks adding that essential sweet-salty contrast that makes snack mixes so addictive, colorful holiday M&Ms contributing chocolate sweetness and festive red-green-white appearance, roasted peanuts providing nutty richness and protein substance, all bound together with smooth, melted white chocolate mixed with coconut oil that coats every piece in sweet, creamy glaze before being spread on baking sheets to cool and harden into crunchy clusters you break apart into irregular chunks perfect for grabbing by the handful. What makes this holiday treat so brilliant is its simplicity combined with impressive results - you're literally just mixing cereals, candy, nuts, and pretzels in a bowl, melting white chocolate, stirring everything together until coated, spreading on a pan, and refrigerating until set, yet the finished product looks like something from an expensive gourmet gift shop and tastes infinitely better than store-bought party mix. The genius of reindeer chow (also called muddy buddies, puppy chow, white trash, or Christmas crack depending on region and family tradition) is how it hits every sensory note simultaneously: sweet from chocolate and candy, salty from pretzels and peanuts, crunchy from cereal, smooth from chocolate coating, with textural variety in every handful creating that "just one more bite" addictiveness that makes bowls disappear at holiday parties faster than you can refill them.
The first time making this reveals how absurdly simple it is - watching all those disparate ingredients come together as you pour melted chocolate over them, then seeing how the chocolate hardens into cohesive clusters demonstrates basic candy-making without intimidation. That moment when you break the cooled slab into irregular chunks and pop the first piece in your mouth, getting crunch from multiple textures plus sweet and salty in one bite creates understanding of why snack mixes are so popular. Tasting how the white chocolate's sweetness plays against the pretzels' salt while the cereals add airiness and the M&Ms contribute chocolate intensity proves that simple combinations of shelf-stable ingredients can create something genuinely crave-worthy.
Ingredients - What You Need and Why
- Rice Chex cereal: about three cups provides light, airy, crunchy base that's largely neutral-flavored allowing other ingredients to shine; the Chex's distinctive ridged squares have lots of surface area for chocolate coating to cling to; Corn Chex or Wheat Chex substitute with slightly different flavors; Rice Krispies work too creating similar crispy texture; the cereal should be fresh and crispy, not stale
- Cheerios: about three cups adds familiar oat flavor and ring shape that provides visual and textural variety from the Chex squares; plain/original Cheerios work best rather than sweetened varieties (Honey Nut, etc.) which would be too sweet; the small rings create nice clusters when chocolate-coated
- Pretzel sticks: about three cups provide essential salty crunch and visual interest with their straight shapes contrasting the round Cheerios and square Chex; you can break them in half for easier eating or leave whole; mini twist pretzels substitute with different shape but same salty function; the pretzels should be fresh and crispy, not stale or soft
- M&Ms: about three cups contribute chocolate sweetness, festive color (use holiday red-green mixes, or regular rainbow), and smooth candy-shell texture that contrasts other crunchy elements; peanut M&Ms add more substance, plain M&Ms are classic, or use seasonal colors for different holidays (red-pink for Valentine's, pastels for Easter, orange-black for Halloween)
- Roasted peanuts: about two cups add nutty richness, protein, healthy fats, and substantial texture; use salted roasted peanuts for best flavor; cashews, almonds, or mixed nuts substitute for different flavors; omit entirely for nut-free version to accommodate allergies
- White chocolate chips or melting wafers: one sixteen-ounce bag (about two and three-quarters cups) creates the coating that binds everything together; white chocolate almond bark, white candy melts, or good-quality white chocolate chips all work; avoid "white baking chips" which aren't real chocolate and won't melt smoothly; the white chocolate should be fresh - old chocolate develops white streaks (bloom) and off-flavors
- Coconut oil: two tablespoons thin the white chocolate slightly making it more pourable and easier to coat all ingredients evenly; the coconut oil also helps the chocolate set with slight sheen rather than dull appearance; refined coconut oil has no coconut flavor; vegetable oil or shortening substitute though coconut oil creates best texture
How to Make Reindeer Chow - Step by Step
- Combine all dry ingredients in large bowl:
- Line a large baking sheet (about thirteen by eighteen inches - a half-sheet pan) with parchment paper or a silicone baking mat and set aside near your workspace. In a very large mixing bowl (at least six-quart capacity - you need room to stir without ingredients flying out), combine three cups of Rice Chex cereal, three cups of Cheerios, three cups of pretzel sticks (broken in half if desired for easier eating), three cups of M&Ms, and two cups of roasted peanuts. Using a large spoon or your hands, toss and mix everything together gently but thoroughly so all ingredients are evenly distributed throughout the bowl. This ensures that when you add the chocolate coating, every scoop will have a good mix of all the components rather than clumps of just one ingredient. The mixture should look colorful and varied with cereals, candy, nuts, and pretzels visible throughout. Set this bowl aside while you prepare the chocolate coating.
- Melt white chocolate with coconut oil:
- Place one sixteen-ounce bag of white chocolate chips (or chopped white chocolate or melting wafers) in a medium microwave-safe bowl. Add two tablespoons of coconut oil to the white chocolate. Microwave on fifty percent power (medium setting) for thirty seconds. Remove from microwave and stir thoroughly with a silicone spatula or spoon - the chocolate won't look melted yet, which is normal. Return to microwave and heat for another thirty seconds at fifty percent power. Remove and stir again thoroughly. The chocolate should be starting to melt and look softer. Continue this process - thirty seconds of heating, then thorough stirring - repeating four to six times total (usually about two to three minutes cumulative) until the white chocolate is completely melted and smooth with no lumps remaining. Don't rush by using full power or you'll scorch the chocolate creating grainy, seized texture. The finished melted chocolate should be smooth, glossy, and pourable like thick cream, not clumpy or separated. If any stubborn lumps remain, reduce power to thirty percent and heat in fifteen-second increments, stirring between, until completely smooth. The coconut oil thins the chocolate making it easier to work with and coating ingredients more evenly.
- Coat mixture and spread to cool:
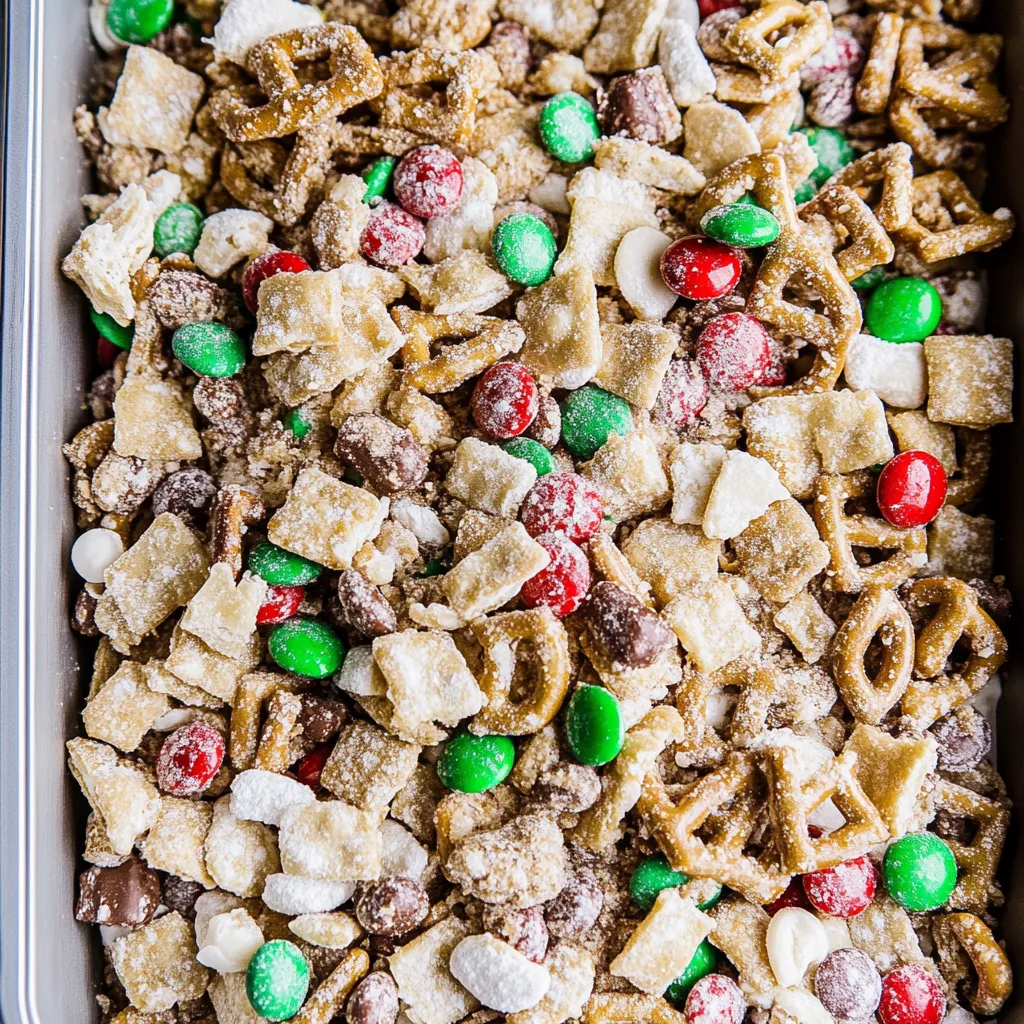
- Working quickly before the chocolate begins setting, pour the melted white chocolate mixture over the bowl of mixed cereals, candy, pretzels, and peanuts. Using a large silicone spatula or wooden spoon, immediately begin folding and stirring, turning the mixture over on itself repeatedly to coat every piece with white chocolate. This requires some effort - you're trying to get chocolate coating on every Chex square, every Cheerio, every pretzel, every peanut. Keep stirring and folding for about two to three minutes until you can see that everything is evenly coated in white chocolate with no dry spots remaining. The mixture will look cohesive and glossy with white chocolate visible throughout. Once thoroughly coated, immediately pour the entire mixture onto your prepared parchment-lined baking sheet. Using your spatula, spread the mixture into an even layer about half an inch to one inch thick across the pan. Don't worry about making it perfectly smooth or uniform - rustic, irregular appearance is part of the charm. Make sure to spread it relatively thin though, not piled in a huge mound, so it cools evenly and quickly. The white chocolate coating will still look wet and glossy at this point.
- Refrigerate until set, then break into pieces:
- Carefully transfer the baking sheet to your refrigerator. Let it chill for at least thirty minutes, though forty-five minutes to one hour is better if you have patience. During this chilling time, the white chocolate coating hardens and sets, transforming from soft, sticky coating into crispy candy shell that holds everything together. After the minimum thirty minutes, check if it's set by gently pressing a finger into the mixture - it should feel firm and dry, not sticky or soft. If still tacky, refrigerate longer. Once completely set and hardened, remove the baking sheet from refrigerator. Using your hands, break the large slab into irregular chunks and clusters - aim for roughly one to two-inch pieces that are easy to grab and eat. Don't worry about uniform sizes; irregular, rustic chunks are traditional and appealing. Some pieces will be large clusters, others smaller, some will be individual coated pieces - this variety is perfect. Transfer the broken pieces to a large serving bowl or storage container. The reindeer chow is now ready to serve or package for gifting.
 Pin it
Understanding that reindeer chow is part of a broader tradition of chocolate-coated snack mixes (muddy buddies, puppy chow) helps you appreciate this as variation on established format with holiday-specific name and ingredients rather than completely unique creation.
Understanding Puppy Chow Variations and Regional Names
Reindeer chow belongs to the family of chocolate-coated Chex mix treats known by various names depending on region and variation. "Puppy Chow" or "Muddy Buddies" (General Mills' trademarked name) typically refers to Chex cereal coated in chocolate-peanut butter mixture then tossed in powdered sugar, creating appearance similar to dog food (hence the name). Reindeer chow adapts this concept for holidays using white chocolate instead of milk chocolate-peanut butter, adding festive M&Ms and pretzels, and skipping the powdered sugar for clusters rather than individual coated pieces. Other regional names include "white trash" (though this has problematic connotations), "Christmas crack" (referencing addictiveness), or simply "holiday mix." The basic concept - coating cereal and other dry ingredients in melted chocolate - appeared in community cookbooks and church recipe collections throughout the Midwest in the 1960s-70s, spreading through word-of-mouth and eventually being formalized by General Mills in the 1990s. Each family and region developed variations using whatever ingredients they preferred or had available. Understanding this tradition helps you see that there's no single "correct" version but rather a flexible template encouraging creativity and personalization based on preferences and available ingredients.
Creating Flavor Variations and Creative Additions
While classic reindeer chow is delicious, exploring variations creates different versions for various occasions and preferences while maintaining the fundamental chocolate-coated snack mix format. For peanut butter version, add one-half cup of creamy peanut butter to the melting white chocolate for richer, peanut-buttery flavor reminiscent of traditional puppy chow. Dark chocolate reindeer chow uses semi-sweet or dark chocolate chips instead of white chocolate for less-sweet, more sophisticated version. Peppermint bark variation adds one teaspoon of peppermint extract to melted white chocolate and sprinkles crushed candy canes over the top while chocolate is still wet for festive mint flavor. S'mores chow substitutes milk chocolate for white chocolate, adds mini marshmallows and graham cereal, creating campfire-inspired treat. Cookies and cream uses white chocolate mixed with crushed Oreos for creamy, crunchy combination. Cinnamon sugar version tosses the chocolate-coated mixture in cinnamon-sugar blend while still slightly warm. Fruity variation uses Froot Loops or Fruity Pebbles instead of plain cereals for rainbow colors and fruit flavors. Caramel corn chow adds popcorn and drizzles with caramel sauce alongside white chocolate. Birthday cake version uses birthday cake flavored white chocolate chips and adds rainbow sprinkles. Trail mix inspired adds dried cranberries, raisins, and various nuts for healthier spin. Each variation maintains the coating-and-clustering technique while exploring different flavor profiles suitable for various occasions beyond just Christmas.
Troubleshooting Common Candy-Making Problems
Even with straightforward technique, sometimes chocolate-coated snacks don't turn out perfectly, but understanding solutions prevents frustration and wasted ingredients. If white chocolate is grainy and seized rather than smooth, you either overheated it causing the cocoa butter to separate, got water in it (even a drop causes seizing), or used old chocolate that's gone bad - use fifty percent power or lower, keep all utensils completely dry, and use fresh chocolate. When chocolate won't coat ingredients evenly and stays clumpy, you didn't add enough chocolate for the quantity of mix, didn't stir thoroughly enough, or the chocolate cooled and started setting before you finished coating - use the full amount of chocolate, stir vigorously for several minutes, and work quickly. If the mixture won't set properly and stays sticky even after refrigeration, your white chocolate wasn't real chocolate but imitation chips that don't harden properly, the kitchen is too warm, or you used too much coconut oil - use real white chocolate, refrigerate longer, and stick to the two-tablespoon oil measurement. Chocolate coating that's too thick and clumpy didn't have enough coconut oil to thin it, or you let it cool too much before coating - add oil as directed and work while chocolate is still fluid and warm. When pieces won't break apart and form one giant stuck-together mass, you spread it too thick on the pan preventing even cooling, or tried to break it before chocolate fully set - spread in thinner layer (half to one inch maximum) and wait full thirty to forty-five minutes. If M&Ms' colors bleed into white chocolate creating streaks, the chocolate was too hot when you mixed everything causing candy shells to crack and color to leach - let melted chocolate cool slightly before coating. Mixture that tastes bland needs more salt - add half a teaspoon of salt to the cereal mixture before coating for better sweet-salty balance.
Complete Gift Packaging and Presentation Ideas
Understanding creative packaging transforms simple snack mix into impressive, giftable treats perfect for holiday giving. For individual gift bags, portion reindeer chow into clear cellophane bags (four-by-six or five-by-seven inches), tie with festive ribbon (red, green, gold, or holiday patterns), and attach gift tags with recipient's name or holiday message. Mason jar gifts layer the colorful mix in pint or quart-sized jars, adding ribbon around the lid and printable labels reading "Reindeer Chow - Handle with Care!" or "Magic Reindeer Food." For party favors, use small Chinese takeout containers lined with tissue paper, fill with chow, close lid, and tie with coordinating ribbon. Create holiday tins by filling decorative tins (available at craft stores) with reindeer chow, adding tissue paper for presentation. Build gift baskets combining reindeer chow in cellophane bags with other homemade treats, hot cocoa mix, and holiday mugs. Package in paper bags stamped or decorated with reindeer, snowflakes, or Christmas trees for rustic presentation. For teacher gifts or coworker presents, use clear plastic cups with lids (like those from party supply stores), fill with chow, wrap in cellophane, and tie at top with curling ribbon. Create "reindeer food" labels printed on cardstock with cute graphics and instructions: "Sprinkle on lawn Christmas Eve for Santa's reindeer!" Label bags with ingredient lists for allergy awareness. Display at parties in festive bowls (red, green, or holiday-patterned ceramic), vintage tins, or wooden crates lined with holiday napkins. Present on tiered stands for impressive buffet presentation. Package in clear bags tied with jingle bells for sound and visual appeal. The colorful nature of reindeer chow (red and green M&Ms, white chocolate, golden Chex) makes it inherently photogenic and gift-worthy with minimal packaging effort.
Storage Guidelines and Shelf Life Considerations
Understanding proper storage ensures reindeer chow maintains optimal texture and freshness throughout the holiday season. Store in airtight containers at room temperature for up to four days - plastic containers with tight-sealing lids, large resealable bags, or even covered bowls all work. Room temperature storage is fine despite the chocolate coating since the hardened chocolate remains stable at normal house temperatures (65-75°F). For longer storage up to one week, refrigerate in airtight containers - the chow remains crunchy and fresh, though you may want to let it come to room temperature before serving for best texture and to avoid condensation. Avoid storing in humid environments or areas with temperature fluctuations (near stoves, dishwashers, windows) as humidity makes the cereal components soften and lose their crunch while temperature changes can cause chocolate to bloom (develop white streaks). If storing for gifting made several days ahead, keep in airtight containers and package into gift bags just before giving to maintain maximum freshness. For freezing (useful if making well ahead), portion into freezer-safe containers or bags, freeze for up to one month, then thaw at room temperature for one to two hours before serving - texture remains quite good though not quite as crispy as fresh. The M&Ms and chocolate coating provide moisture barrier protecting the cereal from going stale as quickly as uncoated cereal would. Signs that reindeer chow has gone bad include stale or rancid smell (from nuts), very soft or chewy texture rather than crunchy (moisture absorption), or white chocolate that tastes off or waxy. The relatively short shelf life (four days room temperature, one week refrigerated) means this is best made close to when you plan to serve or gift it rather than weeks in advance.
The Science of Chocolate Coating and Setting
Understanding the chemistry of chocolate helps explain why technique and temperature matter and how to achieve optimal results. White chocolate consists primarily of cocoa butter (fat from cocoa beans), sugar, milk solids, and lecithin (emulsifier). When you heat white chocolate, the cocoa butter melts and the solid ingredients dissolve into it creating fluid mixture. The coconut oil (also a fat) blends with the cocoa butter, thinning the overall mixture and lowering its melting/setting point slightly. When this melted chocolate mixture coats the dry ingredients, it fills surface irregularities and binds pieces together. As the chocolate cools in the refrigerator, the cocoa butter re-crystallizes (solidifies) in a process similar to tempering. Proper chocolate has specific crystal structure (beta crystals) that creates smooth, stable, snappy texture. The rapid cooling in the refrigerator encourages proper crystallization. If chocolate cools too slowly or unevenly, it can develop other crystal structures creating soft, crumbly, or grainy texture. The refrigeration also speeds setting dramatically - at room temperature, chocolate might take hours to fully set, while refrigeration accomplishes this in thirty to forty-five minutes. Once set and hardened, the chocolate coating remains stable at room temperature (up to about 75°F) because the cocoa butter's melting point is around 93-97°F. This explains why reindeer chow can be stored at room temperature after initial refrigeration without becoming soft or sticky. The cereal, pretzels, and peanuts' porous surfaces allow chocolate to grip mechanically (in addition to adhesive bonding), creating strong clusters that hold together even when handled.
Teaching Fundamental Cooking Skills
This recipe provides excellent opportunity to learn techniques that transfer to other candy-making and dessert preparations. Melting chocolate properly - using reduced microwave power, stirring between intervals, not rushing - teaches chocolate handling essential for countless desserts from ganache to chocolate-covered strawberries to candy making. Understanding the importance of preventing water contact with chocolate (causes seizing) teaches careful equipment management. The skill of coating items in melted chocolate efficiently and evenly applies to making chocolate bark, dipped pretzels, chocolate-covered nuts, and truffles. Learning to spread mixtures on parchment-lined pans for cooling teaches basic candy-making setup used in brittles, barks, and clusters. Understanding how cooling/setting temperature affects final texture teaches principles applicable to all candy work. The concept of working quickly with time-sensitive ingredients (melted chocolate that will set) builds awareness that some recipes have narrow windows requiring preparation and efficiency. For beginners intimidated by candy-making or chocolate work, this recipe builds tremendous confidence because while it involves melting chocolate (which seems advanced), the technique is quite forgiving - even imperfect coating creates delicious results - yet teaches real skills applicable to more advanced chocolate projects. Success with this simple recipe encourages attempting chocolate bark, truffles, and other confections. The no-bake nature makes this accessible to children, teaching them basic cooking concepts (measuring, mixing, following sequences) in a safe, fun context that produces treats they can be proud of making.
The Economics of Homemade Versus Store-Bought Holiday Treats
Understanding cost comparisons reveals significant savings while achieving superior quality and personalization. Homemade reindeer chow costs: Rice Chex (three dollars for large box), Cheerios (three dollars), pretzels (two dollars), M&Ms (four dollars for one-pound bag), peanuts (three dollars), white chocolate chips (four dollars), coconut oil (minimal, maybe twenty cents) - total approximately nineteen dollars for a huge batch making about twelve to fourteen cups (equivalent to three to four pounds), or about one dollar fifty per cup serving. Compare this to: store-bought party mixes (five to eight dollars per pound), gourmet popcorn shops' holiday mixes (fifteen to twenty-five dollars per pound), fancy candy shops' chocolate-covered snacks (twelve to twenty dollars per pound), or gift-quality snack assortments (twenty to forty dollars for comparable amount). Making just one batch saves twenty to sixty dollars compared to purchasing equivalent gourmet versions. For holiday gifting, making three or four batches to package for teachers, neighbors, coworkers, and friends costs about seventy-five dollars total versus two hundred to three hundred dollars if buying comparable gourmet gifts. The time investment (forty minutes including setting time, only five minutes active) is minimal considering the quantity produced. Beyond monetary savings, homemade offers complete customization (adjust ingredients to preferences or allergies), freshness (made within days versus sitting on shelves), and the intangible value of handmade gifts that recipients genuinely appreciate more than store-bought items. For families who regularly purchase holiday snacks or give multiple gifts each year, learning to make treats like this creates enormous savings while producing results that equal or exceed expensive commercial versions.
Understanding Holiday Food Traditions and Gift-Giving Culture
Reindeer chow fits into broader American holiday traditions of homemade food gifts that emerged from practical and cultural factors. Historically, homemade food gifts solved the problem of giving meaningful presents without significant cash outlay - important during Depression and post-war eras when money was tight but ingredients were available. The tradition of holiday baking and candy-making created surplus treats perfect for sharing with neighbors, teachers, mail carriers, and others deserving appreciation. Food gifts conveyed thoughtfulness and effort (time spent baking/cooking) in ways that purchased gifts might not. The rise of Christmas cookie exchanges, neighborhood treat swaps, and recipe sharing reinforced these traditions. Modern revival of homemade food gifts reflects several trends: reaction against commercialization of holidays, desire for authentic, personal connections in increasingly digital world, appreciation for artisanal and handmade items, and economic necessity during recessions making homemade gifts practical. Treats like reindeer chow succeed as gifts because they: look impressive and professional despite simple preparation, package beautifully creating visual appeal, remain stable for gifting (unlike fragile cookies or refrigerated items), accommodate allergies or preferences through customization, and cost very little while seeming generous. The playful name "reindeer chow" adds whimsy that appeals to both children and adults, reinforcing holiday magic. Understanding this context helps appreciate that making and gifting food treats isn't just about the food itself but about participating in cultural traditions of generosity, creativity, and building community through shared treats.
Cultural Context of Snack Mixes and American Party Foods
Snack mixes represent distinctly American food category that emerged in mid-20th century alongside cocktail parties, television snacking, and casual entertaining culture. Original Chex Party Mix (savory seasoned version) appeared in the 1950s, created by Chex cereal company to increase sales. The concept of combining cereals, nuts, pretzels, and seasonings into all-in-one snack proved wildly popular, spawning countless variations. Sweet versions like puppy chow/muddy buddies emerged as home cooks experimented with chocolate coatings rather than savory seasonings. These mixes reflected American values of convenience (use shelf-stable ingredients), abundance (generous bowls for guests to help themselves), and innovation (creative combinations of processed foods). The inclusion of multiple branded products (Chex, Cheerios, M&Ms) shows how home recipes became vehicles for commercial products. Sweet snack mixes particularly suited holiday entertaining - no-bake preparation during busy December, stable for gifting or party serving, visually festive with colorful candies, and universally appealing to diverse palates. Understanding this helps place reindeer chow not as random recipe but as part of broader American food traditions adapting convenience products into homemade treats that feel both nostalgic and practical.
 Pin it
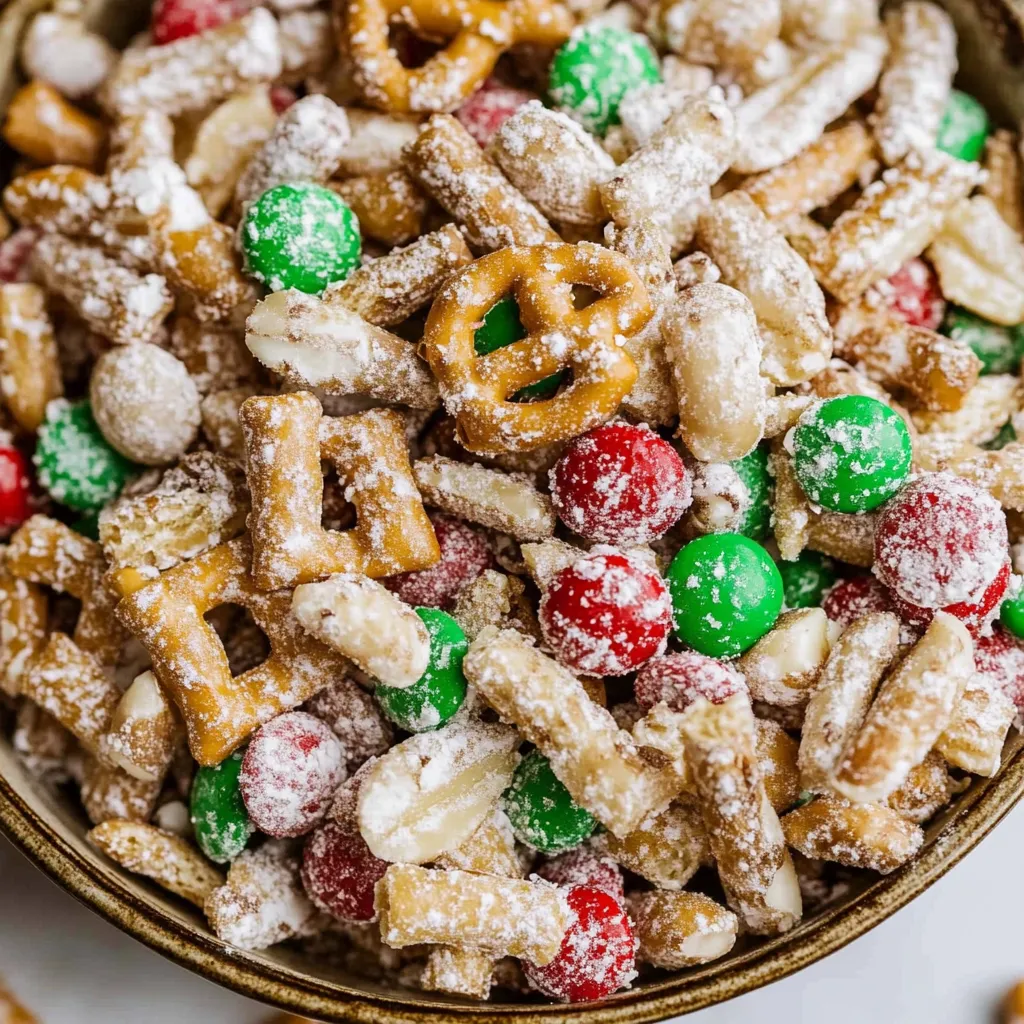
This reindeer chow represents the perfect intersection of holiday tradition and practical simplicity, proving that some of the most beloved seasonal treats aren't necessarily the most complicated or time-intensive but rather those that deliver maximum festivity, giftability, and deliciousness through minimal effort and basic ingredients that honor the busy reality of December while still creating something that looks and tastes special enough to share proudly with everyone you appreciate. What makes this recipe genuinely valuable is how it solves multiple holiday challenges simultaneously - providing easy homemade gift option for the dozen-plus people you want to thank (teachers, neighbors, mail carriers, coworkers), creating crowd-pleasing party snack that's visually festive and endlessly customizable, offering kid-friendly cooking project that's safe and fun building holiday memories, and producing treats that cost pennies per serving yet look expensive and professional when packaged prettily, all while requiring only five minutes of active work and zero actual cooking skill beyond operating a microwave. The transformation of ordinary pantry ingredients - cereals, candy, chocolate, pretzels, nuts - into something that genuinely delights recipients and disappears from party bowls faster than you can refill them demonstrates that impressive holiday cooking doesn't require advanced pastry skills, exotic ingredients, or hours of labor when you understand simple formulas that combine familiar flavors in appealing ways. Whether you're a busy parent seeking sanity-preserving holiday recipes that kids can help make without creating disasters, someone on a budget needing affordable gift options for multiple recipients, a party host wanting impressive snacks that won't keep you kitchen-bound while guests mingle, a beginning cook intimidated by holiday baking wanting approachable success, or simply anyone who appreciates how the perfect combination of sweet, salty, crunchy, and chocolatey can create genuinely addictive eating experience worth making repeatedly, this delivers completely. The four-day room temperature storage and one-week refrigerated life mean you can make several batches across different days spreading the work rather than cramming everything into one exhausting baking marathon, while the endless customization possibilities (swap cereals, change candy colors for different holidays, use different chocolate types) mean you never get bored making the same thing repeatedly. Once you've experienced how ridiculously easy it is to create batches of this that people rave about and request recipes for, seen how excited recipients get about receiving homemade food gifts that clearly required thought and effort even if that effort was minimal, tasted how the sweet white chocolate coating plays perfectly against salty pretzels while the cereals add essential crunch and the M&Ms contribute chocolate intensity, understood how this one simple formula creates dozens of servings for less than twenty dollars making it possibly the most economical impressive treat imaginable, and appreciated how food traditions don't have to be complicated to be meaningful - sometimes the simplest recipes that bring people together around shared enjoyment of sweet, crunchy, chocolate-coated goodness become the most treasured because they're realistic to make repeatedly rather than once-a-year productions requiring heroic effort - you'll find yourself making batch after batch every December, experimenting with different mix-ins and chocolate types to keep it interesting, confidently giving these as gifts knowing they're better than store-bought gourmet versions costing five times as much, watching entire bowls disappear at parties within minutes proving their universal appeal, and recognizing that sometimes the best recipes are those that make you look like a holiday baking superstar while requiring less effort than driving to the store to buy inferior commercial versions, ultimately teaching the valuable lesson that holiday traditions worth maintaining are those that bring genuine joy without creating unsustainable stress, proving that you can absolutely have your beautifully packaged, delicious, homemade holiday treats and eat them too - literally and figuratively - when you embrace recipes designed for real life rather than magazine fantasy, celebrating the fact that simple, honest, crowd-pleasing food shared generously matters infinitely more than complicated showpieces that leave you too exhausted to enjoy the season you're supposedly celebrating.
Frequently Asked Questions
- → Can I use milk chocolate instead of white chocolate?
- Yes, milk or dark chocolate works great too. Use the same amount and follow the same melting instructions.
- → How long does reindeer chow stay fresh?
- It keeps well in an airtight container for up to 2 weeks at room temperature. You can also refrigerate it to extend freshness.
- → Can I make this without peanuts?
- Absolutely. Swap the peanuts for cashews, almonds, or just leave them out completely. The recipe still works perfectly.
- → Why won't my white chocolate melt smoothly?
- Make sure no water gets in the chocolate. Stir well after each 30-second interval. The coconut oil helps it melt smoothly.
- → Can I add other ingredients to this mix?
- Sure! Try adding dried cranberries, mini marshmallows, or different cereals. Just keep the total volume about the same.
- → Do I have to refrigerate this?
- Chilling helps the chocolate set faster, but you can let it cool at room temperature if you have time. It just takes longer.